9-12
3
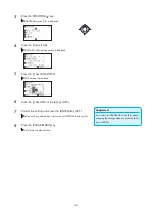
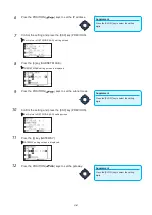
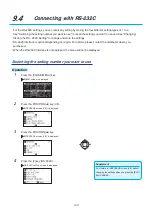
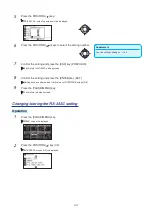
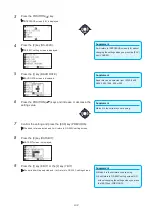
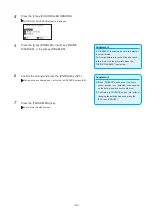
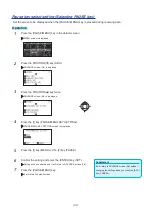
Press the POSITION ( ) key.
INTERFACE screen (2/4) is displayed.
Supplement
It will return to INTERFACE screen (2/4) without
changing the settings when you press the [ESC]
key (CANCEL).
4
Press the [2] key (RS-232C).
RS-232C setting screen is displayed.
Supplement
Baud rate can be selected from 19200, 9600,
4800, 2400, 1200, 600 or 300.
5
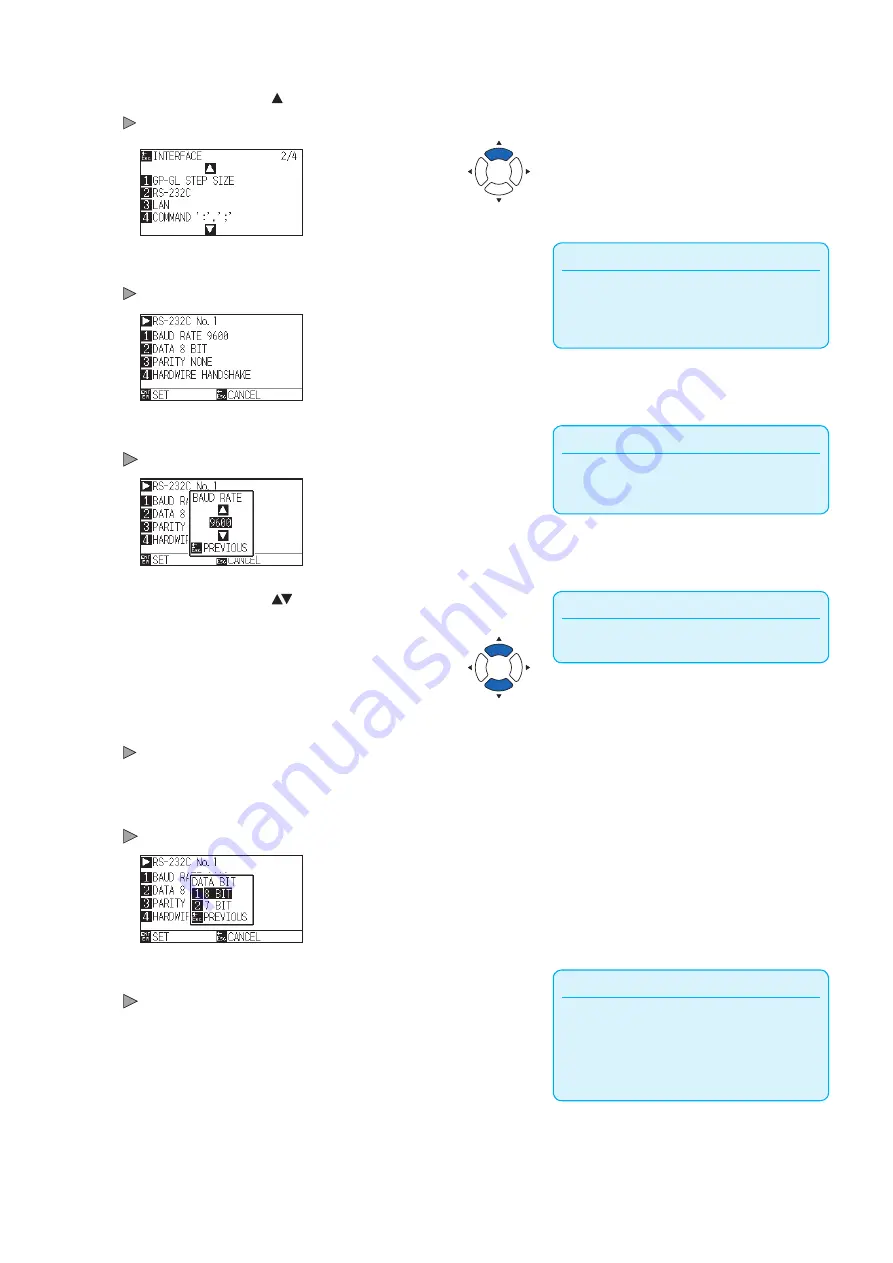
Press the [1] key (BAUD RATE).
BAUD RATE screen is displayed.
Supplement
Match it to the software you are using.
6
Press the POSITION ( ) keys and increase or decrease the
setting value.
7
Confirm the setting and press the [ESC] key (PREVIOUS).
The baud rate is selected and it will return to RS-232C setting screen.
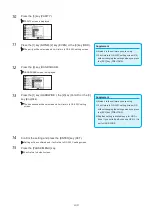
8
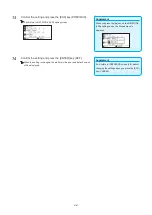
Press the [2] key (DATA BIT).
DATA BIT screen is displayed.
Supplement
•
Match it to the software you are using.
•
It will return to RS-232C setting screen (2/3)
without changing the settings when you press
the [ESC] key (PREVIOUS).
9
Press the [1] key (8 BIT) or the [2] key (7 BIT).
The data bit will be selected and it will return to RS-232C setting screen.
Summary of Contents for CE7000-130AP
Page 1: ...USER S MANUAL MANUAL NO CE70AP UM 151 CE7000 130AP CUTTING PLOTTER...
Page 2: ......
Page 19: ...1 3 Dedicated accessories A stand with a basket is supplied...
Page 84: ......
Page 104: ......
Page 110: ......
Page 128: ......
Page 184: ......
Page 245: ...A 7 PAUSE MENU 2 Continued MENU screen AXIS SETTING 1 1 Default screen Continued 1 2...
Page 246: ...A 8 3 PAUSE MENU Continued MENU screen AREA PARAMETERS 1 1 Default screen Continued 1 2 3 4...
Page 250: ...A 12 PAUSE MENU Continued MENU screen TEST 1 2 TEST 2 2 Default screen Continued 2 3 1 1 4...
Page 251: ...A 13 PAUSE MENU MENU screen MEM SETTING 1 1 1 Default screen Continued Default screen Finish...
Page 254: ......
Page 258: ......
Page 260: ......

