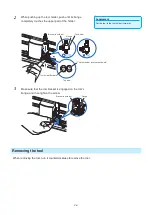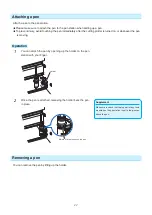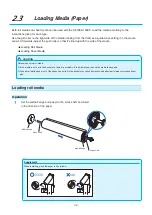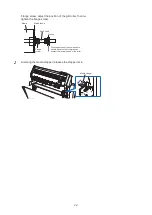
1-4
1.2
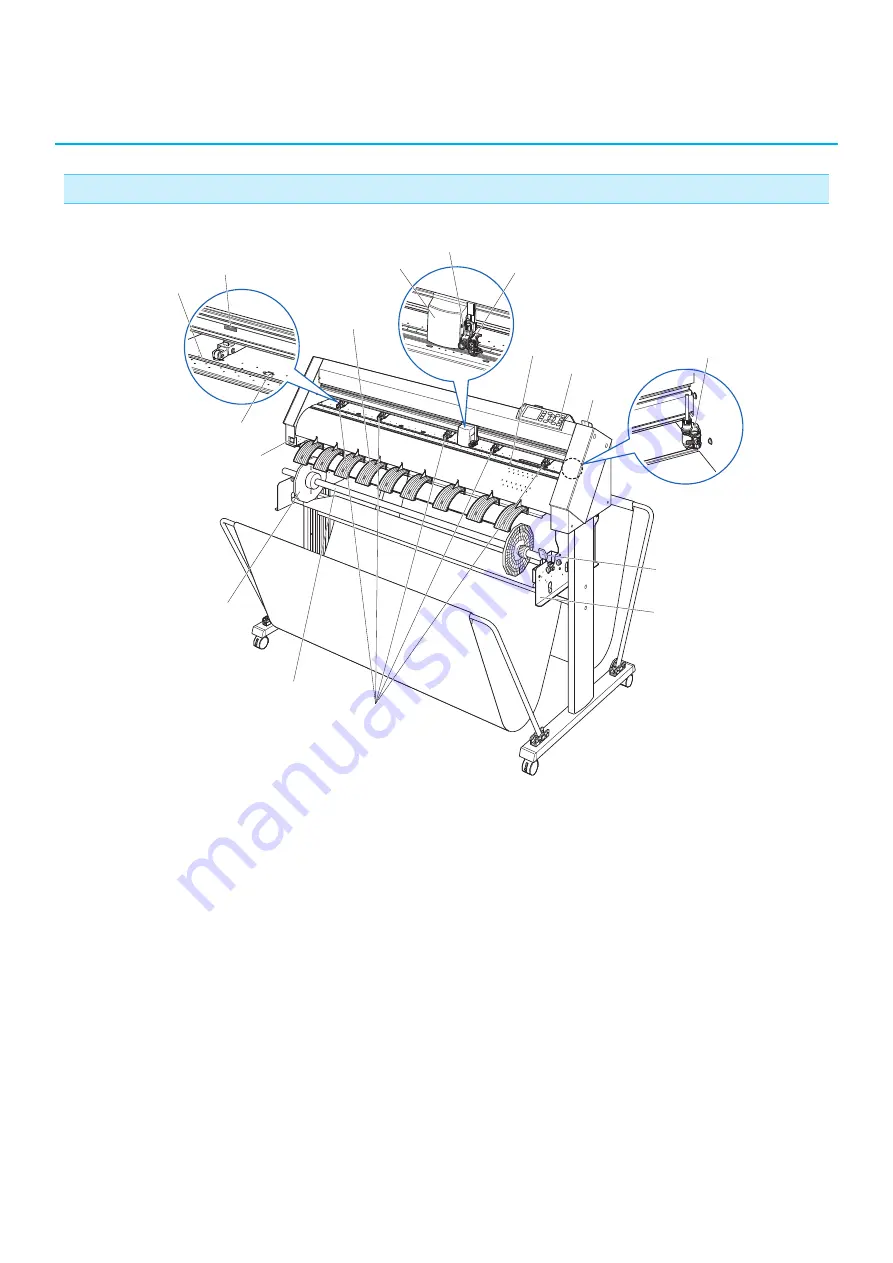
Nomenclature
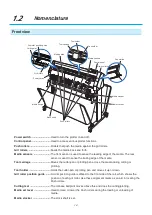
Front view
Cutting mat
Tool holder
Pen holder
Tool carriage
Control panel
Media set lever
Pen station
Push rollers
Media flange
Grit roller position guide
Grit rollers
Stock shaft
Media guide
Media sensors
Media stopper
Media stocker
Power switch
Power switch ...........................Used to turn the plotter on and off.
Control panel ...........................Used to access various plotter functions.
Push rollers .............................Rollers that push the media against the grit rollers.
Grit rollers ...............................Feeds the media back and forth.
Media sensors ........................The front sensor is used to sense the leading edge of the media. The rear
sensor is used to sense the trailing edge of the media.
Tool carriage ...........................Moves the cutter-pen or plotting pen across the media during cutting or
plotting.
Tool holder ..............................Holds the cutter-pen or plotting pen and moves it up or down.
Grit roller position guide .......A roller position guide is affixed to the front side of the rail, which shows the
position of each grit roller. Use these alignment marks as an aid in locating the
Push rollers.
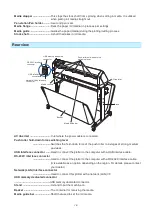
Cutting mat .............................The oil-base ballpoint moves above this and does the cutting/plotting.
Media set lever .......................Used to raise or lower the Push rollers during the loading or unloading of
media.
Media stocker .........................The stock shaft is set.
Summary of Contents for CE7000-130AP
Page 1: ...USER S MANUAL MANUAL NO CE70AP UM 151 CE7000 130AP CUTTING PLOTTER...
Page 2: ......
Page 19: ...1 3 Dedicated accessories A stand with a basket is supplied...
Page 84: ......
Page 104: ......
Page 110: ......
Page 128: ......
Page 184: ......
Page 245: ...A 7 PAUSE MENU 2 Continued MENU screen AXIS SETTING 1 1 Default screen Continued 1 2...
Page 246: ...A 8 3 PAUSE MENU Continued MENU screen AREA PARAMETERS 1 1 Default screen Continued 1 2 3 4...
Page 250: ...A 12 PAUSE MENU Continued MENU screen TEST 1 2 TEST 2 2 Default screen Continued 2 3 1 1 4...
Page 251: ...A 13 PAUSE MENU MENU screen MEM SETTING 1 1 1 Default screen Continued Default screen Finish...
Page 254: ......
Page 258: ......
Page 260: ......

