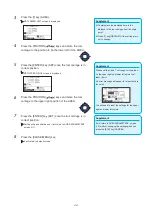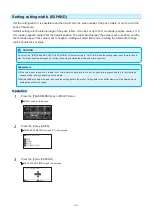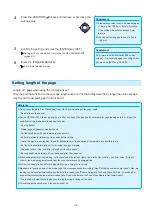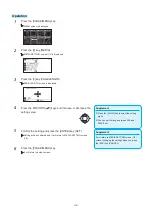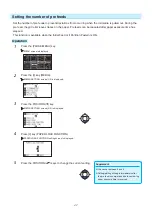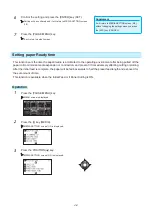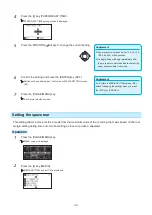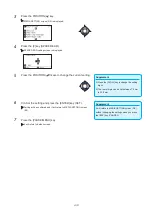
4-11
4.2
Copy (Duplicate Cutting)
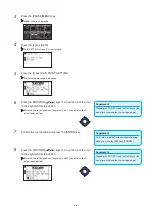
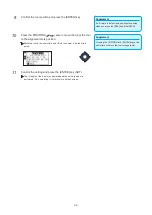
The function to cut specified numbers of cutting data stored in the buffer memory is called COPY.
Supplement
•
Do not send new data to plotter while copying. Cutting data in the buffer memory will be cleared.
•
Previous cutting data will be cleared and newly sent data will be stored as cutting data if you send new data with 10 seconds or more
interval from the time it finished cutting.
•
It can not copy if data is more than 1.6 MB because it cannot be stored in the buffer memory of the plotter.
•
Buffer memory that can be used for copy will decrease if you turn on the data sort. Turn off the data sort when you need to copy
cutting with large data. See "Sorting the Cutting Data" for data sort.
•
Watch out that it does not fall out of media when cutting with copy function.
•
If the original cutting data to be copied starts away from the origin point, copied cutting will also start away from the origin point.
To avoid wasted space, create the cutting data close to the origin point.
When media change mode is OFF
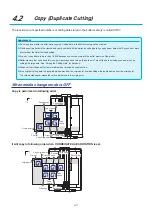
Copy is performed in following order.
Origin point
First cut
Copy origin point
First copy
Second copy
Copy space
Copy
space
Fourth copy
Third copy
It will copy in following order when COORDINATE AXES ROTATION is set.
Origin point
First cut
Copy origin point
Fifth copy
Copy
space
Copy
space
Sixth copy
Third copy
Fourth copy
Second
copy
First copy
Summary of Contents for CE7000-130AP
Page 1: ...USER S MANUAL MANUAL NO CE70AP UM 151 CE7000 130AP CUTTING PLOTTER...
Page 2: ......
Page 19: ...1 3 Dedicated accessories A stand with a basket is supplied...
Page 84: ......
Page 104: ......
Page 110: ......
Page 128: ......
Page 184: ......
Page 245: ...A 7 PAUSE MENU 2 Continued MENU screen AXIS SETTING 1 1 Default screen Continued 1 2...
Page 246: ...A 8 3 PAUSE MENU Continued MENU screen AREA PARAMETERS 1 1 Default screen Continued 1 2 3 4...
Page 250: ...A 12 PAUSE MENU Continued MENU screen TEST 1 2 TEST 2 2 Default screen Continued 2 3 1 1 4...
Page 251: ...A 13 PAUSE MENU MENU screen MEM SETTING 1 1 1 Default screen Continued Default screen Finish...
Page 254: ......
Page 258: ......
Page 260: ......

