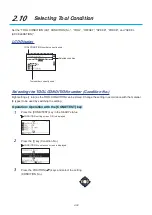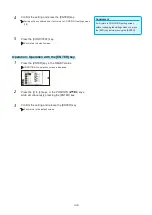
2-25
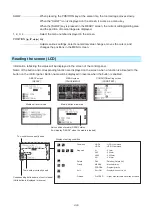
SLOW ......................... When pressing the POSITION key at the same time, the tool carriage moves slowly.
When the "SLOW" icon is displayed on the screen, it works as a menu key.
When the [SLOW] key is pressed in the READY screen, the current cutting/plotting area
and the position of tool carriage are displayed.
1, 2, 3, 4 ..................... Select the menu number displayed in the screen.
POSITION ( , , , ) key
............................ Adjusts various settings, selects numerical value changes, moves the cursor, and
changes the positions in the MENU screen.
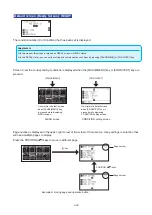
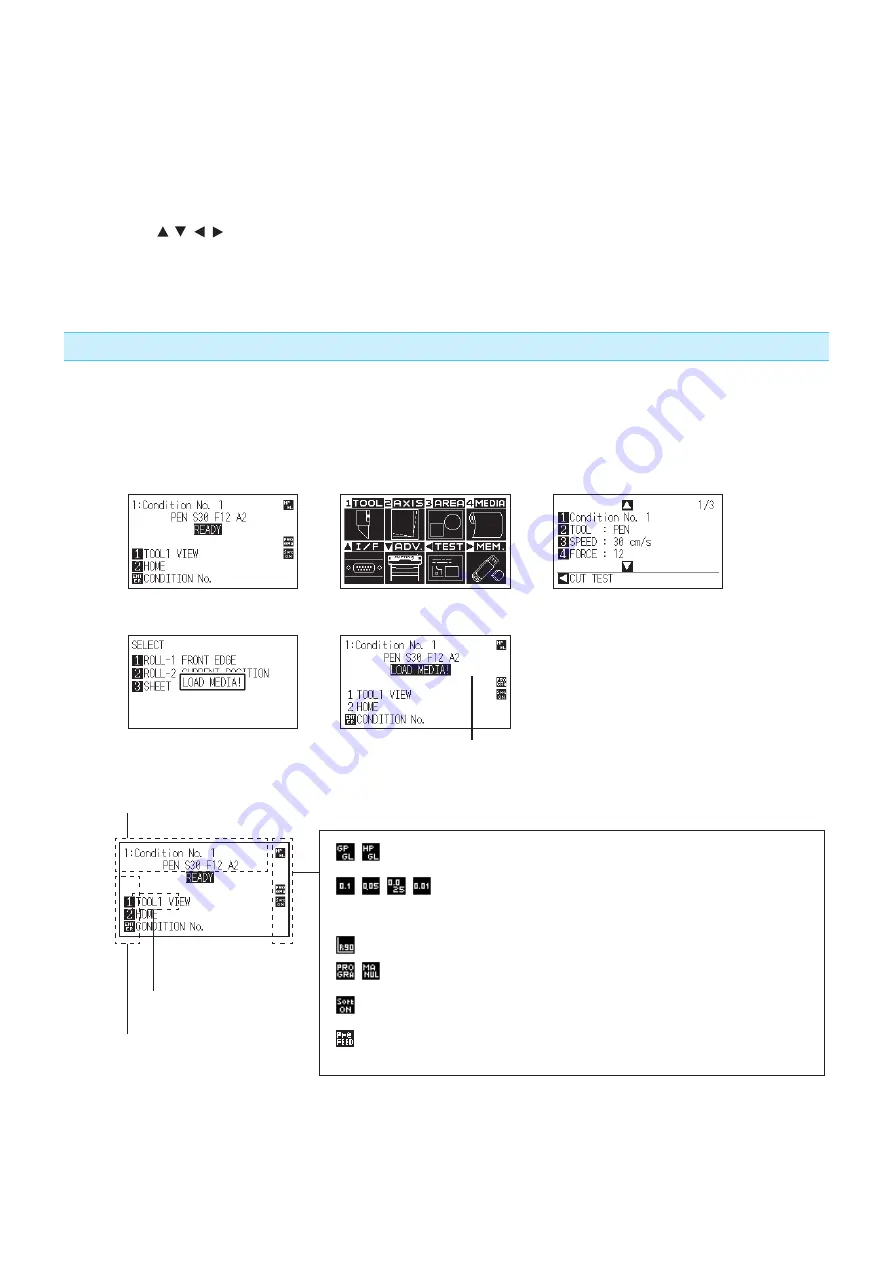
Reading the screen (LCD)
Information reflecting the status will be displayed in the screen of the control panel.
Name of the button and corresponding function are displayed on the screen when a function is allocated to the
button on the control panel. Button name will be displayed in reverse when the button is enabled.
READY screen
(READY)
MENU screen
(PAUSE/MENU)
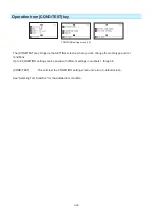
CONDITION setting screen
(COND/TEST)
Media set lever raised
Media set lever lowered
Set condition of media (READY status:
It will display "READY" when the media is loaded)
Display of setting condition
Corresponding button name of control panel
(Valid button is displayed in reverse)
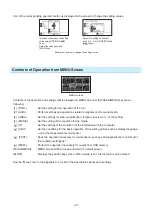
Tool number currently used
Tool conditions currently used
Command
: GP-GL
: GP-GL Command
HP-GL
: HP-GL Command
Step size
: 0.1
: 0.1mm
0.05
: 0.05mm
0.025
: 0.025mm
0.01
: 0.01mm
Rotate
: R90
: Rotation (Rotate 90°)
Priority
: MANUL
: Manual priority
PROGRA
: Program priority
Sort
: Sort ON
: Display when sort is on
Prefeed
: Pre FEED : Display when automatic media feed is onMedia
Summary of Contents for CE7000-130AP
Page 1: ...USER S MANUAL MANUAL NO CE70AP UM 151 CE7000 130AP CUTTING PLOTTER...
Page 2: ......
Page 19: ...1 3 Dedicated accessories A stand with a basket is supplied...
Page 84: ......
Page 104: ......
Page 110: ......
Page 128: ......
Page 184: ......
Page 245: ...A 7 PAUSE MENU 2 Continued MENU screen AXIS SETTING 1 1 Default screen Continued 1 2...
Page 246: ...A 8 3 PAUSE MENU Continued MENU screen AREA PARAMETERS 1 1 Default screen Continued 1 2 3 4...
Page 250: ...A 12 PAUSE MENU Continued MENU screen TEST 1 2 TEST 2 2 Default screen Continued 2 3 1 1 4...
Page 251: ...A 13 PAUSE MENU MENU screen MEM SETTING 1 1 1 Default screen Continued Default screen Finish...
Page 254: ......
Page 258: ......
Page 260: ......

