13-5
Step 2: Create design data for printing and cutting.
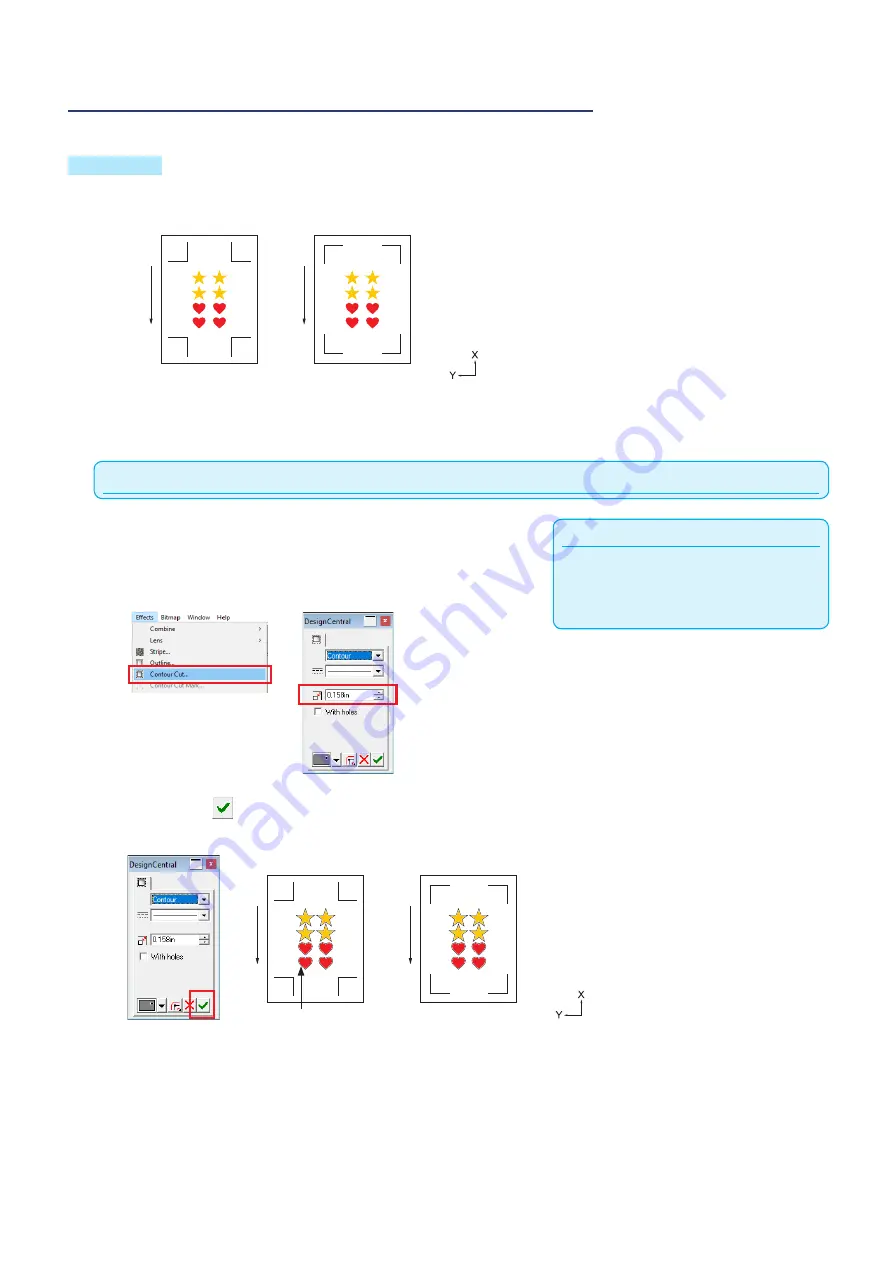
Design the drawing pattern that you want to print and the countour to be cut.
Operation
2-
1 Create print design for printing and cutting.
Fe
ed d
ire
ct
io
n o
f m
ed
ia
Fe
ed d
ire
ct
io
n o
f m
ed
ia
MARK TYPE 1
MARK TYPE 2
2-
2 Create cut design for printing and cutting.
When using Graphtec Pro Studio
Supplement
If this setting is not performed, "Step 4: Cut the
printed media" - "Contour Cut Mark" icoin in
Step 4-2 is not enabled.
1
Select the print data and select "Effects" - "Contour Cut
Mark".
Select the offset value of contour on the "DesignCentral"
screen.
2
Press the on the "DesignCentral" screen.
Cutting data is created on the design screen.
Fe
ed d
ire
ct
io
n o
f m
ed
ia
Fe
ed d
ire
ct
io
n o
f m
ed
ia
MARK TYPE 1
MARK TYPE 2
Cutting data
Summary of Contents for CE7000 Series
Page 1: ...CE7000 SERIES CUTTING PLOTTER USER S MANUAL MANUAL NO CE7000 UM 151 ...
Page 2: ......
Page 18: ......
Page 104: ......
Page 118: ......
Page 168: ......
Page 220: ......
Page 232: ......
Page 254: ......
Page 290: ......
Page 328: ......
Page 343: ...A 15 PAUSE MENU Continued MENU screen TEST 1 2 TEST 2 2 Default screen Continued 2 3 1 1 4 ...
Page 348: ......
Page 352: ......
Page 354: ......


