5-12
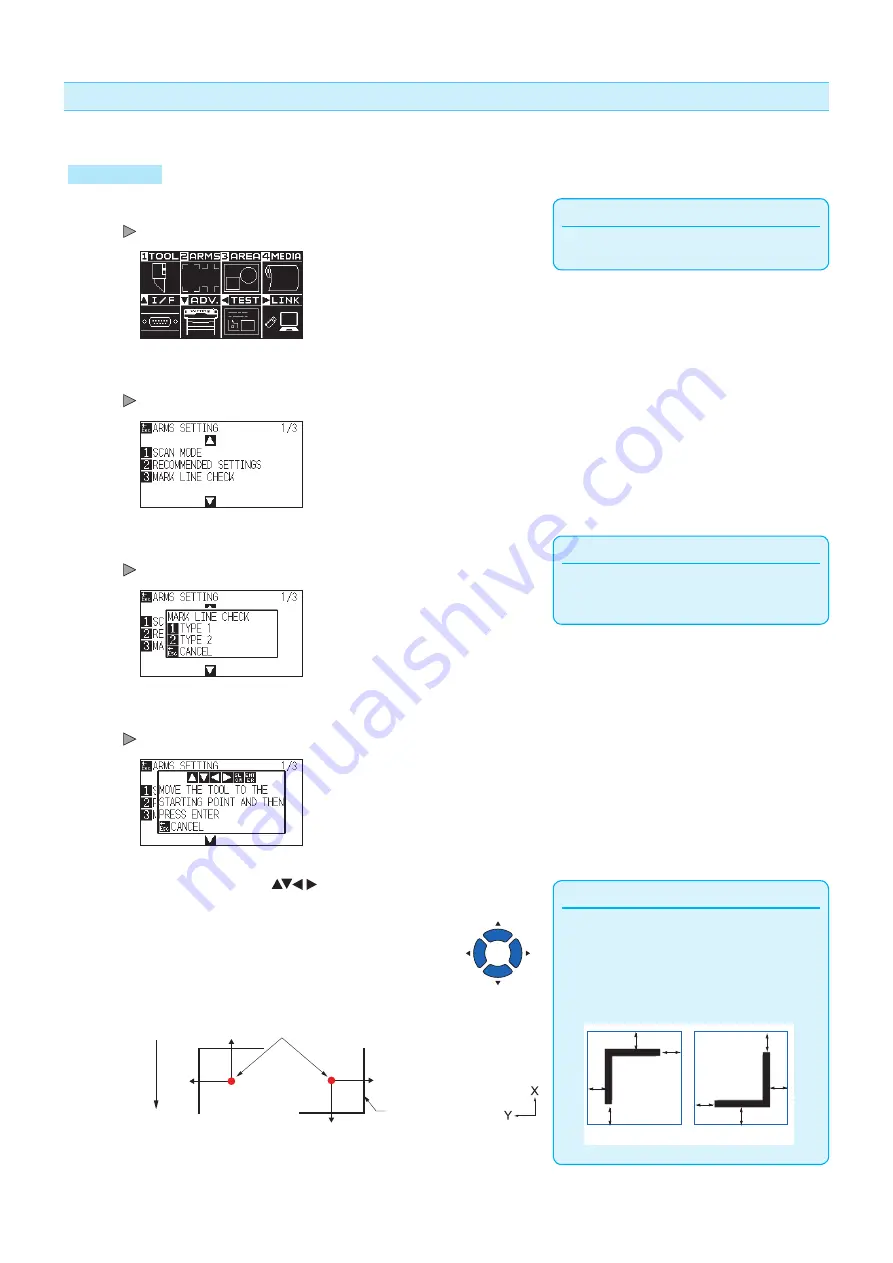
Check the lines of registration mark
After detecting registration marks actually, confirm mark scanning operation.
Operation
Supplement
Perform the settings in Normal mode.
1
Press the [PAUSE/MENU] key.
MENU screen is displayed.
2
Press the [2] key (ARMS).
ARMS SETTING screen (1/3) is displayed.
Supplement
This function is not available when MARK TYPE
3 or MARK TYPE 4 is used.
3
Press the [3] key (MARK LINE CHECK).
MARK LINE CHECK screen is displayed.
4
Press the [1] key (TYPE1) or the [2] key (TYPE2).
The following message is displayed.
Supplement
When checking the lines of registration mark
using the mask registration mark, set the mask
width to 20 mm on the application software.
If it is 20 mm or less, the registration mark lines
cannot be checked properly.
a
a
a
a
a
a
a
a
a=20mm
5
Press the POSITION (
) keys to move the tool to the
scanning start position (red circle).
MARK TYPE 1
MARK TYPE 2
Fe
ed d
ire
ct
io
n o
f m
ed
ia
Registration mark
Registration mark scanning start position
Summary of Contents for CE7000 Series
Page 1: ...CE7000 SERIES CUTTING PLOTTER USER S MANUAL MANUAL NO CE7000 UM 151 ...
Page 2: ......
Page 18: ......
Page 104: ......
Page 118: ......
Page 168: ......
Page 220: ......
Page 232: ......
Page 254: ......
Page 290: ......
Page 328: ......
Page 343: ...A 15 PAUSE MENU Continued MENU screen TEST 1 2 TEST 2 2 Default screen Continued 2 3 1 1 4 ...
Page 348: ......
Page 352: ......
Page 354: ......


