3-11
Chapter 3 Cutting along Printed Data
[4] Cutting the printed media
Media T
ransport Dir
ection
X
Y
Registration Mark Type 1
Registration Mark Type 2
1.
Load the printed media onto CE LITE-50.
(Refer to "2.4 Loading Sheet Media")
2.
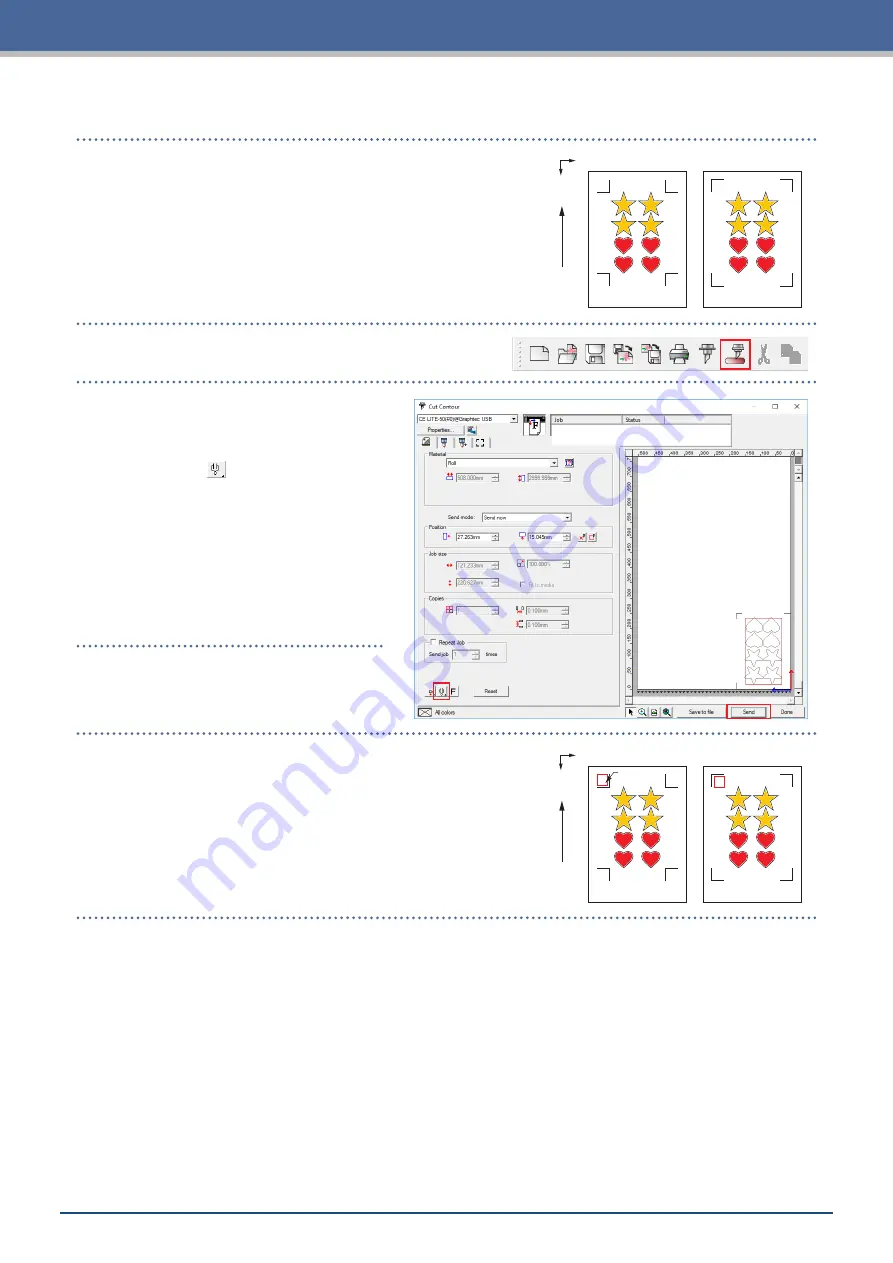
Click the "Cut Contour" icon.
3.
The "Cut Contour" screen will launch.
In order to match the orientation in
which the media has been loaded, set
ROTATE to "
".
•
When the "
Cut Contour" screen is
displayed for the first time, the "Add
Device" screen will be displayed.
Follow the on-screen instructions to
select "CE LITE-50" for the model
name and "Graphtec USB" for the
connection destination.
4.
Click the "Send".
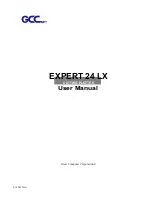
Move tool
here
Media T
ransport Dir
ection
X
Y
Registration Mark Type 1
Registration Mark Type 2
5.
A confirmation screen will appear.
Move the tool to the registration mark (red square) at the top
left and click the "OK".
Scanning of the registration marks will begin, and once all
of the registration marks have been scanned, the cutting will
begin.
Summary of Contents for CELITE-50
Page 1: ...USER S MANUAL CE LITE 50 UM 151...
Page 2: ......
Page 10: ......
Page 22: ......
Page 78: ......
Page 101: ...5 23 Chapter 5 Detailed Settings 3 Select ON or OFF for WIDTH DETECTION...
Page 112: ......
Page 116: ...A 4 Appendix A 3 Appearance Drawing 164 784 227 173 400 Units mm Dimension error 5 mm...
Page 118: ...A 6 Appendix 3 PIECES Previous Page HOME SELECT FILE...
Page 119: ...A 7 Appendix TOOL ARMS MODE 1 MODE 2 MODE 3 CHECK MARK SCAN SENSOR OFFSET ADJ Next Page MENU...
Page 120: ...A 8 Appendix INTERFACE ADVANCE TEST Previous Page AREA MEDIA MENU...
Page 127: ......
Page 128: ......


