3-5
Chapter 3 Cutting along Printed Data
3.3
Registration Mark Scanned Printing & Cutting
With this method, cuts will be made upon scanning the registration marks (reference lines) drawn on the media.
High-precision cutting is realized with this method as displacement of the printing position is adjusted when
cutting the outline of a printed shape or when re-cutting media.
•
If the registration marks cannot be scanned due to a registration mark scanning error or when the positions
are off despite the registration marks being scanned, refer to "5.6 Registration Mark Scan Settings" and
change the settings.
1.
Create printed media on which registration marks have been drawn (refer to "3.4 Types and Arrangement
of Registration Marks).
2.
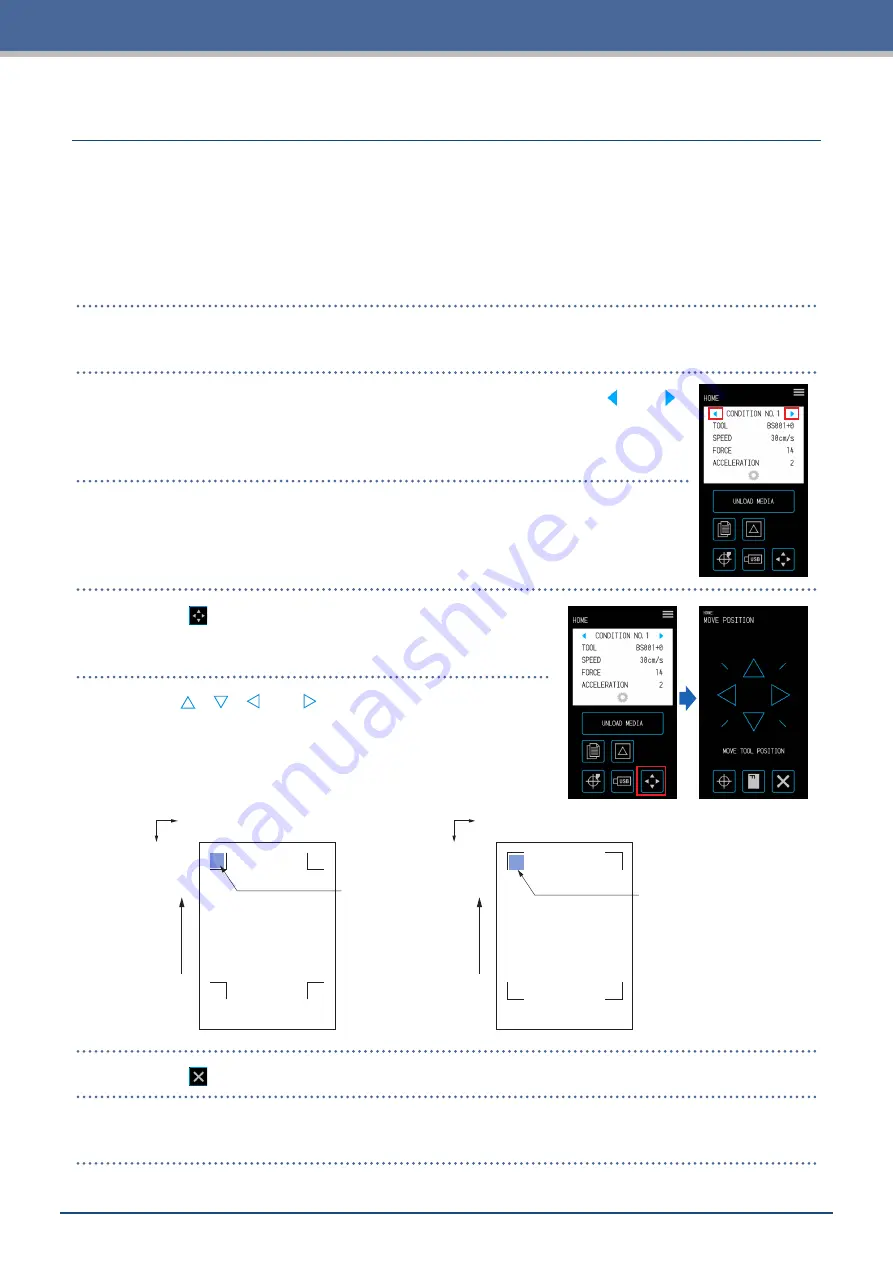
On the "HOME" screen, select the CONDITION NO. to use by using the "
" and " "
and set the tool.
3.
Load the printed media on which registration marks have been drawn.
4.
Touch the
(Position) to open the "MOVE POSITION" screen.
5.
Use the " ", " ", "
" and " " to move the tool to the
registration mark scan starting area.
If the current position of the tool is far away from the registration
mark scan starting area, it may take time to search for the
registration marks or the process may even end in an error.
Registration Mark Type 1
Registration Mark Type 2
X
Y
X
Y
Registration Mark
Scan Starting Area
Registration Mark
Scan Starting Area
Media T
ransport Dir
ection
Media T
ransport Dir
ection
6.
Touch the
(Exit) to return to the "HOME" screen and perform the cutting operation.
7.
To make multiple cuts, send the data while changing the media.
Printing & cutting will be performed according to the tilt when the printed media is set.
Summary of Contents for CELITE-50
Page 1: ...USER S MANUAL CE LITE 50 UM 151...
Page 2: ......
Page 10: ......
Page 22: ......
Page 78: ......
Page 101: ...5 23 Chapter 5 Detailed Settings 3 Select ON or OFF for WIDTH DETECTION...
Page 112: ......
Page 116: ...A 4 Appendix A 3 Appearance Drawing 164 784 227 173 400 Units mm Dimension error 5 mm...
Page 118: ...A 6 Appendix 3 PIECES Previous Page HOME SELECT FILE...
Page 119: ...A 7 Appendix TOOL ARMS MODE 1 MODE 2 MODE 3 CHECK MARK SCAN SENSOR OFFSET ADJ Next Page MENU...
Page 120: ...A 8 Appendix INTERFACE ADVANCE TEST Previous Page AREA MEDIA MENU...
Page 127: ......
Page 128: ......


