5-10
5 ELECTRICAL ADJUSTMENTS
CC100-UM-251-9370
5.8 Adjusting the Distance Accuracy
How to adjust the Distance Accuracy
(1) Connect the computer and the CC100-20 via the USB interface.
(2) Connect the power cable to turn on the power.
(3) Load an A4 (Letter) size sheet of paper with a backing sheet in the CC100-20.
(4) Mount the cutter pen with the cutter blade and the blue blade adjustment cap.
(5) Turn on the standby switch of the CC100-20.
(6) Execute Optionset.exe.
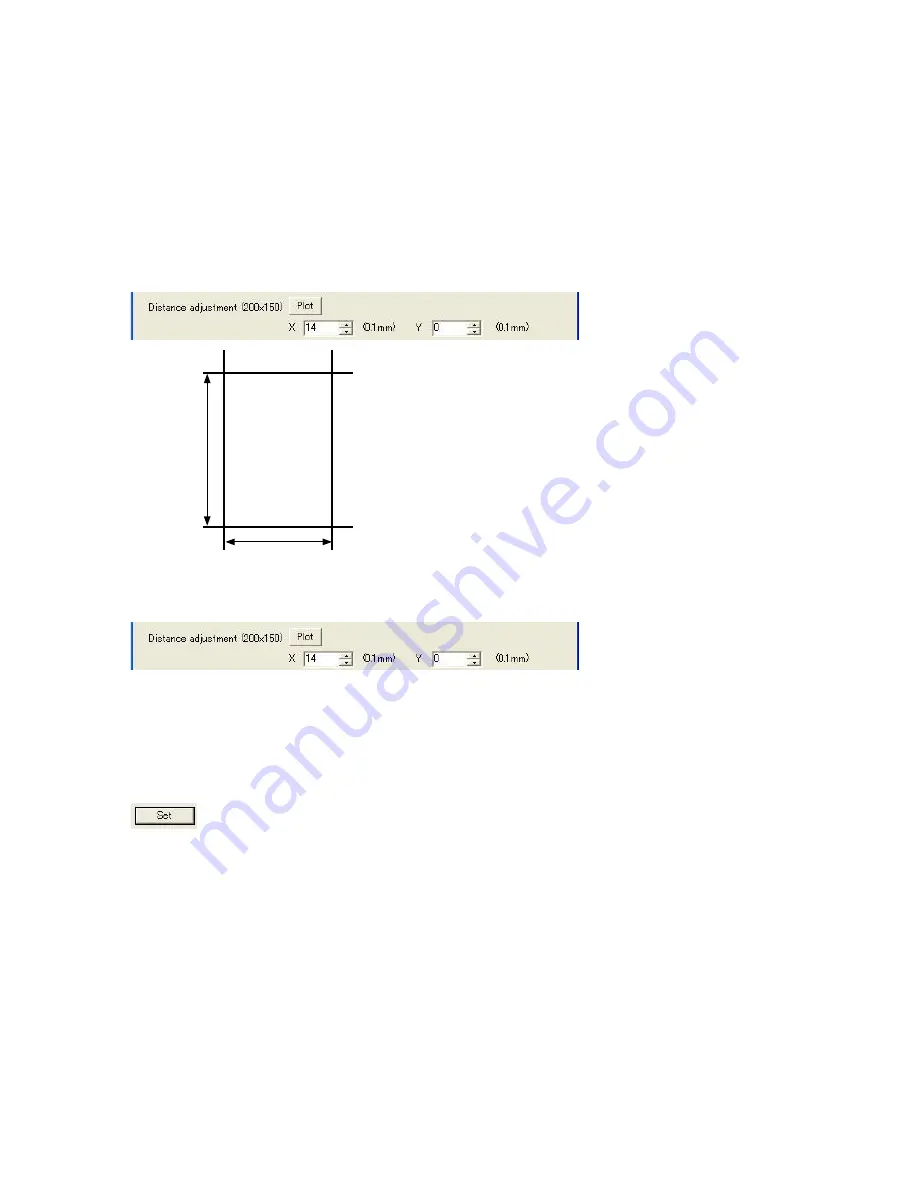
(7) Click the Plot button to cut the test pattern.
X=200 mm
Y=150 mm
(8) Measure the X-axis and Y-axis distances.
(9) Input the values to the input boxes shown below.
The formula of the input value is as follows:
Input value for X-axis = (200mm - measured distance) x 10
For example:
If you measured 200.2 mm for the X-axis, then input -2 for the adjustment value.
(10) Click the Set button to close the adjustment software and store all the settings to the Nov-RAM.


