CHAPTER 3. CRAFT ROBO CONTROLLER
3.
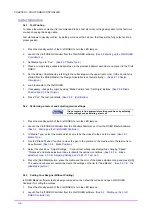
Select media from “Media Type” drop-down list
(See 3.5.7 Media Type.)
4.
Replace the blade adjustment cap as prompted by graphical indicator.
(See 3.5.7-A Blade Adjustment
Cap.)
5.
If cutting is not performed properly, adjust the cutting conditions.
Select the check box “Adjust Settings.” Conduct test cutting while changing the settings such as
“Speed,” “Thickness” and blade adjustment caps to find the optimal conditions.
(See 3.5.7-A Blade
adjustment cap, 3.5.7-B Adjust Settings, and 3.5.7-D Test Cut.)
6.
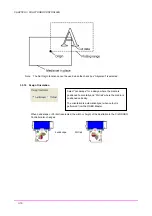
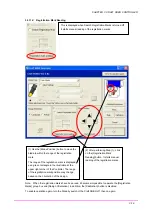
Set the Design Orientation by referring to the image on the plotter. (If the Controller is launched from the
ROBO Master, the Design Orientation is set automatically.)
(See 3.5.10 Design Orientation.)
7.
Load the media to the Craft ROBO.
8.
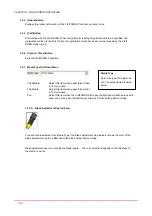
If necessary, use “Blade Position” and “Set Origin” to change the point of origin.
(See 3.5.8 Blade
Position and 3.5.9 Set Origin.)
9.
Press [Cut] to start cutting.
(See 3.5.5 [Cut] Button.)
3.4.4 Printing and Cutting Your Design
In ROBO Master software set the registration marks, create a design composition, then draw the cutlines,
print the design and open Craft ROBO Controller for cutting the cutlines.
The printout will contain both the registration marks and the design composition.
Cut the design as follows:
1.
Press the Craft ROBO’s standby switch to turn the LED lamp on.
2.
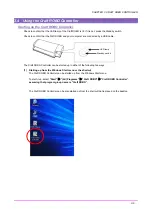
Launch the Craft ROBO Controller from the Craft ROBO software.
(See 3.4 Starting up the Craft
ROBO Controller (2).)
3.
Select the media from “Media Type” drop-down list.
(See 3.5.7 Media Type.)
4.
Replace the blade adjustment cap as prompted by graphical indicator.
(See 3.5.7-A Blade Adjustment
Cap.)
5.
If cutting is not performed properly, adjust the cutting conditions.
Select the check box “Adjust Settings.” Conduct test cutting while changing the settings such as
“Speed,” “Thickness” and blade adjustment caps to find the optimal conditions.
(See 3.5.7-A Blade
adjustment cap, 3.5.7-B Adjust Settings, and 3.5.7-D Test Cut.)
6.
Set the Design Orientation by referring to the image on the plotter. (If the software is started up with
ROBO Master, the Design Orientation is set automatically.)
(See 3.5.10 Design Orientation.)
7.
Load the media to the Craft ROBO.
8.
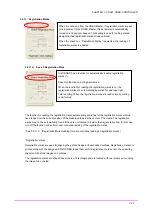
Check to confirm that “Search Registration Mark” is on.
(See 3.5.11-A Search Registration Mark.)
9.
Press [Cut]. The registration mark is searched for and read. When it is properly read, continue with the
cutting. (The procedure is successfully finished if cutting is started.)
(See 3.5.5 [Cut] Button.)
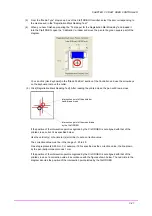
If the system is unable to automatically read the registration marks
To read the registration marks with user’s assistance, perform the following two steps:
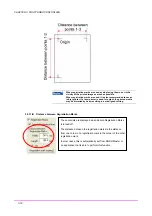
(1) Search for the first registration mark and set it as origin. (The first registration mark is located at the lower
left corner of the ROBO Master design area. It is shown in green on the illustration in the Craft ROBO
Controller. (See 3.5.9 Set Origin)
(2) Check the positions of the second and third registration marks using the first registration mark as a
reference.
The registration marks can generally be designated manually, even if step (1) fails.
10. Turn off “Search Registration Mark” and move the pen to the first registration mark using the Blade
3-9


