FC7000-UM-251-9370
6-14
6. DISASSEMBLY AND REASSEMBLY
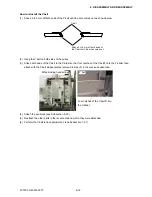
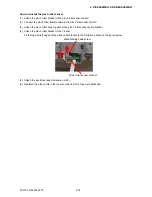
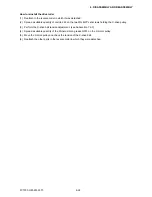
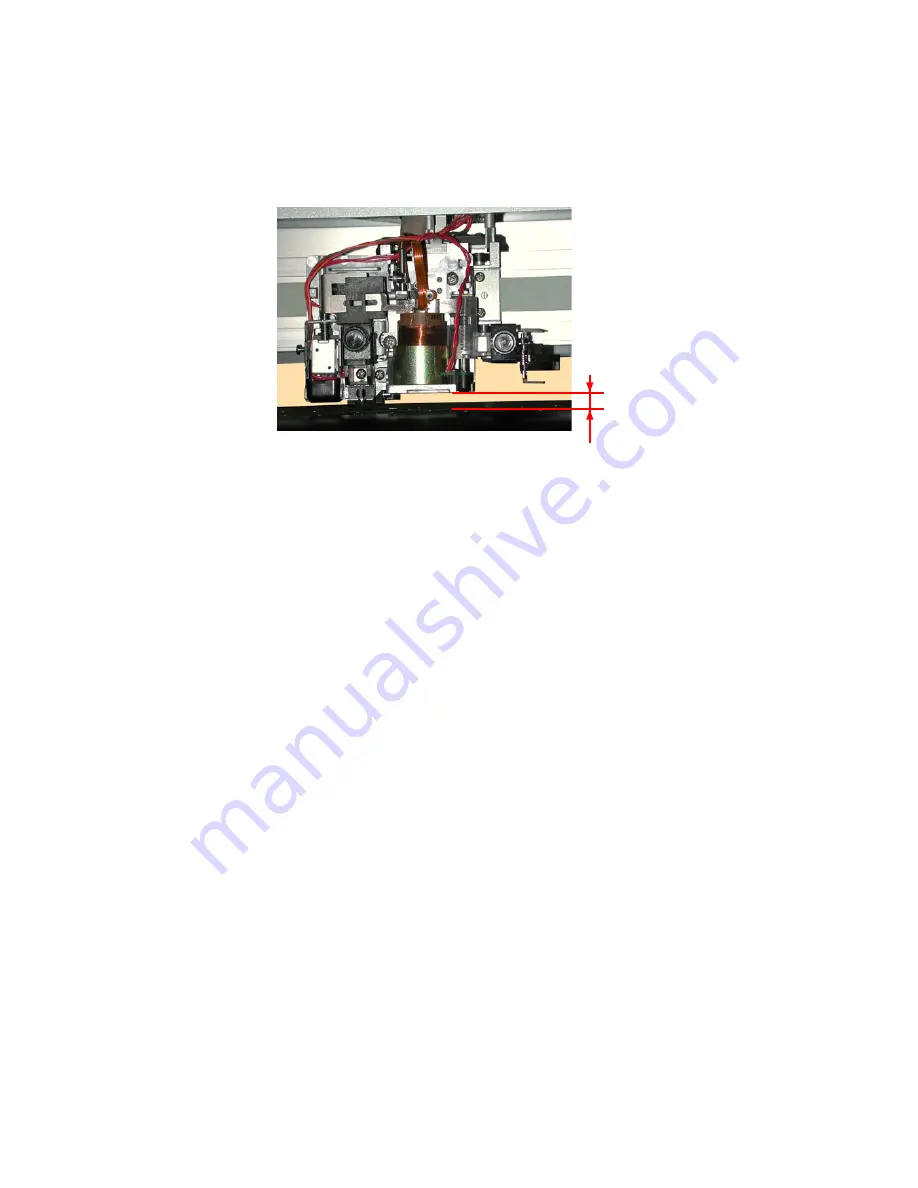
How to reinstall the pen block
(1) Attach the pen block to the Y-slider.
(2) Fasten the two M4L6 binding head screws to attach the pen block so that there is
a gap of 10 mm
between the bottom of the pen block and the cutting mat. Perform a visual check to make sure that
the pen block is not mounted at an angle.
10 mm
(3) Reattach the other parts in the reverse order in which they were detached.
(4) Perform the pen force adjustment (see Section 7.3.7).
(5) Perform the auto registration mark sensor sensitivity adjustment (see Section 7.3.9).
(6) Perform the auto registration mark sensor offset adjustment (see Section 7.3.10).
Summary of Contents for FC7000-100
Page 2: ......
Page 8: ......
Page 34: ......
Page 38: ......
Page 100: ......
Page 110: ......
Page 112: ...FC7000 UM 251 9370 10 2 10 PARTS LIST 1 2 3 4 5 6 7 8 10 9 Control Panel Assy 11 12...
Page 114: ...FC7000 UM 251 9370 10 4 10 PARTS LIST Control Panel 5 4 3 6 9 8 7 1 1 2 3 5 10...
Page 126: ......
Page 141: ...FC7000 UM 251 9370 11 15 11 BLOCK DIAGRAMS AND CIRCUIT DIAGRAMS 11 3 2 Main Board CPU...
Page 142: ...FC7000 UM 251 9370 11 16 11 BLOCK DIAGRAMS AND CIRCUIT DIAGRAMS 11 3 3 Main Board FPGA...
Page 143: ...FC7000 UM 251 9370 11 17 11 BLOCK DIAGRAMS AND CIRCUIT DIAGRAMS 11 3 4 Main Board I F...
Page 144: ...FC7000 UM 251 9370 11 18 11 BLOCK DIAGRAMS AND CIRCUIT DIAGRAMS 11 3 5 Main Board Motor Drive...
Page 145: ...FC7000 UM 251 9370 11 19 11 BLOCK DIAGRAMS AND CIRCUIT DIAGRAMS 11 3 6 Main Board Memory...
Page 146: ...FC7000 UM 251 9370 11 20 11 BLOCK DIAGRAMS AND CIRCUIT DIAGRAMS 11 3 7 Main Board Power Supply...


