4-8
Calibration
Before beginning calibration, clean the transparent contact plates located inside the scanner
and the surface of the document-scanning table. Any dust or dirt on these surfaces may affect
the calibration results and the resulting image quality.
Check that the calibration sheet is free of any dust or dirt.
Caution
• The calibration procedure will take some time. Do not turn off the scanner while
calibration is underway. Accidentally turning off the scanner may result in
damage that requires servicing.
• Handle the calibration sheet with care so that it does not get bent. To prevent
soiling, store it in its special storage box.
• The calibration sheet is a consumable item. It cannot be used if it is bent or soiled.
• The calibration sheet is a paper product. Do not attempt to clean it with any type
of liquid cleaner.
C
heckpoint
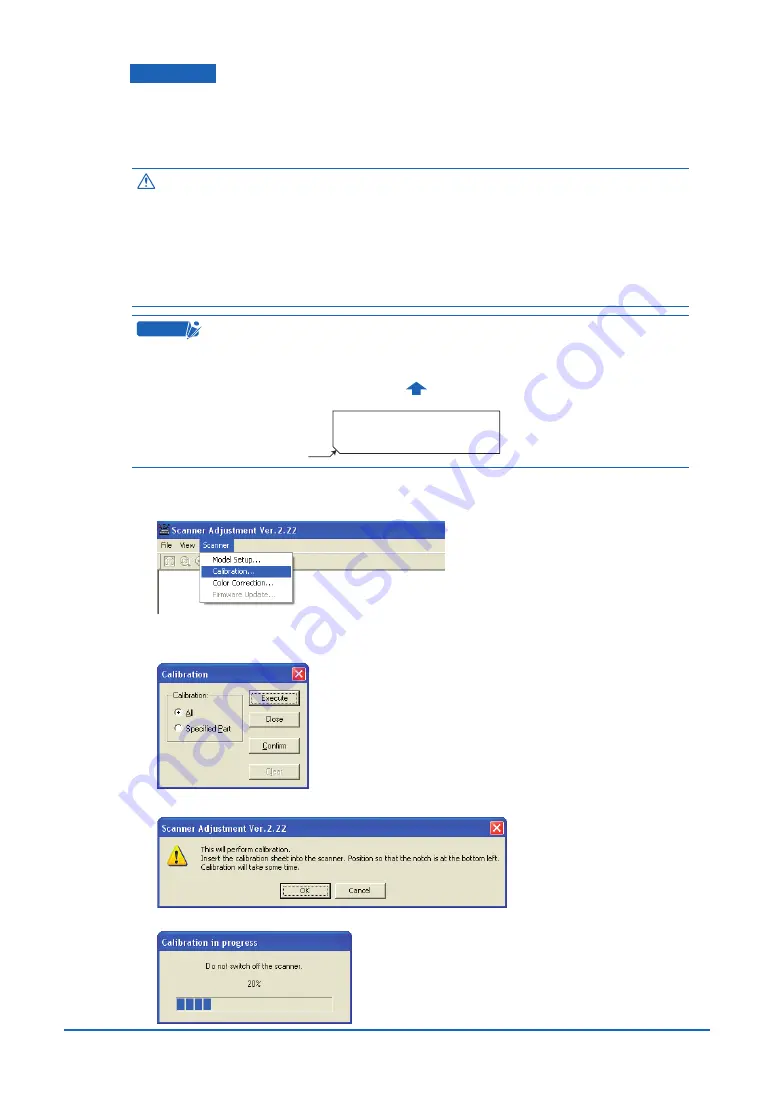
A prompt instructing you to insert the calibration sheet in the scanner will be
displayed in Step 3. At that time, insert the calibration sheet as instructed, with the
notch at the bottom left, as shown in the diagram below.
Calibration sheet
Scanner
Insertion direction
Notch
(1) Launch the Scanner Adjustment program (as described earlier), and then display the
Scanner menu.
Select Calibration on the Scanner menu.
(2) Select All in Calibration and click the [Execute] button.
(3) The following prompt is displayed. Insert the calibration sheet into the scanner as instructed.
(4) Click the [OK] button to begin calibration.


