5-3
5.8 The scanned data is incorrectly aligned
C
heckpoint
Your scanner comes shipped from the factory after being adjusted to ensure high
precision.
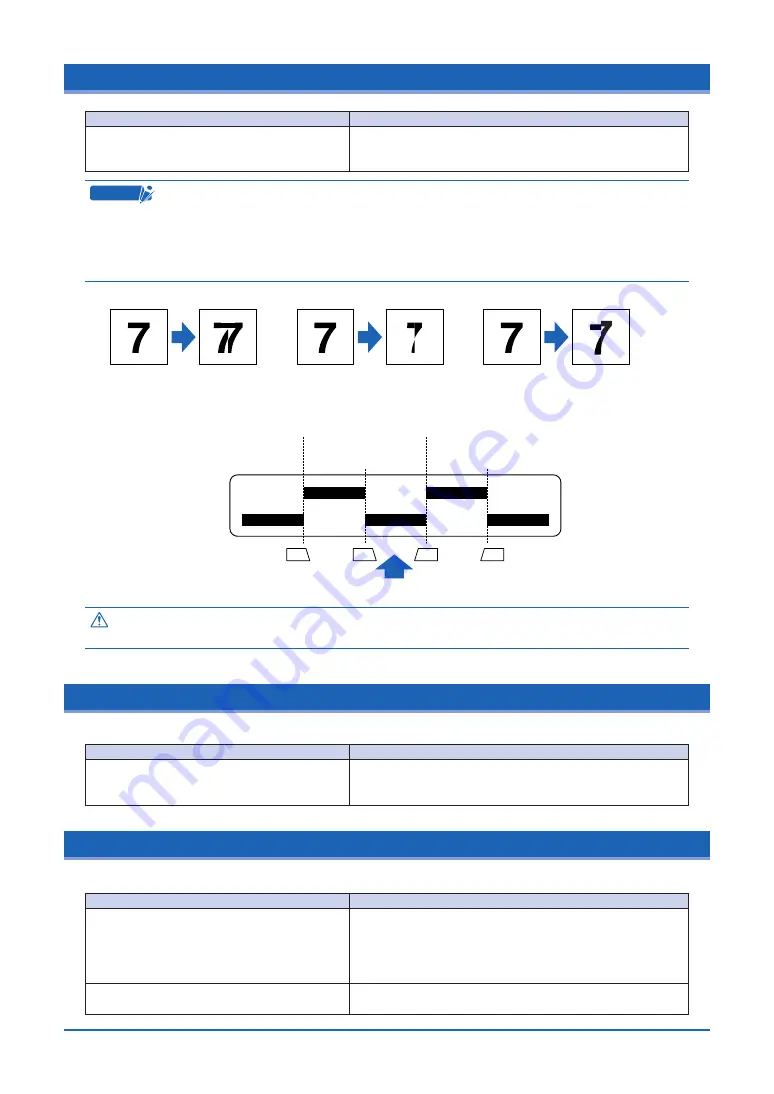
Due to its operating environment or other factors, however, the scanning precision may
deviate in very rare cases. Moreover, fine adjustment to correct any deviation can be
performed using the driver software if the cause of the deviation is overlapped or missing
data. Deviations due to the scanner specifications, however, cannot be adjusted.
Original
document
Data is
overlapped
Overlapped data
Missing data
Deviation due to scanner specifications
Original
document
Data is
missing
Original
document
Deviation caused
by the specifications
Sensor 1
Joint between
sensors 1 and 2
Joint between
sensors 2 and 3
Joint between
sensors 3 and 4
Joint between
sensors 4 and 5
Sensor 2
Sensor 3
Document feed direction
Sensor 4
Sensor 5
A2
8.5
8.5
A2
Image sensor position
Control panel side
Markings on the
document-scanning table
Caution
Because the document is loaded face up, Sensor 1 is the leftmost sensor in the driver
software’s display screens.
5.9 Smudges not appearing in the original document appear in the scanned data
5.10 The color intensity of the image data differs
Cause
The image scanned has a glossy surface, such
as a photograph.
Remedy
Documents with a glossy surface should be scanned by
placing them inside the carrier sheet that is available as an
option.
Cause
The scanner contains five contact image
sensors, the characteristics of which have
been adjusted. However, some variation in
color intensity may occur, depending on the
type of document scanned.
The document scanned was creased or curled.
Remedy
Adjust the color using the color-correction function in the
driver software provided with your scanner. One adjustment
method is to make similar colors all the same color.
l Creased or curled documents should be scanned by placing
them inside the carrier sheet that is available as an option.
Cause
The data is misaligned at a joint between the
image sensors (see the figure below).
Remedy
Select “Adjust” > the “Scanner Adjustment” menu from the
TWAIN driver’s “Settings” tab to perform joint adjustment and
align the joints.


