1-2
1.2 Part Names and Functions
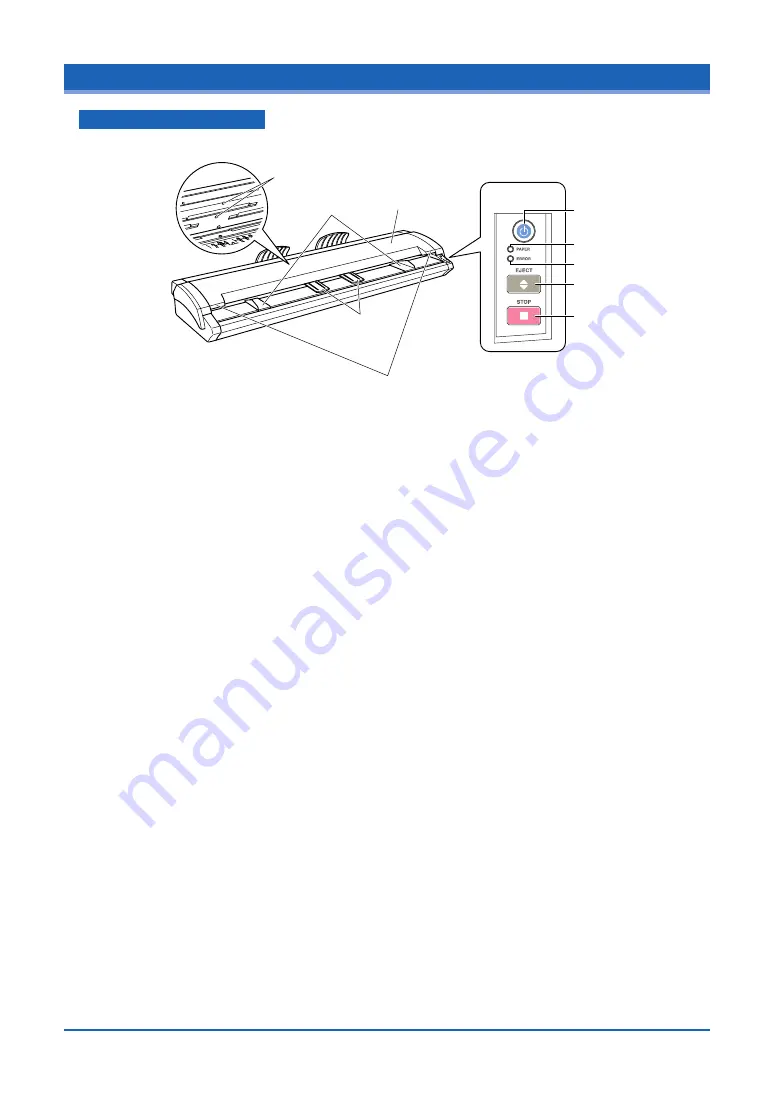
Front View/Control Panel
(1) Top cover
Control Panel
(4) Document guides
(3) Top cover open levers
(2) Paper sensors
(6) Power button
(7) POWER LED
(8) PAPER LED
(9) ERROR LED
(10) EJECT key
(11) STOP key
(5) Anti-curling
guides
Front View
(1) Top cover ....................... Open the top cover to clean the document hold-down unit and
transparent contact plates.
(2) Paper sensors ............... These sense whether a document is present in the scanner.
(3) Top cover open levers ... Press these levers to open the top cover.
If the top cover is opened during a scanning operation, the operation will
be stopped compulsorily.
(4) Document guides .......... Use these guides to determine the position of a document when you
load the document.
(5) Anti-curling guides ........ These guides prevent the document from being caught up in the scanner
during a scanning operation.
Control Panel
(6) Power button ................. Controls the on/off status of the power supply to the scanner.
(7) POWER LED (blue) ...... Unlit: The scanner is turned off.
Lit: Lights when the scanner is turned on and remains lit while it is
operating normally.
Flashing: Flashes when the scanner is in power-saving mode.
(8) PAPER LED (green) ...... Unlit: Normal status (Local status).
Lit: Lights when a document has been loaded.
Flashing: Flashes while image data is being scanned.
(9) ERROR LED (red) ......... Lit: Lights to indicate a hardware error.
Flashing: Flashes when any of the following occurs:
• A document is detected during the self-test when the scanner is turned on
• When a paper jam is detected
• When the top cover is open
• When the document length is shorter than the specified scan length*1
*1 When “Confirm” has been selected for the End-of-paper Processing setting in the driver
software.
Unlit: Normal status


