8920MUX Instruction Manual
31
Configuration
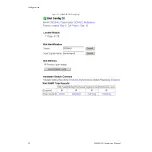
Slot Config Page
functions on the 8920MUX module:
•
Locate Module
– selecting the
Flash
radio button flashes the yellow
COMM and CONF LEDs on the front of the module so it can be located
in the frame.
•
Slot Identification
– You may identify the module by typing a specific
name in the
Name
field. The assigned name is stored on the 8900NET
module and travels with the 8900NET module if it is moved to another
frame. Select
Default
to enter the factory default module name.
•
Slot Memory
– the slot configuration for each media module is automati-
cally saved periodically (once an hour) to the 8900NET module in that
frame. You may also select the
Learn Module Config
button at any time to
save the current configuration for this slot. The configuration is saved
on the 8900NET module. If the 8900NET module is removed or
powered down, the stored configurations are not saved.
When the
Restore upon Install
box has been checked, the current configu-
ration saved to this slot is saved as slot memory. When the current
module is removed and another module of the same type is installed,
the configuration saved to the 8900NET module will be downloaded to
the new module. The box must be checked before the current module
with the saved configuration is removed.
•
Hardware Switch Controls
– a read-only status report of 8900NET module
switch settings for Module Status Reporting and Asynchronous Status
Reporting. These functions must be enabled for the following Slot
SNMP Trap Reports to function.
•
Slot SNMP Trap Reports
– displayed only when the SNMP Agent software
has been installed on the 8900NET module. Slot SNMP traps can be
enabled only when the hardware switches for Module Fault reporting
and Asynchronous Status reporting are in enabled on the 8900NET
module (dipswitch S1 segment 7 and dipswitch S2 segment 1).
The enabled SNMP traps will be reported to any SNMP manager that
is identified as an SNMP Report Destination in 8900NET configuration.
Trap severity is read-only hard-coded information that is interpreted
and responded to by the SNMP Manager software configuration.
Use
this
link
Summary of Contents for 8920MUX -
Page 4: ...4 8920MUX Instruction Manual Contents ...
Page 6: ...6 8920MUX Instruction Manual Preface ...
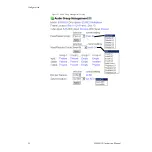
Page 28: ...28 8920MUX Instruction Manual Configuration Figure 12 Audio Group Management Display ...
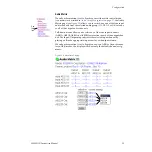
Page 32: ...32 8920MUX Instruction Manual Configuration Figure 15 8920MUX Slot Config Page ...
Page 44: ...44 8920MUX Instruction Manual Functional Description ...
Page 48: ...24 8920MUX Instruction Manual 8920MUX Video Audio Multiplexer ...
Page 50: ...24 8920MUX Instruction Manual 8920MUX Video Audio Multiplexer ...

