background image

208

EDIUS  —  User Reference Guide

Section 3 — Capturing and Importing Clips and Stills

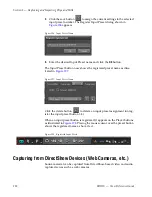
These settings are accessed by selecting Settings>Application Settings from 
the Preview window and selecting Deck Settings. The dialog shown in 

Figure 181

 appears.

Figure 181.  Deck Settings Dialog

Disable the “Automatically divide files” settings by clicking them to 
remove the check mark.

The desired preroll and margin times are also set in this dialog. Verify that 
the current settings are appropriate for the playback device and source to 
be captured. See 

Preroll

 on page 143

 and 

Margin

 on page 143

 for more infor-

mation about these settings.

Capturing from a DV or HDV Device

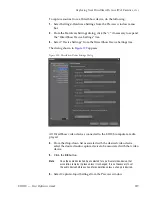
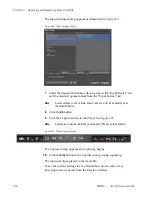
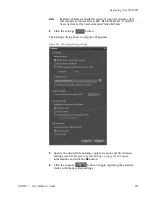
To capture a source from a DV or HDV device, do the following:

1.

Select Capture>Input Settings from the Preview window.

The Input Settings dialog in 

Figure 182

 appears

Summary of Contents for EDIUS

Page 1: ...EDIUS Editing for the Digital Generation User Reference Guide SOFTWARE VERSION 5 1 April 11 2009 ...

Page 2: ... Blvd Salt Lake City UT 84119 United States 7140 Baymeadows Way Suite 101 Jacksonville FL 32256 United States Including its implementation meets the requirements of the standard ISO 9001 2000 Scope The design manufacture and support of video hardware and software products and related systems This Certificate is valid until June 14 2009 This Certificate is valid as of August 30 2006 Certified for t...

Page 3: ...EDIUS Editing for the Digital Generation User Reference Guide SOFTWARE VERSION 5 1 April 11 2009 ...

Page 4: ...0 800 8080 2020 or 33 1 48 25 20 20 United States Canada 24 x 7 1 800 547 8949 or 1 530 478 4148 Local Support Centers available during normal business hours Asia Hong Kong Taiwan Korea Macau 852 2531 3058 Indian Subcontinent 91 22 24933476 Southeast Asia Malaysia 603 7805 3884 Southeast Asia Singapore 65 6379 1313 China 861 0660 159 450 Japan 81 3 5484 6868 Australia and New Zealand 61 1300 721 4...

Page 5: ...33 Create a Profile 33 Change a Profile Name or Icon 35 Delete a Profile 35 Copy a Profile 36 Export Profiles 36 Import Profiles 38 Profile Management 40 Manage Profile Access 40 Switch Active Profile 42 Change Profile Properties 43 Project Presets 45 Create a Project Preset 45 Create a New Project 51 Create a New Project from a Project Preset on Startup 51 Create a New Project From the Current Pr...

Page 6: ... Layout 108 Restoring Default Layout 109 Preview Window 109 Dual Mode 109 Single Mode 111 Player Operation Buttons 112 Recorder Operation Buttons 115 Timeline Window 117 Timeline Operation Buttons 117 Timeline Scale 118 Timeline Scale Controller 118 Track Panel 120 Asset Bin Window 121 Palette Windows 122 Information Palette 122 Effect Palette 123 Sequence Clip Marker Palette 123 Section 2 Applica...

Page 7: ... Input Device 143 Confirm Filename 144 Load to Player After Capture 144 Skip Errors and Continue Capture 144 Automatically Divide Files 144 Deck Control After Capture 144 EditSettings Preroll Time 145 EditSettings Postroll Time 145 EditSettings FirstEdit Pre Rec Time 145 Restore Offline Clip Settings 145 Docking Margin 146 Restore Default Load Project File 146 Restore Default Import EDL File 147 P...

Page 8: ...t Button List to Defaults 159 Control Settings 159 Show Timecode 160 Shuttle Slider 163 Show Player and Recorder Buttons 163 Overlay Settings 164 Normal Edit Overlays 165 Trim Edit Overlays 165 Overlay View Attributes 165 Export Overlays 166 Source Information to Show 166 Show Safe Area Overlay Attributes 167 Audio Level Meter Overlays 168 Display Bin Details Settings 168 View 169 Folder Type 170 ...

Page 9: ...ts 216 Registering Input Presets 217 Capturing from DirectShow Devices Web Cameras etc 218 Capturing from DVD CD 221 DISCcapture Capture Settings 225 Capturing from Devices Not Controlled by Deck Settings 226 Capturing Directly to the Timeline 227 Partial Download 228 Batch Capturing 228 Batch Capture Functions 231 Creating a New Batch Capture List 231 Saving Batch Capture Lists 231 Loading Batch ...

Page 10: ...1 Move to the In or Out Point 272 Removing In and Out Points 273 Editing Clip Properties 274 Editing Clip Settings 277 Color Bar Color Matte and Title Clips 277 Editing Clip Settings for Multiple Clips 279 Clip Width View 279 Detail View 280 Checking Clip Storage Location 281 Opening a Clip with an External Application 282 Clip Management 284 Selecting Clips 284 Copying Clips 284 Cutting Clips 284...

Page 11: ...s on the Timeline 329 Using Clips in the Asset Bin 329 Clip Status Indicators 331 Setting In Out Points and Placing a Clip 333 Place Video or Audio Only on Timeline 334 Placing Clips by Channel 335 Three Point Editing 338 Four Point Editing 339 Placing Special Clips Between In and Out Points of the Timeline 340 Moving Clips on the Timeline 341 Selecting Multiple Clips 341 Moving Selected Clip s 34...

Page 12: ...ndow 393 In Point Out Point or Slide Point Trim 394 Slip Trim or Rolling Trim 394 Trimming by Value 395 Trimming with Shortcuts 398 Ripple Trim 399 Split Trim 401 Slide Trim 403 Slip Trim 405 Rolling Trim 406 Sequence and Clip Markers 408 Show Hide the Marker Palette 408 Sequence Marker Palette 409 Clip Marker Palette 411 Setting Markers 414 Set Marker at Specific Location 414 Set Marker Between I...

Page 13: ...rting Still Image Clips from the Timeline 450 Deleting Temporary Files Manually 450 Timeline Sequence Operations 452 Creating a New Sequence 453 Creating a Nested Sequence 455 Open a Nested Sequence 456 Closing a Sequence 456 Saving Timeline Clips as Asset Bin Sequence 457 Creating A Blank Sequence Clip on the Timeline 458 Duplicating a Sequence 459 Multi Cam Mode 459 Switching to Multi Cam Mode 4...

Page 14: ...4 Clip Margin 514 Clip Transitions 515 Track Transitions 516 Audio Cross Fades 518 Apply Default Effects 519 Changing Default Effects 520 Changing the Length of a Transition or Cross Fade 521 Changing Default Effect Duration 523 Creating Video Composites 523 Composition 524 Picture in Picture 525 Configuring Picture in Picture Effects 526 Adding Motion to the Overlay Window 530 3D Picture in Pictu...

Page 15: ...or TV Display 585 Vector Scope and Waveform Details 589 Titles 591 QuickTitler 591 QuickTitler Application Details 593 Entering Text 595 Changing Text Settings 597 Changing Text Size 598 Moving Text 599 Rotating Text 599 Changing Text Color 600 Applying Transparency to Text 601 Applying Color Gradations 602 Applying Texture to a Text Object 604 Adding a Text Border Edge 605 Adding Shadows to Text ...

Page 16: ...nd 647 Delete Selected Rubber Band Points 648 Normalize Audio 649 Audio Mixer Operations 652 Adjusting Audio in the Mixer 652 Playing Clips From the Audio Mixer 653 Switching the Indicator Display 653 Audio Track Operations 654 Ganging Audio Tracks 656 Playing or Muting a Specified Track 657 Applying V Mute 658 Adding Voice Overs and Sound Effects 659 Section 8 Exporting Project Output 663 Exporti...

Page 17: ...udio Settings HD Only 732 Input Settings HD Only 733 Canopus HQ Codec Settings SD and HD 733 Video Overlay Settings SD and HD 734 Downconverter Settings HD Only 734 Upconverter Settings HD Only 735 HD STORM HXQ E1 Settings 736 System Settings 736 Analog Output Settings 738 Analog Input Settings 739 Canopus HQ Codec Settings 739 Video Overlay Settings 739 HDSPARK HSX Settings 739 System Output Sett...

Page 18: ...4Hz 767 Generic OHCI SD NTSC 767 Generic OHCI SD PAL 768 Generic OHCI SD 24Hz 768 Input Devices 769 Generic OHCI Input 769 Generic HDV Input 769 File Formats Supported In Trimming Operations 770 Default Keyboard Shortcuts 772 Asset Bin Shortcuts 772 Edit Shortcuts 773 Edit Delete Shortcuts 774 Edit Select Shortcuts 774 Edit Move Shortcuts 775 775 View Shortcuts 775 Play Shortcuts 776 Marker Shortc...

Page 19: ...Reference Guide contains detailed information concerning EDIUS tools features and functions used in creating and managing project workflows For information about the installation of EDIUS and importing custom data from prior versions of EDIUS see the Quick Start Guide ...

Page 20: ...D editing 128 MB RAM or larger required 256 MB or larger recommended For HD editing 256 MB RAM or larger required 512 MB or larger recommended ATA 100 7200 rpm or faster hard drive is necessary for video storage Available hard drive space should be twice the size of file to be edited RAID 0 recommended for HD editing One free USB port 1 1 or higher for software protection key Soundcard with WDM dr...

Page 21: ... filters Art Effects Film Effects and Motion Effects ProDAD video effects and image stabilization VitaScene and Mer calli Expert iZotope VST audio plug ins Audio Effects Suite Audio Restore AGC and Mastering Effects Suite SmartSound Sonic Fire Pro 5 Trial MyMusic for EDIUS Plugin Corel Blu Ray authoring DVD Movie Factory Artbeats HD stock footage and graphics ...

Page 22: ...22 EDIUS User Reference Guide Preface ...

Page 23: ... In this case some or all of the shortcuts referenced in this manual may not reflect the shortcuts defined on your system For a comprehensive listing of default keyboard shortcuts see Appendix C Input Output Formats Starting EDIUS To start the EDIUS application do one of the following 1 Double click the EDIUS icon illustrated in Figure 1 on the desktop Figure 1 EDIUS Application Icon 2 Select Star...

Page 24: ...a laptop or if you prefer not to use the USB key it may be desirable to transfer the license from the USB key to the laptop or PC on which EDIUS is installed It is also possible to transfer the license from the USB key provided with EDIUS to another USB key Before pro ceeding with any license transfer please thoroughly read the notes and warnings which follow The license transfer tool must be init...

Page 25: ...rive NIC etc may invalidate the license A transfer of the license to a PC is not recommended without a compelling reason for doing so Starting the License Transfer Tool 1 Attach the USB key to a USB port on the PC on which EDIUS is installed 2 Insert the installation DVD for the installed version of EDIUS into the DVD drive 3 Click on Browse DVD when the splash screen appears 4 Navigate to the Too...

Page 26: ...o be transferred 5 Click the Close button when all license transfers are complete Transfer License to Another USB Key 1 Select the USB to USB tab in the dialog box See Figure 4 Figure 4 USB to USB License Manager Dialog Box 2 Select the license to transfer from the list that appears in the USB to USB tab 3 Click the button to move the license to the list on the right side of the dialog box 4 Repla...

Page 27: ...the license is transferring or the license may be irretrievably lost 8 Click the Close button when all license transfers are complete Select Project Folder Location When EDIUS is started for the first time after a new installation not an upgrade from a prior version the dialog box in Figure 5 will appear Figure 5 EDIUS Project Folder Location Dialog To select a folder in which to store EDIUS proje...

Page 28: ...desired folder already exists on the selected drive select the desired folder and click the OK button see Figure 7 Figure 7 Select Project Folder 4 If the desired folder does not exist on the selected drive Click the Make New Folder button enter the desired folder name and click on the OK button see Figure 8 ...

Page 29: ...rent folder as the default folder for EDIUS project files Note As indicated in the dialog box once the default folder selection is made this dialog box will not appear again when EDIUS is launched Entering Numeric Data Numeric data entry is possible or required in many application screens and data input windows throughout EDIUS including some startup screens This section explains the various metho...

Page 30: ...nput methods apply to all numeric fields Direct Input The direct input method requires entering the numeric values from the key board To enter a numeric value with the direct input method do the fol lowing 1 Select the desired input field 2 To enter for example the value 25 minutes 16 seconds and 15 frames use one of the following methods a enter 25M16S15F b enter 251615 3 Press the Enter key Note...

Page 31: ...nter numbers using the arrow key input method do the following 1 Select the desired input field 2 Use the K key to increment the numeric value use the L key to decrement the numeric value use the I key to move one number segment to the left use the J key to move one number segment to the right 3 Press the Enter key when input is finished Mouse Wheel Input The mouse wheel input method uses the mous...

Page 32: ... to decrease until the mouse button is released Note The number will not decrement below a value of zero 0 Hold down the left mouse button and drag the mouse upward to increase the value Only continued upward movement of the mouse will increase the data value Hold down the left mouse button and drag the mouse downward to decrease the value Only continued downward movement of the mouse will decreas...

Page 33: ...ofile is selected for an EDIUS session the settings associated with that profile are automatically used Multiple profiles may be created Note Hardware settings changes to the Effects palette and preset exporters are not stored with profiles Create a Profile To create a profile do the following 1 Click on the New Profile button 2 Enter a name for the profile 3 If you wish to change the icon for thi...

Page 34: ...e is no icon preview from the icon Open dialog box See Table 1 below for a list of default profile icons Figure 11 User Profile Creation Table 1 User Profile Icons Icon Name Icon Graphic profile01 profile02 profile03 profile04 profile05 profile06 profile07 profile08 ...

Page 35: ...Icon To change the name or icon associated with a profile do one of the fol lowing Select the profile and click the Change button Change the name or icon as desired Right click on the profile icon select Rename or Change Icon from the menu Delete a Profile To delete a profile do one of the following Select the profile and click the Delete button Select the profile and press the Delete key on the k...

Page 36: ... Change a Profile Name or Icon above for information on changing the profile name and icon Export Profiles Profiles created in EDIUS on one computer can be exported and used in an EDIUS system on a different computer Profiles can be exported to network drives external drives USB drives etc and then imported into the EDIUS environment in which they are to be used To export one or all EDIUS profiles...

Page 37: ...ust the right clicked profile or all profiles may be exported This profile refers to the profile right clicked in Step 1 4 Navigate to the location in which the exported profile s will be stored as shown in Figure 14 Note A new folder may be created on the destination drive by clicking on the Make New Folder button in the Browse For Folder dialog ...

Page 38: ...ed location Import Profiles Profiles that have been exported from an EDIUS system may be imported into the same or another EDIUS system To import profiles perform the following actions 1 Right click on any profile icon 2 Select Import from the menu 3 Navigate to the location in which exported EDIUS profiles are stored an example is shown in Figure 15 ...

Page 39: ... To select all profiles click on the first profile in the list and hold down the SHIFT key while clicking on the last profile in the list 5 Click the Open button to import the selected profile s If a profile with the same name as a profile to be imported already exists the dialog shown in Figure 16 appears Figure 16 Profile Overwrite Dialog 6 Select the appropriate response to continue importing p...

Page 40: ...nstalled on the server s on which shared EDIUS profiles will be managed The actions described in this section pertain to EDIUS workstation settings and options and not the server based profile management operations Manage Profile Access To manage profile access do the following 1 Select Settings Change Profile from the Preview window menu bar as illustrated in Figure 17 Figure 17 Settings Change P...

Page 41: ...ct the profile location to be used from this EDIUS workstation by selecting one of the following options Local Only profiles stored on the local EDIUS workstation will be used Shared server Only profiles stored in the shared server folder specified in the next step will be used Local and shared server Profiles stored in both the local EDIUS workstation and the shared server location will be used ...

Page 42: ...ired profile and project preset change actions as described below The Setting Change of the Profile is Permitted If this option is selected creating new profiles changing profile settings name and icon and profile deletion are permitted If this option is not selected these actions are not allowed The Setting Change of the Project Preset is Permitted If this option is selected creating new project ...

Page 43: ...ent profile field 2 Select the profile you wish to activate The Change Delete and OK buttons will become active as illustrated in Figure 22 Figure 22 New Profile Selected 3 Click the OK button to activate the selected profile Change Profile Properties To change a profile name or the icon associated with a profile follow these steps ...

Page 44: ...ttings Change Profile from the Preview window menu bar The Change Profile dialog appears 2 From the Change Profile dialog select the desired profile 3 Click the Change button The new preset dialog shown in Figure 23 appears Figure 23 New Preset Dialog 4 Enter a new profile name if desired 5 Click the button and browse to the icon file you wish to assign to the selected profile 6 Click the OK butto...

Page 45: ... Rendering Format Time Code Preset and Mode Total Length Overscan Size Audio Reference Level Panning Mode Color Space Conversion Number of Video and Audio Tracks Audio Channel Map Multiple project presets may be created from which the appropriate selec tion is made when a new project is started Create a Project Preset To create a project preset do the following 1 From the start up window click the...

Page 46: ...ut format for the project preset Note The Description section of the Project Settings dialog will contain details such as frame size frame rate audio rate sample size channels etc based on the output device an output format selections 4 In the Setup default section of the dialog box click on the list button V of the Rendering format button A drop down list similar to the one shown in Figure 25 app...

Page 47: ...e rendering formats may change depending upon the selected output device and output format See Appendix A Hardware Settings for more information on output device and rendering codecs 5 Click the Detail button to see rendering codec details See Figure 26 Figure 26 Rendering Codec Settings Change settings as desired ...

Page 48: ...tton displays a drop down list of common reference levels 20 dB 18dB and 12dB however any reference level may be entered Note In any field with a drop down selection list indicated by the Vsymbol next to the field the K and L keys may be used to scroll through the list choices without opening the drop down list 11 Select the desired Panning mode The choices are Standard and EDIUS Pro3 Compatible T...

Page 49: ...from one track The number and types of tracks displayed may vary depending on the Track settings specified in Step 13 16 Click the OK button to close the Project Settings dialog box The project preset name dialog shown in Figure 28 appears Figure 28 Project Preset Name 17 If you wish to accept the default project preset name and icon proceed to Step 21 18 If you wish to change the name enter a new...

Page 50: ...he button The icon list shown in Figure 29 appears Figure 29 Project Preset Icon List 20 Select the desired icon from the list and click the Open button 21 Click the OK button to accept the project preset name and icon The EDIUS start up screen re appears see Figure 30 with the new preset definition in the New Project window ...

Page 51: ...ofile in the Profile area of the start up screen The selected profile icon and name appear in the Selected Profile area in the upper right corner of the start up screen see Figure 30 This selected profile will be used when a new project is initiated To create a new project using a project preset do the following 1 Double click the desired project preset icon in the New Project area of the EDIUS st...

Page 52: ...er The project file s will be stored in this folder Note If the Create project name folder option is not selected the project file s will be stored in the selected folder location without creating a new folder with the project name If you wish to specify a location for this project other than the default click the button and browse to the desired location Click to OK button to select the new folde...

Page 53: ...e Preview Window Click the list button V on the New Sequence Icon and select New Project from the menu See Figure 33 Figure 33 Create New Project from New Sequence List Button Note Clicking the New Sequence button will result in the creation of a new sequence in the current project To create a new project click on the list button V symbol See Sequences on page 58 for more information on sequences ...

Page 54: ...ject file appears See Figure 34 Figure 34 Save Current Project Dialog 2 Click Yes to save the current project The Project settings simple settings dialog box shown in Figure 35 appears Figure 35 Project Settings Simple Settings Dialog 3 Enter a name for the project in the Project name field 4 Select the desired project preset and click the OK button Note If you wish to create a new project preset ...

Page 55: ...ge the settings for a particular project at any time before project output To change project settings do the following 1 Select Settings Project Settings from the Preview window The Project Settings window shown in Figure 36 appears Figure 36 Project Settings Change Current Settings 2 Click the Change current setting button The Project Settings detail window appears See Figure 37 ...

Page 56: ...on to save the changes to the current project settings If you back into Settings Project Settings you will notice the addition of the Current Setting icon see Figure 38 The current project settings are associ ated with this project preset Note Changing the current project settings does not change the settings associ ated with the original preset from which the project was initiated Figure 38 Proje...

Page 57: ... an Existing Project Preset If you wish to make changes to the settings of an existing project preset do one of the following Click on the project preset icon from either the EDIUS start up window or the Project Settings dialog shown in Figure 36 and click the Change button Right click the preset icon for which you wish to change the settings and select Change preset from the menu Other Actions in...

Page 58: ...k the New Sequence button in the Timeline window see Figure 40 the New Sequence button is highlighted in blue Figure 40 New Sequence Button Select File New Sequence from the Preview window menu bar Right click on a blank area of the clip view in the Asset Bin and select New Sequence from the menu Note In this case a blank Timeline sequence clip is created in the Asset bin but a sequence tab is not...

Page 59: ... the sequence name Figure 42 New Sequence Clip In Asset Bin Note The sequence tabs can be dragged and dropped to change their order Sequence Settings Some sequence settings may have been defined when creating project pre sets The Sequence Settings dialog is illustrated in Figure 43 Figure 43 Sequence Settings Dialog ...

Page 60: ...n the Timeline for any project using this project preset See Starting EDIUS on page 23 for the various methods of entering numeric data and timecodes Tc Mode Select the TC mode by clicking on the V symbol on the TC mode button If an NTSC device was selected in Step 2 above you may select drop frame or non drop frame for the timecode display Total length If desired you can set the desired length of...

Page 61: ... map dialog as shown in Figure 27 Figure 45 Audio Channel Map Select the desired output channels for each track Click the OK button when finished Note Two 2 channels maximum can be output from one track The number and types of tracks displayed may vary depending on track settings In the Sequence Settings dialog make the desired changes to the sequence settings and click the OK button to save the c...

Page 62: ...wn in the Timeline window To save a project with a name other than the current name do one of the following Click on the list button V of the Save project button and select Save As from the menu While holding down the SHIFT key click the Save project button high lighted in blue in Figure 46 in the Timeline window Select File Save As from the preview window menu bar Press the SHIFT CTRL S keys on t...

Page 63: ...ute second ezp To recover a project from an auto save or backup file copy the file to the original project folder and import the file Note Auto save and backup files are read only and cannot be overwritten Exiting EDIUS To exit EDIUS do any of the following Select File Exit from the Preview window menu bar see Preview Window on page 109 for more information and click on the Yes button if you wish ...

Page 64: ...een illustrated in Figure 47 appears Double click the desired project icon in the Recent Project list Click the desired project icon in the Recent Project list and click the Open Project button Click the desired project icon in the Recent Project list and click the Start button Note Projects may be removed from the Recent Project list by selecting the project to be removed and clicking the Clear H...

Page 65: ...nt Project project name from the preview window menu bar Select File Open Project from the preview window menu bar and select the desired project from the Open dialog Press the CTRL O keys on the keyboard Importing Sequences A collection of clips images effects etc placed on the Timeline is known as a sequence Sequences created in another project may be imported into the current project The import...

Page 66: ...Guide Section 1 Getting Started Figure 49 Open Project Button Menu Import Sequence The Import Sequence dialog shown in Figure 50 appears Figure 50 Import Sequence Dialog 2 Select the desired import settings as explained below ...

Page 67: ... Figure 51 Sequence Import Settings Mismatch Warning Note If the frame rates are different the projects cannot be combined Import Bin The contents of the merged projects can be placed in a designated folder in the Asset Bin Select the Import Bin option and enter the name of the folder you want to create as the import location This folder will be created under the root folder as illustrated in Figu...

Page 68: ...e project file to for example transfer the project to removable media for archival Note See File Formats Supported In Trimming Operations on page 770 of Appendix C Input Output Formats for more information on file format support in trimming and consolidation operations To consolidate a project do the following 1 Click the list button V of the Save Project button and select Consolidate Project from...

Page 69: ...n Select the location to which to save the consolidated project Current Project Location If this location is selected the current project files are overwritten with the consolidated project files Save Project to Folder Designate a new folder location to which to save the consolidated project files If this option is selected enter or browse to the folder loca tion to which to save the files ...

Page 70: ... 00 The trim margin is the area between clips that can be used for adding transitions and audio cross fades or for fine tuning the clip trimming Backup no trimming This will backup the entire project All the files that are used in the project will be copied in to the project folder files that are already in the project folder will not be copied again Backup and Cleanup This will backup the project...

Page 71: ... if the delete unused files option is selected files may not be deleted if user access rights to the project folder do not allow delete opera tions Proxy Clip If a proxy clip is used select the proxy data type from the drop down list Output Log Select the this option and enter or browse to the location in which to save a log file containing the details of the consolidation operation 3 Click the OK...

Page 72: ...file must reference the source files directly To import an AAF file do the following 1 Click the list button V of the Open Project button and select Import Project AAF from the menu as illustrated in Figure 55 Note An alternative method is to select File Import Project AAF from the preview window menu bar Figure 55 Timeline Open Project Menu Import Project AAF The Open dialog illustrated in Figure...

Page 73: ...eated to which the AAF file is imported If this option is not selected a new track in the current sequence is created to which the AAF file is imported Import EDL Files An Edit Decision List EDL is a way of representing sequences of clips or reels stored on disk It contains an ordered list of file and timecode data which represents the final edit To import an EDL file follow these steps 1 Click th...

Page 74: ...ting Started Note An alternative method is to select File Import Project EDL from the preview window menu bar Figure 57 Timeline Open Project Menu Import Project EDL The Open dialog illustrated in Figure 58 appears Figure 58 EDL File Open Dialog ...

Page 75: ...d to which the EDL file is imported If this option is not selected a new track in the current sequence is created to which the EDL file is imported 2 Click the Detailed Settings button in the lower left corner of the Open dialog The EDL Importer Settings Dialog shown in Figure 59 appears Figure 59 EDL Importer Settings Dialog 3 Select the desired EDL import settings as explained below ...

Page 76: ...ted reel names of BL BLK or BLACK designate black clips which will be handled as empty clips Overwrite Clips that are Stacked on Top of Each Other in the Timeline Video Track If this option is selected and New Sequence is not selected in the Open dialog the current clips that are on stacked the 1VA or 1V track on the Timeline will be overwritten If this option is not selected and New Sequence is n...

Page 77: ...g the selected import settings The EDL file is imported and the Find Offline Clip dialog appears Restore the offline clip s using the methods explained in Restore Offline Clips on page 96 Important Considerations The following limitations exist when importing the indicted EDL file types BVE5000 BVE9100 Edit Modes ASMBL and ASSY1 are not supported Edit Types C W and D are the only types supported G...

Page 78: ...eline Open Project Menu Import Project FCP XML The Open dialog illustrated in Figure 61 appears Figure 61 Final Cut Pro XML Open Dialog 2 Select the Final Cut Pro XML file to import from the Open dialog 3 Click the Open button to open the selected Final Cut Pro XML file ...

Page 79: ...in several places on the Timeline each instance will be recognized as separate clips This is the same behavior as Final Cut Pro Freeze frame Multiclip Clips generates wit Bars and Tone and Color Matte in the Video Generator folder A clip generated in the formats listed below using the Bars and Tone video generator in Final Cut Pro will be imported as a color bar clip in the EDIUS Timeline Bars and...

Page 80: ...lters Import P2 Playlists To import a P2 Playlist file follow these steps 1 Click the list button V of the Open Project button and select Import Project P2 Playlist from the menu as illustrated in Figure 62 Note An alternative method is to select File Import Project P2 Playlist from the preview window menu bar Figure 62 Timeline Open Project Menu Import Project P2 Playlist The Open dialog illustra...

Page 81: ...new sequence in the current project is created to which the P2 Playlist is imported If this option is not selected a new track in the current sequence is created to which the P2 Playlist is imported Import XDCAM Files To import a XDCAM file follow these steps 1 Click the list button V of the Open Project button and select Import Project XDCAM from the menu as illustrated in Figure 64 Note An alter...

Page 82: ...tarted Figure 64 Timeline Open Project Menu Import Project XDCAM The Open dialog illustrated in Figure 65 appears Figure 65 XDCAM File Open Dialog 2 Select the XDCAM file to import from the Open dialog 3 Click the Open button to import the XDCAM file ...

Page 83: ...from EDIUS the following limitations should be considered Only active sequences will be exported The following will not be exported Tracks with no clip Audio tracks with no channel map setting Title track Tracks with video or audio mute set All effects Note Source files with pan and volume settings will be exported with those settings Sections of clips with transitions or cross fades applied will ...

Page 84: ...re 66 Timeline Save Project Menu Export Project AAF File The Save As dialog illustrated in Figure 67 appears Figure 67 AAF Save As Dialog 2 Select the desired export settings as explained below Preset Select the desired preset export type from the drop down list ...

Page 85: ...e video source to which the AAF file refers is not copied or exported Frame based audio information corresponding to the exported video information range is exported as a single clip AIFF file Type 3 This preset writes frame based video and audio clip information to the AAF file The video and audio sources to which the AAF file refers is not copied or exported Detail Button Displays the AAF Detail...

Page 86: ...ideo clips will be handled Output AAF If selected this option add video clip information to the AAF file Copy Clips Copy export the video source file s that are referenced in the AAF file Compress and Copy a Clip All video clips on the Timeline will be exported as a single clip The file name of the first clip on the smallest numbered track will be used as the name for the exported file containing ...

Page 87: ... Output Audio Track by Samples Select this option to export audio tracks as sample units Deselect this option for a frame based export of audio tracks Enable Pan Setting Select this option to export stereo tracks as individual monaural tracks The clip names will be clip name L for channel 1 Left and clip name R for channel 2 Right If this option is deselected stereo tracks will be downmixed and ex...

Page 88: ...urrently selected preset Note Only presets created by using the Save Preset button may be deleted The system installed presets Type 1 Type 2 and Type 3 may not be deleted OK Button If the OK button is clicked instead of the Save Preset button the detailed export setting are used temporarily for the current AAF file export Use the Save Preset button if you wish to save and register the current sett...

Page 89: ...9100 1A 2A 3A and 4A CMX340 1A and 2A only CMX3600 1A 2A 3A and 4A To export an EDL file from EDIUS do the following 1 Click the list button V of the Save Project button and select Export Project EDL from the menu as illustrated in Figure 69 Note An alternative method is to select File Export Project EDL from the preview window menu bar Figure 69 Timeline Save Project Menu Export Project EDL File ...

Page 90: ...ted Figure 70 EDL Save As Dialog 2 Designate a file name and folder destination in the Save As dialog 3 Click the Detailed Settings button in the lower left corner of the Save As dialog The EDL Exporter Detailed Settings dialog shown in Figure 71 appears ...

Page 91: ... desired EDL export type Export Format Select the desired export format mode Mode 1 Comment lines are not added to the EDL file Mode 2 Comment lines are added to the EDL file Note If EDL files from other applications are not correctly imported into EDIUS use this mode for exporting EDL files from EDIUS as it may improve the ability of these files to be imported in other applications as well as EDI...

Page 92: ...k _V A track _A 2VA or 2V track _INSERT T track _T If a 2VA or 2V track has a transition it is replaced with a center cut Replace Transitions with Center Cuts If selected this option replaces all transitions and audio cross fades with center cuts No Split Information If selected audio and video that is grouped together across multiple tracks is split and handled as separate clips If EDL files are ...

Page 93: ... option may improve the compatibility of exported EDL files with EDIUS and other applications Combine Insert Tracks Select this option to overwrite the 1VA or 1V track with the files from the 2VA or 2V track and export both tracks together as a 1VA or 1V track Create Reel List Select this option to create a list of reel number associated with the files clips to be exported Add Reel No to Clip Name...

Page 94: ... start timecode Regenerate Setting Set the start timecode to the In point of the first source clip Jam Sync Setting Set the In and Out point of the source clip to the In and Out points of the Timeline 5 Click the OK button to save settings and return to the Save As dialog 6 Click the Save button Handling Split Clips When clips placed on different tracks are grouped and they have a gap of less than...

Page 95: ... 00 00 to 00 00 05 00 C 00 00 01 00 to 00 00 06 00 No Split Information is Not Selected Gaps between the clips are split The B1 and C1 areas see Figure 72 are split and the information is separated into one 1 time period represented by area D D 00 00 01 00 to 00 00 06 00 including the split information for B1 and C1 Handle Split Clips Separately is Selected Separates the gaps between tracks and el...

Page 96: ...e file is moved renamed or deleted after the project file is saved clips linked to the source file become offline clips Figure 73 shows an offline clip on the Timeline Figure 73 Offline Clip on the Timeline Figure 74 shows the same offline clip represented in the Asset Bin Figure 74 Offline Clip in the Asset Bin The Find Offline Clip dialog illustrated in Figure 75 appears when a project file is o...

Page 97: ...e clips replace each offline clip with the recaptured file For more information on the batch capture procedure see Batch Capturing on page 228 Find From Captured Files If this method is selected already captured files are searched by reel number and timecode If no matching file is found click the Select Folder button in the Restore Offline Clip dialog to change the search location To restore all m...

Page 98: ...ile and is closed before restoring the offline clips it can be opened at any time by one of the following methods Click the list button V of the Open Project button and select Restore Offline Clip from the menu as illustrated in Figure 76 Figure 76 Timeline Open Project Button Menu Restore Offline Clip Select File Restore Offline Clip from the preview window menu bar Important Considerations When ...

Page 99: ...dialog button highlighted in blue in Figure 77 Figure 77 Restore Offline Clip Dialog Open the Clip Restoration Dialog The Restore Offline Clip dialog is displayed as illustrated in Figure 78 2 Select the clip s to be restored from the Offline Clip List and select Relink select file or Relink select folder from the Restoration Method column See below for an explanation of the restoration methods ...

Page 100: ...he desired method from the list Options are Relink select file Displays an Open dialog from which the source file to relink to the offline clip may be selected Relink select folder Displays a Browse for Folder dialog Search for the source file of the same name as the offline clip in the specified folder and select the file to relink Capture All Click the Start batch capture button in the lower lef...

Page 101: ...Folder dialog button to relink the source to the offline clip 4 Click the Close button in the Restore Offline Clip dialog Note When the Restore Offline Clip Close button is clicked a message will display if restoration failed on any offline clips 5 Click the Close button in the Find Offline Clip dialog Alternative Method Double click the offline clip on the Timeline or in the Asset Bin and browse ...

Page 102: ...igure 80 Batch Capture Dialog 2 Execute the batch capture following the instructions found in Batch Capturing on page 228 Alternative Method Select Capture all or Capture only the areas used in timeline from the Restoration Method column in the Restore Offline Clip dialog For more information on the Restore Offline Clip dialog see Relink and Restore on page 99 ...

Page 103: ...e similar but not identical to those depicted in this manual Multi Monitor Layout In a multi monitor configuration using for example two monitors the Preview and Timeline windows will be displayed on one monitor and the Asset Bin and Palette windows will be displayed on the second monitor Sample layouts are shown below in Figure 81 and Figure 82 Figure 81 Dual Monitor Sample Layout Monitor One The...

Page 104: ... the asset bin can be organized and managed according to user needs The three smaller windows on the left of the screen are from top to bottom the Information Palette the Effects Palette and the Marker Palette Single Monitor Layout In a single monitor layout all of the above windows are displayed on a single monitor The default layout presents these windows as illustrated in Figure 83 The Asset Bi...

Page 105: ...e the entire lower section of the monitor display for the Timeline the Information Palette can be moved to the upper tabbed section with the Asset Bin and other palettes as illustrated in Figure 84 In the custom layout in Figure 84 all of the major elements of EDIUS are still readily available with a single mouse click Note Other custom layouts may be created according to user preferences The exam...

Page 106: ...y displayed See Preview Window on page 109 for more information 2 Drag the Information tab and drop it next to the Bin Effect and Sequence Marker tabs in the upper right section of the display as illustrated in Figure 85 3 Drag the right edge of the Timeline window to the right edge of the screen The result is the custom layout in Figure 84 Note The Bin Effect Sequence marker and Information Palet...

Page 107: ...ing windows reordering tabs moving palettes to other locations etc Saving Custom Layouts Custom screen layouts such as the layout created in the steps above may be saved so they can be applied during future EDIUS sessions To save a custom layout do the following 1 Click View on the menu bar 2 Select Layout then Save Current Layout then New See Figure 86 ...

Page 108: ...rrent Layout Menu 3 Enter the desired name for the custom layout and click OK Apply a Saved Layout To apply a saved layout Click View on the menu bar select Layout then Apply Layout then the name of the saved layout you wish to apply See Figure 87 Figure 87 Apply Layout Menu ...

Page 109: ...e and Single Mode The manner in which the preview window is displayed and the area it occupies on the screen is also dependent upon the active screen layout as described in the sections which follow Dual Mode To select Dual Mode click on View in the menu bar and select Dual Mode Note All layout and preview mode functions are also available by clicking on the GV logo in the upper left corner of the...

Page 110: ...ayout Player The Player window on the left is used to preview material before importing it into EDIUS and placing it on the Timeline for editing Already captured clips can also be placed on and edited to the Timeline through the player window The Player can control external devices or play a clip from the Asset Bin Recorder The Recorder window on the right is used to preview edits and effects appl...

Page 111: ... 89 shows the menu that appears when the GV logo is clicked In single mode only one preview window is visible The preview display is switched between the Player and the Recorder as necessary to manage the EDIUS workflow When in single mode preview toggle buttons appear in the upper right corner of the Preview window as shown in Figure 92 Figure 92 Single Mode Preview Toggle Buttons The active prev...

Page 112: ...non overlapping windows Figure 94 Single Mode Preview Single Monitor Custom Layout Player Operation Buttons Figure 95 shows the Player operation buttons The function of each of these buttons is explained in Table 2 Note All keyboard shortcuts are the default shortcuts Keyboard shortcuts may be customized through the Application Settings dialogs see Section 2 Application and Plug In Settings for mo...

Page 113: ...e previous frame Holding down the key moves frame by frame in a faster step rewind Play Plays the clip in Player ENTER Next Frame Goes to the next frame in a clip Each click of the button moves to the next frame Holding down the key moves frame by frame in a faster step forward Fast Forward Fast forwards through the clip in the Player L Loop Repeatedly plays back the clip in the Player until playb...

Page 114: ...114 EDIUS User Reference Guide Section 1 Getting Started Note Additional functions not available in the Player preview window are available from this menu Figure 96 EDIUS Logo Player Function Menu ...

Page 115: ...rewinds the clip in the Recorder J Previous Frame Goes to the previous frame in a clip Each click of the button moves to the previous frame Holding down the key moves frame by frame in a faster step rewind Play Plays the content in the Recorder ENTER Next Frame Goes to the next frame in a clip Each click of the button moves to the next frame Holding down the key moves frame by frame in a faster st...

Page 116: ...ccess to the Recorder functions with their descriptions and keyboard shortcuts To access the menu as shown in Figure 96 click on the EDIUS logo select Func tions and then Recorder Note Additional functions not available in the Recorder preview window are avail able from this menu Figure 98 EDIUS Logo Recorder Function Menu ...

Page 117: ... managed on the Timeline The Timeline is where the finished project takes shape A collection of clips images effects etc placed on the Timeline is known as a sequence Figure 99 depicts the major components of the Timeline window Figure 99 EDIUS Timeline The Timeline window is comprised of the Timeline Operation Buttons the Timeline Scale the Timeline Scale Controller the Track Panel Timeline Opera...

Page 118: ...smaller scale unit less material will be visible on a single screen Or course regard less of the scale unit setting all material placed on the Timeline is accessible using the scroll bar at the bottom of the Timeline window The Timeline scale is adjusted using the Timeline scale controller depicted in Figure 102 Timeline scale units range from one frame to 60 minutes Figure 102 Timeline Scale Cont...

Page 119: ...e unit is changed to 10 seconds the Timeline scale adjusts accord ingly with each first degree tick mark representing two 2 seconds and each third degree tick mark 50 seconds See Figure 104 Figure 104 Timeline Scale Unit at 10 Seconds Viewing Entire Sequence on the Timeline If clips have been added to the Timeline that individually or collectively exceed the Timeline scale and it is desirable to v...

Page 120: ...scale to accommodate the entire sequence on a single screen Figure 106 Timeline Sequence Fit Scale Unit Track Panel The track panel is used for managing video clips and audio clips gener ating audio wave forms managing titles etc More details regarding the track panel are found in Section 5 Timeline Operations Click the icon to lock a track and prevent it from being edited Figure 107 Timeline Wind...

Page 121: ...mponents the Operation Buttons the Folder View the Clip View The Asset Bin is shown in Figure 108 Figure 108 Asset Bin The folder view on the left side of the window displays a tree view of asset folders into which clips can be grouped and organized The clip view on the right side of the window shows thumbnails default view of the clips stored in the selected folder ...

Page 122: ...r Palette Information Palette Information regarding the clip selected on the Timeline is displayed in the Information Palette window Any effects that have been applied to the clip are also displayed in the Information Palette window For more informa tion concerning the Information Palette see Section 4 Clip Operations and Management Figure 109 Information Palette ...

Page 123: ...ette window displays the time code position of all markers applied to assets on the Timeline Markers are used to quickly jump to marked positions on the Timeline The markers become chapter points in the project output for the Burn to Disc application see Export to DVD or Blu Ray on page 536 for more information on Burn to Disc Note Outputs other than Burn to Disc do not receive marker information ...

Page 124: ...124 EDIUS User Reference Guide Section 1 Getting Started Figure 111 Sequence Marker Palette ...

Page 125: ...sed with EDIUS are discussed in Appendix A Hardware Settings Application Settings Application settings are organized in the following settings categories Timeline Render Duration Source Deck Settings Restore Offline Clip Playback Match Frame Application Customize Button Control Overlay Display Bin Details Keyboard Shortcuts Window Color Any or all of these settings can be adjusted according to you...

Page 126: ...gs dialog shown above select Timeline from the Applica tion Settings tree click the to expand the tree if it is collapsed The following settings affect clips and effects on the Timeline see Figure 112 Note After making changes to any of the items in the Timeline Settings dialog click the Apply button to apply the changes and make them active Several changes may be made before clicking the Apply bu...

Page 127: ...r more information on Extend Mode see Extend Mode on page 308 Figure 113 Extend Mode Example Fix Mode Extend clips when applying transition cross fade If this setting is not checked disabled adding a transition or an audio cross fade between clips shortens the overall length of the sequence on the Time line as illustrated in Figure 114 Deleting a transition or cross fade lengthens the sequence on ...

Page 128: ... the 3 5 frame midpoint of the transition Default Checked Hold the Next Clip When Trimming a Clip Except Ripple Trim If this item is checked clips after the clip that is trimmed will hold their position on the Timeline unless ripple trim is enabled Default Not Checked Add Clips to Mapped Track With this option enabled when a clip is added to the Timeline parts of the clip that have corresponding m...

Page 129: ...ed dragging a clip with both video and audio to an audio track will result in the audio of the clip appearing in the selected audio track and the video of the clip appearing in the mapped video track Default Not Checked Snap of Event Selection in this section determine which items will snap to which destina tion and the range to which this applies Snap Item Check the items from the following list ...

Page 130: ... of the inserted clip see Figure 115 Default On Figure 115 Insert Mode Example Overwrite Mode With overwrite mode enabled adding a new clip overwrites the existing clip at the insertion point by the amount of overlap between the two clips The length of the sequence does not increase see Figure 116 Default Off Figure 116 Overwrite Mode Example Note Insert Mode and Overwrite Mode are mutually exclus...

Page 131: ... one another from the insertion point on See Figure 118 for an example Default Not Checked Figure 118 Sync Mode With Insert Enabled Sync Mode may also be toggled on and off by either of the following methods Click the list button V on the Insert Mode or Overwrite Mode icon and select Sync Mode A check mark by Sync Mode indicates that Sync Mode is on Sync Mode is off when the check mark is not pres...

Page 132: ...k icon toggles the lock on and off Figure 120 Track Lock Toggle Ripple Mode With ripple mode enabled when a clip is deleted or trimmed the clips which follow in the Timeline move to fill in the space formerly occupied by the trimmed or deleted clip Default Checked On Note With ripple mode on the behavior of clips on all tracks is also affected by the status of the Sync Mode setting The examples be...

Page 133: ...oggled on and off by one of the following proce dures Click the Ripple Mode button on the Timeline window tool bar Each click toggles ripple mode on or off When ripple mode is off there is a slash through the ripple mode icon When ripple mode is on the slash is removed See Figure 123 for details Figure 123 Ripple Mode Toggle Button Select Mode Ripple Mode in the Preview window As in the example ab...

Page 134: ... Thumbnails may be displayed on the left edge the right edge or both locations Default All Checked Render Settings These options control the behavior of the blue aqua green orange red lines under the time scale ticks on the Timeline These colored lines control what is rendered by forced temporary rendering the Render In Out Render Overload Area on the Preview window menu bar Blue The area should p...

Page 135: ...lecting Render from the Application Settings tree in the Settings dialog See Figure 124 For more information on rendering see Rendering Operations on page 441 Note After making changes to any of the items in the Render Settings dialog click the Apply button to apply the changes and make them active Several changes may be made before clicking the Apply button Figure 124 Render Settings Select or de...

Page 136: ...es are included in the rendering process if this parameter is checked Frame size different than project settings Aspect ratio different than project settings Frame rate different than project settings Field order different than project settings CODEC compression format different than project settings Alpha channel information included in clip Rendering Decisions If this parameter is checked EDIUS ...

Page 137: ...s and my be changed on a source by source basis on the Timeline The format of these duration fields is HH MM SS FF H hour M Minutes S Seconds F Frames See Entering Numeric Data on page 29 for more infor mation on the various methods for entering numeric data The Duration settings are accessed by selecting Settings Application Set tings from the Preview window and then selecting Duration from the A...

Page 138: ... Add Between In Out Check this box if you want to allow still images to be placed between In Out points on the Timeline Default Checked Title When a title is placed on a title track its default duration will be the dura tion specified in this setting Default 00 00 01 00 1 second Automatically Add Title Mixer When Importing Titles If this setting is checked placing a title on the track automaticall...

Page 139: ...0 01 00 1 second Rubberband Point Set the desired auto add point for rubberband points Source Settings Source settings determine how sources imported into EDIUS are treated The Source settings are accessed by selecting Settings Application Settings from the Preview window and then selecting Source from the Application Settings tree in the Settings dialog See Figure 126 Note After making changes to...

Page 140: ...gs frame rate Default Not Checked Color Range for RGB Clip This setting determines the default way EDIUS should treat RGB color space clips Note The color range setting can be changed for individual clips in the Bin in the Clip Properties Because there are two different methods for converting RGB color space to YCbCr color space for broadcast you may find that RGB clips may have blown out whites a...

Page 141: ...g grayish blacks and dull whites set the clip s color range to Super White Color Range for YCbCr Clip This setting determines the default way EDIUS should treat YCbCr color space clips Note This option does not have any affect on Canopus DV Canopus HQ or Canopus Lossless clips These formats are always treated as Super White Select the color range for YCbCr Clips Choices are White Super White defau...

Page 142: ...cted partial download is available when adding clips to the Timeline from the Player When Added to the Bin from Player If this option is selected partial download is available when adding clips to the Asset Bin from the Player Margin The margin on both sides of the clip is specified by the Margin setting Any margin from 0 seconds to 1 hour may be specified Default 5 seconds Deck Settings Deck sett...

Page 143: ...e device before capturing begins Margin Enter the desired clip margin added at In and Out points during capture operations The margin is the dead space before and after clips that can by used to insert transitions and other effects Confirm Reel No When Setting Input Device If the option is selected when an input device is selected for capture oper ations the ReelName dialog illustrated in Figure 1...

Page 144: ...capture operation will be automatically loaded into the Player when the capture is complete Default Not Checked Skip Errors and Continue Capture If this setting is checked errors encountered during batch capture opera tions will be ignored and capturing will continue Default Checked Automatically Divide Files Select the conditions which will cause captured data to be automatically divided into mul...

Page 145: ...argin uses the Margin setting on page 143 Restore Offline Clip Settings Clips that have been used in projects may go offline if they are acciden tally moved or deleted If offline clips need to be recaptured the settings in this section determine the restoration parameters The Restore Offline Clip settings are accessed by selecting Settings Appli cation Settings from the Preview window and then sel...

Page 146: ... the Timeline in closer proximity than the docking margin they are combined into a single clip Set the desired docking margin in a HH MM SS FF H hour M Minutes S Seconds F Frames format See Entering Numeric Data on page 29 for more information on the various methods for entering numeric data Restore Default Load Project File When restoring clips using a project file select the preferred restoratio...

Page 147: ...s Playback settings determine behavior during project playback operations The Playback settings are accessed by selecting Settings Application Set tings from the Preview window and then selecting Playback from the Application Settings tree in the Settings dialog See Figure 130 Note After making changes to any of the items in the Playback Settings dialog click the Apply button to apply the changes ...

Page 148: ...rames may be skipped while scrubbing When scrubbing on MPEG or Windows Media files it is best to leave this option disabled Default Not Checked Combine Filter Layers and Track Layers for Effect Settings When checked this option displays a composite image when previewing clips in the effect settings dialog box For example the composite image of V1 and V2 track images is displayed when opening the s...

Page 149: ...pper track transparency is not set to 100 the lower track timecode is not displayed Match Frame Settings Match Frame settings determine search order and targets The Match Frame settings are accessed by selecting Settings Application Settings from the Preview window and then selecting Match Frame from the Application Settings tree in the Settings dialog See Figure 131 Note After making changes to a...

Page 150: ...ine Next searches from left to right across the Timeline Target Tracks The target tracks selection determines which tracks are searched All tracks is the default If you want to limit the tracks that are searches select Choose Tracks and then check the tracks to be included in searches Choices are VA tracks or V tracks Video Audio or Video only A tracks Audio T tracks Title Selected track track cur...

Page 151: ...les records window positions creates titles and other application specific operations The Application settings are accessed by selecting Settings Application Settings from the Preview window and then selecting Application from the Application Settings tree in the Settings dialog See Figure 132 Note After making changes to any of the items in the Application Settings dialog click the Apply button t...

Page 152: ...nu bar See Figure 133 for an example Figure 133 Recent Clip Menu Recent Clip Number of Files The number entered in this field designates how many recently used clips will be displayed in the Recent Clip list Default 5 Recent Clip Show Thumbnail in the MRU List If selected this setting displays clip thumbnails in the Recent Clip list Large or Small default clip thumbnails may be selected The Recent...

Page 153: ...t the interval specified in Auto save interval The Auto save interval is specified in minutes Default Checked with a 3 minute auto save interval Player Format Select the desired player format for file playback Auto detect or Timeline format default Default Titler Select the default application to be used for creating titles QuickTitler is the default application included with EDIUS If other EDIUS ...

Page 154: ...indow and then selecting Button from the Customize tree in the Settings dialog See Figure 134 If the Customize tree is collapsed click the to expand the tree Note After making changes to any of the items in the Button dialog click the Apply button to apply the changes and make them active Several changes may be made before clicking the Apply button Figure 134 Button Settings Buttons for the Player...

Page 155: ...ded into the following button groups see Figure 135 Left Center Left Center Right Right Figure 135 Player Operation Button Groups The drop down list at the top of the Button dialog see Figure 136 displays the button groups that may be customized Figure 136 Select Button Group ...

Page 156: ...he insertion marker marks the position at which the button will be inserted See Figure 137 for an example Figure 137 Select New Button Position 3 Select a button to add from the Available Buttons list and click the Add button Note The Available Buttons list can be filtered to narrow down the possible selec tions From the Category drop down list a specific button category may be selected see Figure...

Page 157: ...her buttons as needed following the steps above Alternative Methods Double click the button to be added from the Available buttons list The button is inserted in the Current Buttons list above the insertion point Drag and drop the button from the Available Buttons list to the Current Buttons list The button may be dropped at any point in the Current Buttons list and the selected insertion point is...

Page 158: ... to the Player Center Left Player Center Right Recorder Center Left or Recorder Center Right button groups only the buttons that can be displayed within the available area will be shown Other button actions may be performed in the Button Setting dialogs as explained below Add a Space Between Buttons Space is an available button on all available button lists Add Space as you would any other button ...

Page 159: ... the list Reset Current Button List to Defaults Click the Default button to reset the button list in the Current Buttons list to the defaults for that list Control Settings Control settings determine the display properties of timecodes shuttles and sliders and operation buttons in the Preview window The Control settings are accessed by selecting Settings Application Set tings from the Preview wind...

Page 160: ...r and Recorder the following timecodes may be displayed Current In Out Duration Total The default selections is all timecodes checked for both the Player and Recorder The timecode font size may be selected from either the drop down list or be entering the desired font size in the Size field The Show Timecode settings shown in Figure 141 result in the timecode displays for the Player and Recorder s...

Page 161: ...ings The In Out and Duration timecodes have been de selected for the Player All timecodes are selected for the Recorder Display font size for timecodes is set at 16 point Note If the Show Timecode box is not checked no timecodes will be displayed in the Player and Recorder windows ...

Page 162: ...uide Section 2 Application and Plug In Settings Figure 142 Player Timecodes Only the Current and Total timecodes are displayed in the Player window Figure 143 Recorder Timecodes All timecodes are displayed in the Recorder Window ...

Page 163: ...allow the Shuttle display to be removed from the Player or Recorder windows or both Default Shuttle and Slider with Shuttle selected for both Player and Recorder Figure 144 shows the Recorder window with both shuttle and slider dis played Figure 144 Recorder Shuttle and Slider Show Player and Recorder Buttons If selected the operation buttons are displayed for both the Player and Recorder windows ...

Page 164: ...Settings Application Set tings from the Preview window and then selecting Overlay from the Cus tomize tree in the Settings dialog See Figure 145 If the Customize tree is collapsed click the to expand the tree Note After making changes to any of the items in the Overlay dialog click the Apply button to apply the changes and make them active Several changes may be made before clicking the Apply butt...

Page 165: ... determined by the Source information to show setting Label Status Default All Checked Trim Edit Overlays Select the overlay elements to be displayed during trim edit operations By default Sequence timecode is selected Source information is not selected Overlay View Attributes The View settings determine the position of the overlay elements that are visible in the Preview window The default positi...

Page 166: ... or large Default Large Background With Background checked the shaded background area is displayed behind the overlays If the shaded background is not desired de select the background Default Checked Export Overlays Select which overlay information to include in Export displays By default Sequence timecode is selected Source information is not selected Source Information to Show If Source Informat...

Page 167: ...the screen In Figure 146 the action safe area was set to 95 to better see the overlay The title safe area is fixed at 80 of the screen area and cannot be changed Select Title safe area 80 to display the title safe area overlay Guide Lines for 16 9 Monitor If the project settings and content have a 16 9 aspect ratio enabling guides for another aspect ratio is helpful in order to see what content ma...

Page 168: ...nge The color selector shown in Figure 149 appears Figure 149 Meter Bar Color Selector Select the desired color for the meter bar segment Note Check the IRE warning box to limit color selection to pre determined safe IRE levels To change the thresholds enter the desired dB level for segments two an three at which meter bar colors will change Click the Default button to return meter colors and thre...

Page 169: ...tomize tree is collapsed click the to expand the tree Note After making changes to any of the items in the Display Bin Details dialog click the Apply button to apply the changes and make them active Several changes may be made before clicking the Apply button Figure 150 Display Bin Details Settings View In the Asset Bin window contains imported video and audio clips for use in EDIUS projects diffe...

Page 170: ... selected column information designates what will be shown when the mouse cursor is placed over a clip in the bin When Detail is selected the selected column information will display in the Asset Bin when the bin view is set to any of the following Detail Text Large Detail Text Small Detail Icon Folder Type Views for two different folder type may be defined A Normal Folder is a view of all the con...

Page 171: ...Clicking the Default button sets all columns back to the defaults for the selected view and folder type To set the display information for Asset Bin views do the following 1 Select the view from the View drop down list for which you wish to define the display details 2 Designate if the column selections will apply to a Normal Folder or a Find Folder by making the appropriate selection from the Fol...

Page 172: ...ult keyboard shortcuts are provided however they may be customized to meet user needs and usage patterns The Keyboard Shortcut settings are accessed by selecting Settings Appli cation Settings from the Preview window and then selecting Keyboard Shortcut from the Customize tree in the Settings dialog See Figure 153 If the Customize tree is collapsed click the to expand the tree Note After making ch...

Page 173: ...EDIUS User Reference Guide 173 Customize Settings Figure 153 Keyboard Shortcut Settings ...

Page 174: ...ther Timeline Edit Edit Delete Edit Select Edit Move View Play Marker Mode Mode Multicam Capture Rendering Audio Mixer Filter A filter keyword e g Delete may also be entered to narrow down the shortcut list to only those shortcuts that fit the keyword Shortcut Assignment Buttons The buttons explained in this section are used in making keyboard shortcut assignments Assign When the Assign button is ...

Page 175: ...ist in combination with the black colored special key s These keys may be used in shortcut assignments Dark grey keys e g numbers keys on numeric keypad are keys which cannot be used in keyboard shortcuts Blue key s are keys currently used in the selected assignment alone or in conjunction with any black special keys In the example in Figure 154 the black special key Shift is currently assigned wi...

Page 176: ...grading from one version of EDIUS to another Custom keyboard shortcuts are not always retained during an upgrade The existing keyboard shortcuts should be exported before the upgrade and then imported after the upgrade to the new version Exported shortcuts are saved in a file with an eap extension Making a Keyboard Shortcut Assignment To make new keyboard shortcut assignment or modify existing ass...

Page 177: ...olor settings allow you to change the primary interface color according to preference The Window Color settings are accessed by selecting Settings Application Settings from the Preview window and then selecting Window Color from the Customize tree in the Settings dialog See Figure 156 If the Customize tree is collapsed click the to expand the tree Note After making changes to any of the items in t...

Page 178: ...color As the sliders are moved the current color selection appears in the small sample box next to the Reset to Default button 2 Click the Apply button to apply selected color and leave the Window Color dialog open or click the OK button to apply the color setting and close the Window Color dialog The settings shown in Figure 157 change the interface color as illustrated in Figure 158 ...

Page 179: ...179 Customize Settings Figure 157 Window Color Slider Operation Figure 158 New Window Color Applied To return to the default window color open the Window Color dialog and click the Reset to Default button then click the OK button ...

Page 180: ... from the Preview window and then selecting AVCHD Importer from the Plug In Settings tree in the Settings dialog See Figure 159 Figure 159 AVCHD Importer Settings Select the settings to be used when importing Advanced Video Codec High Definition AVCHD content for use in EDIUS Default All Checked Use Accel Seek Selecting this option speeds up the seek times on AVCHD files If this item is selected t...

Page 181: ...t pro duces the AVCHD mts files Create Seek Information in Background Selecting this option causes the time stamp information of AVCHD files to be collected in the background during CPU idle times The collected seek information speeds up AVCHD seek times Default Checked Save Seek Information to File Selecting this option causes the collected seek information to be saved in a reusable file ese exte...

Page 182: ...ld selections Default Frame Filtering Select the desired image filtering setting No Filtering may result in lower image quality if Odd Field or Even Field is the selected capture field Set filtering to Motion Only if blurring occurs only in motion scenes Set filtering to Full Screen if blurring appears in all parts of the image cap ture Default No Filtering Adjust Aspect Aspect ratios differ in vi...

Page 183: ...t JPEG Files jpg TIFF Files tif Photoshop Files psd JPEF File Interchange Format Files jfif Portable Network Graphic Files png Mac Pict Files pic QuickTime Image Files qtif SGI Files sgi VMF Importer These setting determine how Grass Valley Aurora Edit VMF files are imported VMF files are imported as JPEG2000 files Set the desired quality and the downsampling coefficient compression ratio from the...

Page 184: ...MPEG Importer MPEG Importer settings determine the parameters for importing MPEG files for use in EDIUS The MPEG Importer settings are accessed by selecting Settings Plug In Settings from the Preview window and then selecting MPEG Importer from the Plug In Settings tree in the Settings dialog See Figure 162 ...

Page 185: ...ing this option causes the time stamp information of MPEG files to be collected in the background during CPU idle times The collected seek information speeds up MPEG seek times Default Checked Save Seek Information to File Selecting this option causes the collected seek information to be saved in a reusable file Default Checked Don t Use PTS Some MPEG files may not have valid time stamp PTS inform...

Page 186: ...GOP header timecode information Default Not Checked Note If you notice flashes of colored frames when playing for scrubbing MPEG clips try enabling this option as a possible resolution MXF Importer MXF Importer settings determine the parameters for importing MXF files for editing in EDIUS The MXF Importer settings are accessed by selecting Settings Plug In Set tings from the Preview window and the...

Page 187: ...downsampling coefficient Choices are 1 1 highest quality default 1 2 1 4 1 8 1 16 lowest quality XDCAM Importer The XDCAM Importing settings determine proxy editing parameters The XDCAM Importer settings are accessed by selecting Settings Plug In Settings from the Preview window and then selecting XDCAM Importer from the Plug In Settings tree in the Settings dialog See Figure 164 Figure 164 XDCAM ...

Page 188: ... is neither a high resolution nor proxy available When proxy is edited high resolution audio is used if available VFAM drive only GPUfx Settings If have a video card that is supported by GPUfx these settings determine how the GPUfx are used in EDIUS The GPUfx Settings are accessed by selecting Settings Plug In Settings from the Preview window and then selecting GPUfx Settings from the GPUfx tree i...

Page 189: ... all multisample types Quality Level The quality level is set to a default of 0 Rendering Quality Select the desired rendering quality Full quality Draft quality Fader Device Select The Fader Device Select dialog allows selection of a fader connected to the computer on which EDIUS is installed Fader Devices Select is accessed by selecting Settings Plug In Settings from the Preview window and then ...

Page 190: ...Choices are Behringer BCF2000 and EDIUS FC 1 If Behringer BCF2000 is selected see Behringer BCF2000 below 2 Select the port on which the device is connected to the EDIUS computer 3 Click the Reconnect button to detect and connect to the device Note If the device is not found the error dialog in Figure 167 appears Check the device and the port connection to make sure it is correct Figure 167 Jog Fa...

Page 191: ...the InputController Fader tree in the Settings dialog See Figure 168 Figure 168 Behringer BCF2000 Preset When the Behringer BCF2000 is selected the first time the Select Preset No dialog shown above appears To install a preset do the following 1 From the Preset No drop down list select the preset number to be installed for the Behringer BCF2000 and click the Next button The Load Preset dialog in F...

Page 192: ... the preset installation If the preset installation fails because the device is not detected the dialog in Figure 170 appears Check that the device is properly connected and click the Retry button Figure 170 Preset Installation Failed If the installation is successful the Behringer BCF2000 dialog illustrated in Figure 171 appears ...

Page 193: ...re 171 Behringer BCF2000 Settings Jog Device Select Jog Device Select is accessed by selecting Settings Plug In Settings from the Preview window and then selecting JogDevice Select from the Input Controller Jog tree in the Settings dialog See Figure 172 ...

Page 194: ...e from the Device drop down list Choices are EDIUS JC1p and MKB 88 S 2 Select the port on which the device is connected to the EDIUS computer 3 Click the Reconnect button to detect and connect to the device Note If the device is not found the error dialog in Figure 167 appears Check the device and the port connection to make sure it is correct Figure 173 Jog Fader Reconnect Failed ...

Page 195: ...Set tings from the Preview window and then selecting EDIUS JC1p from the InputController Jog tree in the Settings dialog See Figure 174 Figure 174 EDIUS JC1p Settings An overview of the EDIUS JC1p controller is displayed A yellow colored key indicates that key currently has an assigned opera tion Placing the mouse cursor over a yellow key shows hover text con taining the current operation assignme...

Page 196: ...his is useful if you want to make a jog device key assignment that is equiv alent to a particular keyboard shortcut Default Clicking the Default button resets the operation assignment to the default for the selected key Import The Import button is used to import a jog device key assignment file jljog extension into EDIUS Export The Export button is used to export the current jog device key assignm...

Page 197: ...y click on the List tab and click the Assign button The list tab displays all buttons assigned operations and repeat On Off status in a list The dialog shown in Figure 175 appears Figure 175 EDIUS JC1p Select Operation 2 Use the Category drop down list or the Filter field to narrow down the list of operations to just those that pertain to the selected category or filter keyword e g delete Operatio...

Page 198: ... 5 Click the OK button to make the operation assignment to the selected key In the List tab the No assign button can be used to delete the operation assignment for the selected controller key That key will then be white in the controller overview screen Control tab Click the OK button on the EDIUS JC1p dialog to save all operation assign ments and close the dialog MKB 88 Settings Operation assignm...

Page 199: ... operation assignment for that key A white colored key is a key for which no operation assignment currently exists Operation Assignment Buttons The buttons explained in this section are used in making operation assign ment to device keys Assign When the Assign button is clicked the keyboard map shown in Figure 154 appears No Assign Clicking the No assign button changes the operation assignment for...

Page 200: ...ce key assignments to a file which can then be imported into another EDIUS system Export is also useful when upgrading from one version of EDIUS to another Custom device key operation assignments are not retained during an upgrade The existing device key operation assignments should be exported before the upgrade and then imported after the upgrade to the new version Exported device key operation ...

Page 201: ... the Category drop down list or the Filter field to narrow down the list of operations to just those that pertain to the selected category or filter keyword e g delete Operation categories are All default Other Timeline Edit Edit Delete Edit Select Edit Move View Play Marker Mode Mode Multicam ...

Page 202: ...while the key is held down 5 Click the OK button to make the operation assignment to the selected key In the List tab the No assign button can be used to delete the operation assignment for the selected controller key That key will then be white in the controller overview screen Control tab Click the OK button on the MKB 88 for EDIUS p dialog to save all operation assignments and close the dialog ...

Page 203: ...e 178 VST Plugin Bridge Settings Adding a Location to the VST Plugin Search List To add a VST Plugin location to the search list do the following 1 click the Add button The Browse For Folder dialog in Figure 179 appears Figure 179 VST Plugin Browse Folder ...

Page 204: ...appear in the VST Plugin Search List as illustrated in Figure 180 Figure 180 VST Plugin Search List To remove a folder from the search list select the folder path and click the Remove button Note EDIUS must be restarted before the search list changes are recognized Click the OK button on the VST Plugin Bridge Settings dialog to save all changes and close the dialog VST folder s will be registered ...

Page 205: ...red directly to the Timeline for immediate use Importing is the process of making existing clips and stills stored on the EDIUS computer local disk or other attached storage available in the Asset Bin for use in EDIUS projects Supported File Types The Asset Bin can contain clips of any of the following file types and exten sions AVCHD m2ts mts Note Using the AVCHD Converter available in the Tools ...

Page 206: ...es png Mac Pict Files pic pct pict QuickTime Image Files qtif qti qif Silicon Graphics Image Files sgi rgb Compuserve GIF Files gif Windows Meta File wmf emf Maya IFF File iff DPX SMPTE 268M 2003 File dpf QuickTitler etl Infinity Clip File xml MPEG Program Stream mpg mpeg m2p mp2 vob vro Note If a vob file cannot be imported capture the source with DISCcapture see Capturing from DVD CD on page 221...

Page 207: ...anopus HQ codec DVCPRO HD and DVCPRO 50 formats may also be captured Source Connections Playback sources may be connected to any of the following Generic OHCI IEEE 1394 port Main board DV terminal of optional SHX E1 SHX E2 NHX E1 and NHX E2 EDIUS boards Note These optional boards cannot be used for HDV capture DV terminal of Grass Valley editing systems If your playback device supports HDV set the...

Page 208: ... files settings by clicking them to remove the check mark The desired preroll and margin times are also set in this dialog Verify that the current settings are appropriate for the playback device and source to be captured See Preroll on page 143 and Margin on page 143 for more infor mation about these settings Capturing from a DV or HDV Device To capture a source from a DV or HDV device do the fol...

Page 209: ...ailable HD 60 Hz input formats are listed because the CODEC selection has been set to All Frame size to HD and Frame rate to 60 See Sorting Input Formats on page 216 for more information on how to use these settings 4 Select the Convert 16Bit 2ch option if you wish to convert the source audio to 16 bit 2 channel audio as it is captured Default Not Checked 5 Click the OK button to save the current ...

Page 210: ...re 183 TC Jump Dialog 7 Playback the source using the Player operation buttons Set In and Out points as desired Setting no In and Out points allows you to capture the entire source For more information on In and Out points see Setting In and Out Points on page 214 Note See Player Operation Buttons on page 112 for information about the Player buttons and their functions 8 Click the Capture see Figu...

Page 211: ... the actual clip timecode is displayed for five seconds See Sequence and Clip Markers on page 316 for more information on Clip markers Note The total number of Clip markers set during a capture operation is also dis played in the Capture dialog Captured clips are placed in the Asset bin at the conclusion of the capture process These clips are now available for use in EDIUS Neo projects Setting Ree...

Page 212: ...nu ReelName Settings If the UserBit is used as ReelName option is selected the reel name will be automatically set and manual reel name entry is disabled If this option is not selected the reel name may be manually entered or selected from the drop down list of previously used reel names Note When capturing an audio file UserBit as reel name option is disabled and cannot be selected Enter or selec...

Page 213: ...e for captured clip s is specified as illustrated in Figure 189 Figure 189 Capture Settings Confirm Filename Confirm Filename If the Confirm filename option is not selected the file will be named auto matically with no confirmation If the Confirm filename option is selected you may choose to confirm the filename before or after capturing a clip and the dialog shown in Figure 190 appears either bef...

Page 214: ...re placed in the Asset bin at the conclusion of the capture process These clips are now available for use in EDIUS projects Setting In and Out Points Setting In an Out points allows you to choose just a portion of the source material for capture instead of capturing the entire source and then trim ming as needed Setting In an Out points is done in the following ways While playing a clip click the ...

Page 215: ...llowing 1 Click the list button V on the In button The menu in Figure 192 appears Figure 192 Mark In Menu 2 Select Set Video In or Set Audio In to mark an In point for video or audio only The procedure is the same for marking an Out point for video or audio only except the list button V on the Out button is clicked You may also set the In and Out buttons to one of three modes such that clicking on...

Page 216: ...ws Set Video In Set Video Out Set Audio In Set Audio Out Sorting Input Formats In the Input Settings dialog available input formats may be sorted by Frame Size Frame Rate Codec To use the criteria above to sort the formats do the following 1 Select the desired input device 2 From the Frame Size drop down list select the desired frame size All SD or HD 3 From the Frame Rate drop down list box selec...

Page 217: ...t settings as an input preset do the following while in the Input Settings dialog 1 Click the Input Preset drop down list button highlighted in blue in Figure 195 if you wish to register the current settings as an input preset From the list select the preset 1 8 to which to register the current input settings Note The button will have no text as shown in Figure 195 if the current settings have not...

Page 218: ...registered preset name as illus trated in Figure 197 Figure 197 Input Preset Name Click the delete button to delete an input preset assignment unreg ister the input preset button 1 8 When an input preset button is registered it appears on the Player buttons as illustrated in Figure 198 Placing the mouse cursor over the preset button shows the registered name as hover text Figure 198 Registered Inp...

Page 219: ... in Figure 199 appears Figure 199 DirectShow Device Settings Dialog All DirectShow video devices connected to the EDIUS computer are dis played 4 From the drop down list associated with the desired video device select the desired audio capture device to be associated with that video device 5 Click the OK button Note Once the audio device had been selected for a particular video device that associa...

Page 220: ...h as bitrate aspect ratio etc will vary depending upon the selected device 8 Click the OK button 9 Click the Capture button in the Player See Figure 201 Note Capturing can also be initiated by pressing the F9 key on the keyboard Figure 201 Player Capture Button The Capture dialog appears and capturing begins 10 Click the Stop button in the Capture dialog to stop capturing The captured clip is plac...

Page 221: ... following for mats WAV Audio CDs files MPEG 2 DVD Video and DVD VR files Note Copy protected content cannot be captured To capture source material from a CD or DVD perform the following actions 1 Select Capture DISCcapture from the Preview window menu bar See Figure 202 Figure 202 DISCcapture The DISCcapture application starts up ...

Page 222: ...the EDIUS computer select the appropriate disc drive from the drop down list in the DISCcapture dialog and insert the source disc in the drive The track list appears in the DISCcapture dialog as illustrated in Figure 203 Figure 203 DISCcapture Track List Note Track contents vary according to the source disc With Audio CDs the track control buttons see Figure 204 allow you to Play Pause Stop Go to ...

Page 223: ... click on the track list and select Select All Tracks 4 Click the settings button The Settings dialog shown in Figure 205 appears Figure 205 DISCcapture Settings Dialog 5 Specify the desired file naming capture location and file division settings see DISCcapture Capture Settings on page 225 for more information and click the OK button 6 Click the capture button to begin capturing the selected trac...

Page 224: ...egin track capture 7 When the DISCcapture Capture completed message appears see Figure 206 click the OK button Figure 206 DISCcapture Capture Completed Dialog 8 Click the X in the upper right corner of the DISCcapture dialog to close DISCcapture when all capture operations are complete Alternative Methods To capture a single track right click the desired track and select Cap ture This Track from t...

Page 225: ... the Use EDIUS project folder when EDIUS is Running option if you wish to store captured tracks in the default EDIUS project folder Audio CD Settings To reduce the audio level of captured tracks enter the dB value by which you want the level reduced A level of 0 does not reduce the audio level DVD Video Settings Separate files when capturing DVD Video select one At each Program creates a separate ...

Page 226: ...the fol lowing 1 On the external device go to the point in the source at which you wish to begin capturing and stop or pause the device 2 Select Capture Input Settings in the Preview window The Input Settings dialog appears see Figure 182 on page 209 3 Select the external input device name and input format 4 Click the OK button 5 Click the Capture button in the Player See Figure 207 Note Pressing ...

Page 227: ...u wish to insert the captured clip In Figure 208 the cursor is at the 00 03 05 00 mark 3 Playback the source and set the desired In and Out points Note Setting no In and Out points causes the entire source to be captured 4 Click the Insert to Timeline or Overwrite to Timeline button See Figure 209 Figure 209 Capture to Timeline Buttons After capturing the clip is placed on the track with the clip ...

Page 228: ...rrent sequence All Sequences Downloads clips used in any Timeline sequence All Sequences and Bin Downloads clips used in all sequences and in the Asset Bin even if they are not used on the Timeline Batch Capturing Batch capturing is the process of capturing multiple clips in one operation These can be selected clips from different sources or multiple clips from the same source Batch capturing work...

Page 229: ... to add the selected clip to the batch capture list Note Pressing CTRL B on the keyboard also adds clips to the batch capture list 4 Repeat steps 2 and 3 for all clips you wish to capture Note To capture additional clips from the same source clear the previous In and Out points after adding the clip to the batch capture list 5 After adding all desired clips to the batch capture list click the list...

Page 230: ...propriate batch capture settings 8 Click the Capture button to begin capturing the clips in the batch capture list The Batch Capture dialog see Figure 213 for an example shows the batch capture operation in progress Figure 213 Batch Capture in Progress 9 While capturing a clip clicking the Set Mark button will place a Clip marker at the current timecode location and the message marker set to 00 00...

Page 231: ...ure list may be cleared and a new list created To create a new batch capture list click the Create New Capture List button Create a new list following the steps above Saving Batch Capture Lists To create a batch capture list perform the following actions 1 Click the list button V of the Add to Batch Capture List button and select Batch Capture from the menu See Figure 210 Note Pressing F10 on the ...

Page 232: ...re List 2 Click the Save Capture List button The Save As dialog shown in Figure 216 appears Figure 216 Batch Capture List Save As Dialog 3 Specify the location file name and file type in which to save the batch capture list and click the Save button Note Files may be saved in CSV Mode1 or CSV Mode2 formats ...

Page 233: ...tton V of the Add to Batch Capture List button and select Batch Capture from the menu See Figure 210 Note Pressing F10 on the keyboard also starts batch capture Figure 217 Batch Capture Menu The Batch Capture dialog appears 2 Click the Load Capture List button The Capture List Open dialog inFigure 218 appears Figure 218 Batch Capture List Open Dialog ...

Page 234: ... Stills into the Asset Bin Capturing clips from external sources is one way of placing clips in the Asset Bin However there might also be existing clips or still files stored on the EDIUS computer local disk or attached storage that may be imported into the Asset Bin for use in EDIUS To import existing clips or stills into the Asset Bin do the following 1 Click the Add Files button in the Asset Bi...

Page 235: ...rated in Figure 220 files of many different types may be imported into the EDIUS asset bin You can use the file type list to browse for files of a particular type or display all files in the directory Figure 220 File Type List 4 When all the files you wish to import have been selected click the Open button The selected files are placed in the Asset Bin and are available for use in EDIUS project ...

Page 236: ...irectory To import a series of still images into the Asset Bin as a sequence do the fol lowing 1 Click the Add Files button in the Asset Bin window See Figure 221 The Add Files button is highlighted in blue Note Pressing CTRL O on the keyboard is another way in which files can be added to the Asset Bin Figure 221 Add Files to Asset Bin A file Open dialog appears 2 Navigate to the drive and directo...

Page 237: ...irst four will be imported as a sequence as they are consecutively numbered JPG_100 through JPG_103 The next still after JPG_103 is named JPG_116 and thus breaks the consecutive numbering rule JPG_116 to JPG_118 may be imported as a separate sequence Once stored in the Asset Bin sequence clips may be used as sequence or divided into separate still images For more information on the Asset Bin and t...

Page 238: ...ight click a folder icon in the Asset Bin folder view and select Open Folder from the menu See Figure 223 Note The folder icon on which you right click will be the parent folder under which the imported folder and its contents will be stored Figure 223 Asset Bin Open Folder 2 Navigate to the folder you wish to import and click the OK button The Folder and its contents are imported one level beneat...

Page 239: ...g and drop the folder into the clip view or a folder in the Asset Bin folder view Automatic Watch Folder Import Watch folders are folders that are watched by EDIUS When new content is added to these folders that content is imported automatically into the Asset Bin To specify and configure a watch folder do the following 1 Select Capture EDIUS Watch in the Preview window menu bar as shown in Figure...

Page 240: ...d Stills Figure 225 Capture Menu EDIUS Watch The EDIUS Watch application starts and the dialog shown in Figure 225 appears Figure 226 EDIUS Watch Tool Dialog 2 Click the Configure button to configure the Watch Tool The Watch Settings dialog illustrated in Figure 227 appears ...

Page 241: ... Settings 3 Click the Add button to add a watch folder The Watch Folder Path dialog shown in Figure 228 appears Figure 228 Watch Folder Path Dialog 4 Click the button and navigate to the desired watch folder 5 Select the Watch sub folders option if you wish to have sub folders of the selected folder watched ...

Page 242: ...ay to indicate that folder watching is active When content is added to a watched folder a Watch Folder is created in the Asset Bin folder view and the new content is added to that folder See Figure 229 for an example Figure 229 Asset Bin Watch Folder Watch Tool rules If a file added to a watch folder has the same name as a file already in the Asset Bin Watch Folder the new file will not be added I...

Page 243: ... from within EDIUS or configured to start automatically when Windows starts See Watch Folder Settings on page 243 for more information Watch Folder Settings To configure the Watch Tool in the task tray do the following 1 Right click the EDIUS Watch Tool icon in the task tray and select Configure from the menu See Figure 231 Figure 231 EDIUS Watch Tool Configure The Watch Settings dialog illustrate...

Page 244: ...he Watch Tool should watch for Any files with these extension will be added to the Asset Bin Watch Folder Note Separate file extensions with a Wildcard characters such as and are not allowed An extension list may be similar to the following avi mpg jpg mov 5 Specify the desired Watch Condition by selecting one of the following Note Watch Condition options apply only if the Watch Tool is running Th...

Page 245: ...e results in a temporary file which will be used on the next EDIUS startup Note Selecting this option restores the last watch folder status on startup This option should not be selected if the environment changes significantly between EDIUS sessions 7 Select the Add shortcut to startup option to start the EDIUS Watch Tool automatically when Windows starts 8 Click the MPEG Seek Information button c...

Page 246: ...re 235 appears Figure 235 EDIUS Watch Tool Detected Files Dialog The icons that may appear in the list and their meaning is as follows File saved in the Asset Bin File saved in the Asset Bin and MPEG seek info created File not yet saved to Asset Bin Deletion of file detected File name change detected File does not exist 2 Select the Refresh file list automatically option if desired Note If this op...

Page 247: ...ed in the Asset Bin Right click and select Delete from List to remove them from the file list Note You may also press the DEL key on the keyboard to remove selected files from the file list These files are removed from the list only They remain in the watch folder s To see how many files are in the watched folder file list that have not yet been saved to the Asset Bin position the mouse cursor ove...

Page 248: ...248 EDIUS User Reference Guide Section 3 Capturing and Importing Clips and Stills ...

Page 249: ...io clips Color bars Color matte Title clips Timeline sequence clip Sequence clip Video audio still and sequence clips are captured or imported for use in projects Color bars color matte and title clips are created from within EDIUS or external applications Timeline Sequence clips are created by EDIUS as the result of building projects with the other clip types Clip Display Properties If the Asset ...

Page 250: ...a unique icon that identifies the clip type Reel Name the name of the source reel as set by user or automatically generated during capture and import operations Poster Frame the clip frame that serves as the clip thumbnail Start Timecode the beginning timecode of the clip End Timecode the end timecode of the clip Clip Name the name of the clip as automatically generated during capture or import or...

Page 251: ...d if the clip is placed on a Timeline track and then stored again in the Asset Bin Clip Name the name of the clip as automatically generated during capture or import or entered by the user Audio Clip Figure 239 Audio Clip Display Properties Clip Type Icon a unique icon that identifies the clip type Start Timecode the beginning timecode of the clip End Timecode the end timecode of the clip Clip Nam...

Page 252: ...lip Name the name of the clip as automatically generated during cre ation or entered by the user Color Bar is the default clip name Color Matte Clip Figure 241 Color Matte Clip Display Properties Clip Type Icon a icon that identifies the clip type Thumbnail a small version of the still image for easy identification Duration not set at time of clip creation Duration is created if the clip is placed...

Page 253: ... a Timeline track and then stored again in the Asset Bin Note When animated titles are created their duration is specified at clip creation Clip Name the name of the title clip as specified in the title creation application Timeline Sequence Clip Figure 243 Timeline Sequence Clip Display Properties Clip Type Icon a unique icon that identifies the clip type Reel Name the name of reel as set by user...

Page 254: ...bnail Start Timecode the beginning timecode of the clip End Timecode the end timecode of the clip Clip Name the name of the clip as automatically generated during capture or import or entered by the user Renaming Clips To rename any clip do one of the following Select a clip and click on the clip name Right click the clip and select Rename Clip from the menu Select a clip and press the F2 key on t...

Page 255: ...ip and press SHIFT B on the keyboard Drag and drop the clip from the Timeline to the Asset Bin Select Clip Add to Bin from the Preview window Double click a clip to display it in the Player and click the list button V on the Update Bin button highlighted in blue in Figure 246 in the Player Select Add Clip to Bin from the menu Figure 246 Player Update Bin Button Double click a clip to display it in...

Page 256: ...rting processes as explained in Section 3 Capturing and Importing Clips and Stills Color Bar Color Matte and Title clips are created from within EDIUS or an external application Sequences may also be created by conjoining multiple clips Sequences may be created by storing individual clips in a sequence of stills or video clips Create a Color Bar Clip To create a Color Bar clip follow these steps 1...

Page 257: ... x 75 x Color Bar 100 x 100x Color Bar ITU R BT 801 100 x 75 x Color Bar ITU R BT 801 100 x 100 x Color Bar SPECIAL Bar 3 Set the desired Tone level by select the form one of the following Tone levels in the Tone drop down list 12 dB 18 dB 20 dB Mute 4 Click the OK button Alternative Methods Select File New Color Bars from the Preview window menu bar The Color Bar clip is placed at the Timeline cu...

Page 258: ...f In and Out points are set on the Timeline the clip is placed between the In and Out point with the appropriate duration Figure 249 Create Title Button Menu Color Bars Set In and Out points on the Timeline Right click on the track in which you wish to place a clip and select New Clip Color Bars from the menu A Color Bar clip with a duration between the In and Out points is cre ated Modify Color B...

Page 259: ...ton in the Asset Bin and select Color Matte from the menu See Figure 250 Figure 250 Asset Bin New Clip Menu Color Matte The Color Matte Setup dialog in Figure 251 appears Figure 251 Color Matte Setup Dialog 2 Click a blank color box begin with the one on the left of the four box color palette The ColorSelect dialog shown in Figure 252 appears ...

Page 260: ... box in the upper right Enter the color number values in YCrCb or RGB fields Click the color picker eyedropper in the lower right and click on a color in the Player Recorder The selected color is displayed in the color preview box 5 Click the OK button The ColorSelect dialog is closed and focus returns to the Color Matte Setup dialog 6 If color gradation is desired set the value in the Colors fiel...

Page 261: ...e set on the Timeline the clip is placed between the In and Out point with the appropriate duration Right click on a blank space in the Asset Bin clip view area and select New Clip Color Matte from the menu Click the list button V on the Create Title button on the Timeline and select Color Matte from the menu see Figure 249 The Color Matte clip is placed at the Timeline cursor position on the acti...

Page 262: ...ck the Color Matte clip in the Asset Bin Right click on the Color Matte clip in the Timeline and select Edit Double click on the Color Matte clip on the Timeline Create a Title Clip See Titles on page 591 for more information on creating Title clips Creating a Sequence Conjoining Multiple Clips In order to create a sequence from multiple clips the following conditions apply The clip type image siz...

Page 263: ...per left corner identifies the clip as a sequence clip Figure 256 Asset Bin New Sequence Clip Note Clips are conjoined in the sorting order of the Asset Bin and any In and Out points for the original clips are disabled in the new sequence clip Creating Individual Clips from a Sequence Cancelling a Sequence To create individual clips from a sequence clip do the following Right click the sequence cl...

Page 264: ...n a sequential manner based on the name of the first clip in the sequence See Figure 258 for an example Note The icon in the upper left corner of each new clip identifies them as individual still clips Figure 258 New Individual Clips in the Asset Bin The original sequence clip was named IMG The new individual clips are named IMG IMG 2 and IMG 3 ...

Page 265: ...view and click the Show in Player button highlighted in blue in Figure 259 Figure 259 Asset Bin Show In Player Button Drag a clip from the Asset Bin and drop it on the Player window Right click on a clip and select Show In Player from the menu Double click the clip Select a clip and press the ENTER key on the keyboard Clip Playback Clip playback in the Player is controlled with the Player operatio...

Page 266: ...n the Player window K or SHIFT L Review Reviews rewinds the clip in the Player Each click changes the reverse speed to four 4 times or twelve 12 times J see note 1 below Previous Frame Goes to the previous frame in a clip Each click of the button moves to the previous frame Holding down the key moves frame by frame in a faster step rewind Play Plays the clip in Player While a clip is playing click...

Page 267: ...n the position bar to display the frame at that position Drag the slider along the position bar in either direction The Player shows the clip at the position of the slider Expand Slider If a clip with In and Out points is displayed in the Player clicking the Expand Slider button will cause only the portion of the clip between the In and Out points to occupy the entire position bar Portions of the ...

Page 268: ...ouse wheel the faster the playback speed Note Playback operations with the mouse are not available for non digitized data Setting In and Out Points Setting In and Out points on the allows you to restrict the range in which certain operations will take place or to display only a portion of a clip in the Player To set In and Out points in the Player follow these steps 1 Play a clip in the Player unt...

Page 269: ...ustrated in Figure 263 Drag the cursor position to change the In point When the cursor is positioned at the Out point it changes to OUT and can also be dragged to change the Out position Figure 263 Set In and Out Points by Trimming Note If the Out point is placed before the In point the position bar between the points is displayed in red and part of the timecode is also displayed in red to indicat...

Page 270: ...n V on the Out button is clicked You may also set the In and Out buttons to one of three modes such that clicking on the button sets the In or Out point according to the selected mode Video Only Audio Only Video and Audio To change the In Out button mode click the In Out toggle button in the bottom left corner of the Player window see Figure 265 Figure 265 In Out Mark Toggle Button The In and Out ...

Page 271: ...n Bar for Video and Audio Alternative Methods Select Marker Set Audio In or Marker Set Audio Out from the Preview window menu bar Press U or P on the keyboard to set In or Out points respectively Note When setting In and Out points for either video or audio only only that portion of the clip can be placed on the Timeline If In and Out points are set for both parts of the clip both may be placed on...

Page 272: ...the Set In button and select Go to In from the menu as illustrated in Figure 267 Figure 267 Set In Button Menu Go to In Note To move to the In point for either the video portion of the clip or the audio portion select Go to Video In or Go to Audio In from the menu Hold down the SHIFT key while clicking the Set In button Press SHIFT I on the keyboard Press SHIFT U to move the Audio In point Out Poi...

Page 273: ... to Video Out or Go to Audio Out from the menu Hold down the SHIFT key while clicking the Set Out button Press SHIFT O on the keyboard Press SHIFT P to move the Audio Out point Removing In and Out Points To remove In and Out points in the Player do the following Click the list button V on the Set In Set Out button in the Player and select Clear In or Clear Out from the menu See Figure 269 ...

Page 274: ...s while holding down the SHIFT key Note If the Set In button is in Video In or Audio In mode holding down the SHIFT key while clicking the Set In button on a In point will clear only the respective video or audio In point The same is true with the Set Out button Editing Clip Properties To edit the properties associated with a clip perform the following actions 1 Select a clip in the clip view of t...

Page 275: ... If desired edit the clip name and enter comments in the File Info tab 3 A reel number may have been created during source capture If you wish to change the reel no enter the new number in this field 4 Set a new clip color if desired by selecting from the Clip Color drop down list See Setting Clip Color on page 287 for more information 5 If the Video Info tab is displayed make any desired modifica...

Page 276: ...ings Click this button to reset video info properties to the defaults A menu appears from which you can reset all properties or selected properties to their default values 6 If the Still Image Info tab is displayed make any desired modifications to the following properties Duration This is the amount of time a still image will be displayed when placed on the Timeline Aspect Ratio From the Aspect R...

Page 277: ...elect Properties from the menu Select a clip on a Timeline track and check the properties in the Infor mation Palette Note The Information Palette is display only and the properties cannot be changed in this view Editing Clip Settings Color Bar Color Matte and Title Clips Color Bar Color Matte and Title clips have additional settings that may be edited To edit the settings for these clip types do ...

Page 278: ...low For Color Bar clips see Create a Color Bar Clip on page 256 For Color Matte clips see Create a Color Matte Clip on page 259 For Title clips see Titles on page 591 Alternative Methods Double click the clip in the Asset Bin Right click a clip on the Timeline and select Edit from the menu Double click a clip on the Timeline Select a clip on the Timeline and press the SHIFT CTRL E keys on the keyb...

Page 279: ...p Width Small the fol lowing clip properties may be changed Clip Name Reel No Comments Note If the Clip name is changed for more than one clip each clip name will have a unique number added to the name automatically To change clip properties in a clip width view do the following 1 Select one or more clips in the Asset Bin clip view 2 Do one of the following to display the Clip Properties dialog Cl...

Page 280: ...etail View If the clip view is set to one of the detail displays Detail text Large Detail Text Small or Detail Icon the following settings may be changed from the Asset Bin Detail view Clip color Frame rate Aspect ratio Field order Color range Note The clip attributes above must appear in the bin detail list in order to be edited in the manner described below See Display Bin Details Settings on pa...

Page 281: ...ttons to allow changing these settings for all selected clips Figure 274 Asset Bin Detail View 2 Click the drop down list button for any setting you wish to change Note an denotes the default setting 3 Select the desired setting from the drop down list Note If a setting cannot be changed for a selected clip a warning dialog will appear asking if you wish to continue If you continue the setting wil...

Page 282: ...orer window opens displaying the clip file in its storage location Opening a Clip with an External Application To open a clip with the application associated in Windows with the clip file extension do any of the following Right click the clip in the Asset Bin and select Open from the menu as illustrated in Figure 276 ...

Page 283: ...ser Reference Guide 283 Clip Operations Figure 276 Clip Menu Open Right click a clip on the Timeline and select Open from the menu Select a clip on the Timeline and press the SHIFT CTRL P keys on the keyboard ...

Page 284: ...y select the first clip in a range and the last clip in a range All clips from the first to the last will be selected Copying Clips To copy a clip do any of the following Select a clip in the Asset Bin and click on the Copy button highlighted in blue in Figure 277 Figure 277 Asset Bin Copy Button Right click a clip in either the Asset Bin or Timeline and select Copy from the menu Select a clip and...

Page 285: ...utton highlighted in blue in Figure 279 Figure 279 Asset Bin Copy Button Right click on a blank area in the Asset Bin clip view and select Paste from the menu Right click on a clip and select paste from the menu Press CTRL V on the keyboard To paste a clip in the Timeline do one of the following Position the Timeline cursor at the point where you want to past the clip and press CTRL V on the keybo...

Page 286: ...sset Bin is deleted Clips released from the bin cannot be restored To delete a clip from the Timeline do one of the following Right click a clip a select Delete from the menu Select a clip and press the DELETE key on the keyboard Note A clip deleted from the Timeline may be restored by selecting Edit Undo from the Preview window menu bar Sorting Clips Clips may be sorted in the Asset Bin by doing ...

Page 287: ...mn headers same as the sort criteria above changes the sorting order on the clicked header from ascending to descending or vice versa as indi cated by the symbol on the header Ascending U Descending V Setting Clip Color The clip color is the highlight color for a clip display as illustrated in Figure 282 Figure 282 Clip Color Clip Width Large View ...

Page 288: ...presented by the assigned clip color as shown in Figure 283 Figure 283 Clip Colors on the Timeline Each clip may have a different clip color as illustrated in Figure 282 To set the clip color follow these steps 1 Right click on the clip and select Clip Color from the menu See Figure 284 for an example Figure 284 Clip Color Menu ...

Page 289: ...Text Large view Figure 285 Clip Color Detail Text Large View Alternative Method Select the File Info tab in the Clip Properties dialog see Editing Clip Prop erties on page 274 for more information and select the desired clip color from the Clip Color drop down list Creating Folders To create a new folder in the Asset Bin do the following 1 Right click on the folder under which you wish to create t...

Page 290: ...ed New folder is created under the folder on which you clicked in Step 1 See Figure 287 for an example Figure 287 New Folder Created 3 Enter the desired name for the new folder Moving Folders To move a folder in the Asset Bin drag and drop it on a new destination folder See Figure 288 for an example Figure 288 Moving Folders Diagram ...

Page 291: ... the root top level folder all clips including clips in the root folder and sub folders are deleted however the root folder is not deleted 1 Select the folder to be deleted and click the Delete button highlighted in blue in Figure 289 Figure 289 Asset Bin Delete Button A dialog box appears asking you to confirm the folder deletion 2 Click the OK button to delete the folder and its contents Note On...

Page 292: ... one folder level Figure 291 Asset Bin Move Up Button 1 Click on a blank area in the clip view and select Move from the menu see Figure 292 2 Select the desired folder move operation to the Root Folder or Up One Folder level from the current folder Figure 292 Asset Bin Folder Move Menu Exporting Bin Information Asset Bin folder information can be exported as an ebd file with the folder structure m...

Page 293: ...the same loca tion the older file is overwritten 3 Click the Save button to save the folder information file Note Exporting does not save the actual contents of the folder It saves only an information file that can be used to reconstruct a folder and its contents by importing the information file The original clip files must still exist in the original location Importing Bin Information Folder inf...

Page 294: ... contents are created under the folder on which you right clicked in Step 1 The clips stored in the folder at the time it was exported must still exist in their original location or they cannot be imported Exporting Stored Information Folder information may be exported as an html file with or without using cascading style sheets as a template To export a folder structure as an html file do the fol...

Page 295: ...DIUS User Reference Guide 295 Clip Management Figure 295 Asset Bin Folder Menu Export Html A Save As dialog appears as illustrated in Figure 296 Figure 296 Save As Dialog Cascading Style Sheet Selection ...

Page 296: ...e and click the Open button 4 Navigate to the location in which you wish to save the html file and specify the desired file name 5 Click the Save button to export the folder information as an html file Figure 297 shows an example of a Folder and its contents exported as an html file with the small cascading style sheet applied Figure 297 Folder Exported as HTML with Cascading Style Sheet Searching...

Page 297: ...arch criterion from the Category drop down list box as shown above The Bin Search dialog changes to a category specific dialog based on the criterion selected in Step 2 See for an example based on the Clip Type Note The category specific dialog will be different for different search categories The remaining steps are presented as an example that applies to a Clip Type search only ...

Page 298: ...ype for which you wish to search and click the Add button 4 Repeat Step 3 for any additional search types you wish to add All added search types appear in the List section as illustrated in Figure 301 Figure 301 Asset Bin Search List 5 Select additional search parameters such as an And or and Or search logic and search only current folder ...

Page 299: ...on select it in the List and click the Remove button Right click the Search Results folder and select Change Search Set tings from the menu to change the search criteria Select the Search only current folder to search only in the currently selected folder Sub folders are excluded from the search Still image color bar color matte and title clips have no In and Out points When searching by In and Ou...

Page 300: ...303 Figure 303 Search for Unused Clips Bin Search Dialog 4 Click the Close button to close the Bin Search dialog To delete the source files of unused clips right click the clip in the Search Results folder and select Delete File from the menu Note Clips used on the Timeline have a green dot in the upper left corner of the clip display See Figure 304 The green dot is not present for clips not used ...

Page 301: ...emove the Search Results folder do the following 1 Select the Search Results folder and click the Delete button highlighted in blue in Figure 289 Figure 305 Asset Bin Delete Button A dialog appears asking to confirm the deletion 2 Click the OK button to delete the Search Results folder and its contents Alternative Methods Right click the Search Results folder select Clear from the menu and click t...

Page 302: ...302 EDIUS User Reference Guide Section 4 Clip Operations and Management ...

Page 303: ...order to produce the final project After editing is complete transitions effects and titles are added before the final project is exported as a completed work This section focuses on the tasks associated with the editing process Timeline Settings When performing operations on the Timeline Timeline settings determine the behavior of many of those operations With some settings there are interdepende...

Page 304: ...rease if the inserted clip is shorter than or equal in length to the clip it overwrites see Figure 307 Default Off Figure 307 Overwrite Mode Example Note Insert Mode and Overwrite Mode are mutually exclusive Only one or the other is active Enabling one mode automatically disables the other Insert and Overwrite mode are toggled from the tool bar in the Timeline window See Figure 308 Figure 308 Inse...

Page 305: ...er from the insertion point on See Figure 309 for an example Default Not Checked Figure 309 Sync Mode With Insert Enabled Sync Mode is toggled on and off by either of the following methods Click the list button V on the Insert Mode or Overwrite Mode icon and select Sync Mode A check mark by Sync Mode indicates that Sync Mode is on Sync Mode is off when the check mark is not present Select Mode Syn...

Page 306: ...les the lock on and off Figure 311 Track Lock Toggle Ripple Mode With ripple mode enabled deleting or trimming a clip causes all the clips which follow in the Timeline to move to fill in the space formerly occupied by the trimmed or deleted clip Default Checked On Note With ripple mode on the behavior of clips on all tracks is also affected by the status of the Sync Mode setting The examples below...

Page 307: ...ing procedures Click the Ripple Mode button on the Timeline window tool bar Each click toggles ripple mode on or off When ripple mode is off there is a slash through the ripple mode icon When ripple mode is on the slash is removed See Figure 314 for details Figure 314 Ripple Mode Toggle Button Select Mode Ripple Mode in the Preview window As in the example above the icon next to the Ripple Mode me...

Page 308: ...g a transition or audio cross fade between clips will not change the overall sequence length on the Time line as illustrated in Figure 315 Figure 315 Extend Mode Example When adding a transition or audio cross fade the In Out points of the clips before and after the transition extend with the length of the transition The net result is that the overall sequence length does not change See Figure 316...

Page 309: ... When the setting is disabled not checked fix mode is enabled To change the setting select Settings Application Settings Timeline from the Preview window menu bar Enable or disable the Extend clips when applying transition cross fade setting depending upon the mode you desire In Fix Mode adding a transition or an audio cross fade between clips shortens the overall length of the sequence on the Tim...

Page 310: ...n length as illus trated in Figure 320 Figure 320 Transition Length Increased Fix Mode When a transition or audio cross fade is deleted the total length of the sequence increases by the length of the transition as illustrated in Figure 321 Figure 321 Transition Deleted Fix Mode Note Overall length of the Timeline sequence when adding modifying or deleting transition may also be affected by Sync Mo...

Page 311: ...ve as well as additional settings may be changed in the Sequence Settings dialog For more information on accessing and changing sequence settings see Sequence Settings on page 59 The following is a list of the settings that can be changed in the Sequence Settings dialog Sequence Name TC Preset TC Mode Total Length Panning Mode Color Space Conversion Audio Channel Map Track Panel The items shown in...

Page 312: ...enabled the video portion of video clips with audio color bar clips color matte clips and title clips may be placed on the track With video channel off no video clips may be placed on the track Video Mute This button toggles the video mute video play status With video mute on video on the track will not be played Pressing SHIFT W on the keyboard also toggles the video mute on and off Audio Channel...

Page 313: ... page 4 of the audio manipulation how to docu ment located at http desktop thomsongrassvalley com support supportdocs docs edius_v45 How_To_Manipulate_Audio_KH022608C pdf Wave This button toggles the display of the audio waveform on and off Figure 324 shows the audio waveform enabled on an audio track Pressing CTRL W on the keyboard also toggles the waveform display on and off Note If the clip has...

Page 314: ...display of the VOL PAN button on and off Pressing ALT S on the keyboard also toggles the VOL PAN button on and off VOL PAN This button toggles between volume VOL adjustment mode and pan PAN adjustment mode Expand 2 This button Z V toggles the display of the MIX button on and off Pressing ALT W on the keyboard also toggles the MIX button on and off MIX This button toggles transparency adjustment mo...

Page 315: ...ack panel the cursor shape changes as indicated in Figure 327 Drag the edge of the track panel in the desired direction Figure 327 Adjust Track Panel Width Note All track panels have the same width It does not matter on which track panel the cursor is positioned Dragging the edge adjusts the width of all track panels Adjust Track Panel Height Track panel height may be adjusted for individual panel...

Page 316: ...o adjust the height of all tracks simultaneously do the following 1 Right click on the sequence tab 2 Select Track Height height unit from the menu as illustrated in Figure 329 Figure 329 Adjust Height of All Tracks The height of all tracks is adjusted according to your selection Note Tracks height will be adjusted according to current expand settings When viewing waveforms it is often desirable t...

Page 317: ... A Audio Track T Title Track These track names may be changed if desired Track names may be up to 30 characters in length Multiple tracks may have the same name To change a track name do the following 1 On the track panel click the current track name which you wish to change The current track name appears in an edit box as shown in Figure 331 Figure 331 Change Track Name ...

Page 318: ... New Track Name Alternative Method Right click the track panel to change and select Rename from the menu see Figure 333 Figure 333 Track Menu Rename Note When a track is duplicated the track name is also duplicated Copy Tracks To copy a track follow these steps 1 Right click on the track panel of the track you wish to copy 2 Select Duplicate from the menu see Figure 334 ...

Page 319: ...Tracks To move a track follow these steps Note The relative order of track types is maintained when moving tracks V and VA tracks are at the top T tracks come next and A tracks are at the bottom of the track panel You may switch the order of V and VA tracks multiple T tracks or multiple A tracks however you cannot move a T track before a V or VA track nor an A track before a T V or VA track 1 Righ...

Page 320: ...s in the track panel order relative to other tracks of the same type Figure 336 Track Panel Move Tracks Note A track that is moved is assigned a new track number to indicate its position with respect to other tracks of the same type Alternative Method Drag and drop the track in the desired position in the track panel Note Tracks moved in this manner may be reordered only with respect to tracks of ...

Page 321: ... the same type in the Track Panel Figure 337 Track Panel Menu Add Track The Add Track dialog shown in Figure 338 appears Figure 338 Add Track Dialog 3 Enter the number of tracks of the selected type to be added and click the OK button Note If you right clicked on a V or VA track in Step 1 a dialog appears see Figure 339 from which to select the track type to be added in addition to the number of t...

Page 322: ...anel do the following 1 Right click on the track to be deleted 2 Select Delete from the menu as shown in Figure 340 Figure 340 Track Panel Menu Delete If the track has no clips on it it is deleted immediately If the track has clips on it the dialog in Figure 341 appears 3 Click the OK button to delete the track Figure 341 Track Delete Confirmation Dialog ...

Page 323: ...key on the keyboard to assign stereo channels 1 2 to a track Press the 6 key on the keyboard to assign stereo channels 3 4 to a track Press the 1 key on the keyboard to assign mono channel 1 to a track Press the 2 key on the keyboard to assign mono channel 2 to a track Press the 3 key on the keyboard to assign mono channel 3 to a track Press the 4 key on the keyboard to assign mono channel 4 to a ...

Page 324: ...n all tracks Note Audio clips assigned to these tracks are not cleared Only the audio track assignment that appears in the track panel is cleared Clear All Tracks clears the video and audio channel assignments in all tracks Note Video and audio clips assigned to the tracks are not cleared Only the video and audio channel assignments and status that appears in the track panel are cleared To set the...

Page 325: ...tes the rendering requirements or status for a clip on the Timeline The line color indicates the status as follows Blue The area should play back in real time no rendering required Aqua Blue Clip will playback in real time with no rendering rendering may be required in certain circumstances Green The area has been rendered to a temporary file Orange The area may not play back in real time this are...

Page 326: ...splayed in units ranging from 1 Frame to 60 minutes The entire project may also be displayed without scrolling by automatically adjusting the Timeline scale to Fit the project For information on adjusting the Timeline scale see Timeline Scale on page 118 Clip Placement In and Out Points When working with clips on the Timeline it is often desirable to set In and Out points in order to use only a po...

Page 327: ... the menu Press I on the keyboard 3 Move the Timeline cursor to the position at which you wish to set the Out point 4 Click Set Out in the Recorder You may also do one of the following to set the Out point Right click on the time scale select Set Out from the menu Select Marker from the Preview window menu bar and select Set Out from the menu Press 0 on the keyboard Setting In and Out Points on En...

Page 328: ...eview window menu bar Select Set In Out on Selected Clip Select a clip and double click the time scale above the clip Adjusting In and Out Points Once In and Out points have been set on the Timeline they may be adjusted by dragging the In or Out slider to a new location Note If the Out point is set or moved to a position before the In point the Timeline scale between the points is displayed in red...

Page 329: ...elect Clear In Out Note If you select Delete In Out from the menu both the In and Out points and the clip between these points is deleted Select Marker on the menu bar and select Delete In Out Press X on the keyboard Placing Clips on the Timeline An EDIUS project is comprised of one or more sequences and a sequence is comprised of one or more clips A sequence is built by placing related clips on t...

Page 330: ...clips are placed on this track T Track Video still images titles color bar clips and matte color clips are placed on this track Title positions can be adjusted on this track Note If video clips with audio are placed on this track the audio is disabled A Track Audio clips are placed on this track Note If video clips with audio are placed on this track the video is disabled and only the audio is use...

Page 331: ... by pressing E on the keyboard Select a track and move the Timeline cursor to the desired clip insertion point Drag and drop a clip to the Recorder the clip will also be placed in the Timeline at the cursor position with the cursor position as the In point Move the Timeline cursor to the desired clip insertion point Right click a track not the Track Panel and select Add Clip An Open dialog appears...

Page 332: ...the clip has been rendered For other rendering status indicators seeTimeline Scale Markings on page 325 Figure 351 Rendered Clip Indicator Filter Set The aqua blue line above the on the clip in Figure 352 indicates that a video filter has been set for this clip Figure 352 Filter Set Indicator Between Clip Transition Indicator When a transition has been added between clips in the Timeline the betwe...

Page 333: ...area Click the Mix button to display the Transparency rubber band as shown in Figure 355 See Clips with Keyer effects applied display an aqua blue line at the top of the mixer area on page 526 for more information Figure 355 Transparency Adjustment Setting In Out Points and Placing a Clip To set In Out point on a clip and place it on the Timeline at the Timeline In point do the following 1 Select ...

Page 334: ...the Insert to Timeline or Overwrite to Timeline button in the Player The clip is placed on the Timeline with the position of the Timeline cursor as the In point Alternative Methods After setting clip In and Out points in the Player drag and drop the clip on the Timeline After setting clip In and Out points in the Player press the E key to place the clip on the Timeline Place Video or Audio Only on...

Page 335: ...button 3 Select the track on which to place the clip 4 Position the Timeline cursor at the desired insertion point 5 Click the Insert to Timeline or Overwrite to Timeline button Only the video or audio of the clip is placed on the Timeline at the Timeline cursor position Alternative Methods After Step 2 drag and drop the clip in the Player to the Timeline Set In and Out points for the video or aud...

Page 336: ...king the button toggles the button between an enabled and disabled dim state When Audio Channel is enabled small A symbol the designated audio channel s of the audio portion of a clip can be placed on that track Clicking the button toggles the button between an enabled and disabled dim state Note When enabling the Audio Channel the desired audio channels are selected from the menu In the example a...

Page 337: ...or audio channel do the following 1 Set the desired channels by clicking on the Video Channel and Audio Channel buttons on the desired tracks Select the desired audio channels from the menu Note Audio channels are limited to those selected from the Audio Channel button menu 2 Move the Timeline cursor to the position at which the clip will be inserted 3 Select a clip in the Asset Bin and click the ...

Page 338: ... Out and Timeline In Out are defined the fourth is automatically determined as clip speed is constant Figure 361 Three Point Editing To perform three point editing do the following 1 Select a clip in the Asset Bin and click the Show in Player button see Figure 362 Figure 362 Asset Bin Show in Player Check the video in the Player and set In and Out points if necessary 2 Select the track on which to...

Page 339: ...y determined based on clip length The playback speed of the positioned clip is unchanged Four Point Editing Four point editing is placing the In and Out points of a clip between the In and Out points of the Timeline Figure 363 Figure 363 Four Point Editing To perform four point editing do the following 1 Select a clip in the Asset Bin and click the Show in Player button see Figure 364 Figure 364 A...

Page 340: ... points of the clip is adjusted auto matically in order to stay between the In and Out points of the Timeline The range between In and Out points is maintained Placing Special Clips Between In and Out Points of the Timeline Special clips are clips that can be created as needed and are not already found in the Asset Bin To create and place a special clip between the Time line In and Out points so t...

Page 341: ... OK or Close as appropriate in the special clip creation dialog Moving Clips on the Timeline Clips on the Timeline may be moved to a new location on the current track or another track Functions and behaviors related to the movement of clips on the Timeline are explained in this section To move clips they must first be selected You can select a single clip by clicking on that clip on the Timeline o...

Page 342: ...ound clip s on the Timeline Press CTRL A on the keyboard to select all clips on the selected track Press SHIFT A on the keyboard to select all clips on the Timeline Moving Selected Clip s One or more selected clips may be moved by dragging and dropping the clip s to the desired location as illustrated in Figure 367 Note When sync mode is set clips in different tracks also move in order to main tai...

Page 343: ... that have a transition or audio cross fade defined between them the selected clip is moved and the transition is released deleted from both clips Moving Selected Clip s and Subsequent Clips To move a clip and any clips that follow on the same track do the fol lowing 1 Select the first clip of the clips to be moved 2 Press and hold the SHIFT and ALT keys on the keyboard and drag the clip in the tr...

Page 344: ...der to maintain their position relative to the selected track 3 Drop the selected clip in the desired position on the track Changing Clip Order To change the order of clips drag and drop the desired clip s to the new location on the track as illustrated in Figure 370 Figure 370 Change Clip Order Note If sync mode is enabled clips in other tracks will move as well to maintain their position relativ...

Page 345: ...rmation Figure 371 Clip Order Changed with Insert Mode Enabled Searching Timeline Clips in the Asset Bin To search for clips in the Asset Bin that match criteria of clips on the Time line do the following 1 Select a clip in the Timeline to search 2 Select Clip Search Bin from the Preview window menu bar as shown in Figure 372 Figure 372 Timeline Clip Search Menu ...

Page 346: ...der in the Asset Bin folder view Note Search settings can be changed to refine the search results in the search folder For more information on searching clips in the Asset Bin see Searching for Clips in the Asset Bin on page 296 Alternative Method Right click a clip and select Search Bin clip criterion from the menu Timeline Clip Operations Unlink The video and audio portions of a video clip on a ...

Page 347: ...link separate audio and video clips do the following 1 Select the video and audio tracks to be linked 2 Right click either the audio or video clip and select Link from the menu Note You may also select Clip Link from the Preview window menu bar or press Y on the keyboard to relink selected clips The clips are relinked and can be treated as a single clip If there is a gap between the starting point...

Page 348: ... Menu Set Group Alternative Methods Select Clip Set Group from the Preview window menu bar Press G on the keyboard Ungroup Remove Group To remove a clip grouping do any of the following after selecting a clip in the group Right click on a grouped clip and select Remove Group from the menu Select Clip Remove Group from the Preview Window menu bar Press ALT G on the keyboard Copy To copy a clip on t...

Page 349: ...the Cut to Clipboard button highlighted in blue in Figure 377 on the Timeline Figure 377 Timeline Cut to Clipboard Button Right click a clip and select Cut from the menu Select Edit Cut on the Preview window menu bar Press CTRL X on the keyboard Press SHIFT DELETE on the keyboard Ripple Cut To ripple cut a clip from the Timeline do any of the following after selecting the clip Right click on a cli...

Page 350: ...n the same track moves forward to fill in the gap created by the deleted clip Note If sync mode is enabled clips on other tracks may also move in order to maintain their positions relative to the clip which moves to fill in the gap created by the ripple cut An example is illustrated in Figure 379 Figure 379 Ripple Cut with Sync Mode Enabled ...

Page 351: ...380 on the Timeline Figure 380 Timeline Paste to Cursor Location Button The clip is pasted to the Timeline with the position of the Timeline cursor set as the In point Alternative Methods Right click on the track on which you wish to paste the clip and select Paste from the menu Select Edit Paste Cursor from the Preview window menu bar Right click on any clip on the track on which you wish to past...

Page 352: ...lip before the In point of the selected base clip Clip Out Insert the clip after the Out point of the selected base clip Figure 381 Paste In Paste Out Menu Alternative Method Right click on the clip you desire to be the base point for the paste operation and select Paste Clip In or Paste Clip out from the menu Replace You can replace a clip on the Timeline with a clip that has been copied cut or r...

Page 353: ...e replacement clip is automatically adjusted based on the In point of replaced clip The playback speed does not change Replace Clip Elements Certain elements of the clip may be replaced without replacing the entire clip an all clip elements The elements that can be replaced are Filter Mixer Clip Clip and Filter To select the elements of a clip to be replaced follow these steps 1 Select a clip that...

Page 354: ...Filter Press the ALT R keys on the keyboard Replace the Mixer Press the SHIFT CTRL R keys on the keyboard Replace the Clip Press the SHIFT R keys on the keyboard Replace the Clip and the Filter Press the SHIFT ALT R keys on the keyboard Set Clip Color on Timeline To set the display color of a clip on the Timeline do the following 1 Right click on a clip and select Properties from the menu The Clip...

Page 355: ...Press the ALT ENTER keys on the keyboard Dividing Clips at Cursor Position Clips may be divided at the Timeline cursor position This will create sep arate clips that may be treated separately on the Timeline To divide clips at the Timeline cursor position execute the following steps 1 Select the track where the clip to be divided is placed 2 Position the Timeline cursor at the point in the clip at...

Page 356: ...ect Selected Track from the menu Right click on the clip to be divided and select Add Cut Point Selected Track from the menu Select Edit Add Cut Point Selected Track from the Preview window menu bar Press the C key on the keyboard To divide all clips on all tracks at the Timeline cursor position do any of the following Click the list button V on the Add Cut Point button and select All Tracks from ...

Page 357: ...n Out Selected Tracks Alternative Methods Right click on a clip and select Add Cut Point In Out Selected Tracks from the menu Press the ALT C keys on the keyboard To divide all clips on all tracks at the Timeline In Out points do any of the following Click the list button V on the Add Cut Point button and select In Out All Tracks from the menu Right click on any clip and select Add Cut Point In Ou...

Page 358: ... code gaps or timecode overlaps at the cut point s Figure 388 Clips Selected to be Combined 2 Click the list button V on the Add Cut Point button and select Remove Cut Points from the menu as illustrated in Figure 389 Figure 389 Add Cut Point Menu Remove Cut Points The clips are combined and can be treated as a single clip as shown in Figure 390 Note When clips are combined all effects and rubber ...

Page 359: ...yed Enabling or disabling a clip is a toggle operation performed in the same manner If the clip is currently enabled it will be disabled If it is currently disabled it will be enabled To disable or enable a clip on the Timeline right click on the clip and select Enable Disable from the menu as illustrated in Figure 391 Figure 391 Clip Menu Enable Disable Note Pressing the 0 Zero key on the keyboar...

Page 360: ...or portion and select Enable only focus clip from the menu All other clips or portions of the clip are disabled Figure 393 shows an example of only the video portion of one clip in a group enabled Figure 393 Video Only Enabled in a Clip Group Deleting a Clip To delete a clip from the Timeline select the clip and click the Delete button highlighted in blue in Figure 394 on the Timeline Figure 394 T...

Page 361: ...t points on the Timeline may be deleted This includes any portion of one or more clips that are between the In and Out points To delete clips between the In and Out points on the Timeline do the fol lowing 1 If not already defined set In and Out points on the Timeline See Setting In and Out Points on Timeline on page 326 for more information 2 Click the list button V on the Delete button and selec...

Page 362: ...Right click the track and select Delete In Out from the menu Note If only and In point is set the clip s or portions of clips after the In point are deleted When only an Out point is set the clip s or portions of clips from the beginning of the Timeline to the Out point are deleted Deleting Only the Video or Audio Portion of a Clip It is possible to delete only the video or the audio portion of cl...

Page 363: ...r more infor mation Drag a clip and place it on either a V video only track or an A audio only track The other portion is deleted Press the ALT V keys on the keyboard to delete the video portion Press the ALT A keys on the keyboard to delete the audio portion Figure 397 Delete the Video Portion of a Clip Ripple Deleting Clips Ripple deleting a clip and causes subsequent clips to move to fill in th...

Page 364: ...in the example above clips on other tracks also move See Sync Mode on page 305 for more information on sync mode Ripple Deleting Between In Out Points on Timeline The portion of a sequence that exists between the In and Out points on the Timeline may be ripple deleted This includes any portion of one or more clips that are between the In and Out points To ripple delete clips between the In and Out...

Page 365: ...ist button V on the Delete button and select Ripple Delete In Out from the menu as shown in Figure 400 Figure 400 Timeline Delete Button Menu Ripple Delete In Out All clips or portions thereof between the In and Out points are ripple deleted as illustrated in Figure 401 ...

Page 366: ...p s or portions of clips after the In point are deleted When only an Out point is set the clip s or portions of clips from the beginning of the Timeline to the Out point are deleted Ripple Deleting Only the Video or Audio Portion of a Clip It is possible to ripple delete only the video or the audio portion of clips with both video and audio To ripple delete only the video or audio portion of a cli...

Page 367: ...arts Delete Video Clip or Edit Delete Parts Delete Audio Clip from the menu Note When sync mode is enabled clips on other tracks also move See Sync Mode on page 305 for more information on sync mode Delete Timeline Gaps To delete the gap between clips in a Timeline track do any of the following after selecting the clip after the gap to be deleted Right click a blank space on the Timeline and selec...

Page 368: ...he Delete button and select Delete Gap Press the SHIFT ALT S or the Backspace keys on the keyboard The gap is deleted as shown in Figure 404 Figure 404 Gap Delete To delete multiple gaps simultaneously select the clips after all the gaps to be deleted before performing one of the operations above See Figure 405 for an example ...

Page 369: ...sed only by an amount equal to the length of gap A Figure 405 Delete Multiple Gaps Simultaneously Changing Clip Playback Speed The playback speed of a clip may be changed to accommodate a particular time requirement or to slow down or speed up a clip To change the playback speed of a clip do the following 1 Right click a clip and select Speed from the menu Note An alternative method is to select C...

Page 370: ...n Timeline is changed option is selected the dura tion adjusts automatically to reflect the specified rate If the Duration on Timeline is changed option is not selected the clip duration is unchanged regardless of the selected rate Note When the playback rate is changed and the duration is unchanged only the portion of the source is used which corresponds to the current duration at the selected pl...

Page 371: ...he same playback speed Clips have no transitions or audio cross fades applied The Duration on Timeline is changed option is deselected Off If an attempt is made to change the playback speed of multiple selected clips with the Dura tion of Timeline is changed option selected On an error dialog appears indicating which conditions above do not match the requirements Time Remap Time remapping is the p...

Page 372: ... Menu Time Remap The Time Remap dialog appears as shown in Figure 408 Figure 408 Time Remap Dialog 2 Drag the Timeline cursor to the position at which you want to set a frame key 3 Click the Add Key button circled in Figure 408 to add a key at the cursor position See Figure 409 ...

Page 373: ...ag it to the left or the right to reposition the frame at the key location See Figure 410 for drag points Figure 410 Reposition Key Frame Other frames in the clip are automatically interpolated to match the new positions of the key frames and maintain the original clip length 5 Click the Playback button or Loop Playback button see Figure 411 to review the remapped clip The clip is displayed in the...

Page 374: ...tments Note To disable the remapping de select the Enable option 7 Click the OK button to close the Time Remap dialog Time Remap Dialog Details Time Remap dialog details are illustrated in Figure 412 Figure 412 Time Remap Dialog Detail Operation Buttons Add Key Adds a remapping key at the position of the Timeline cursor Shortcuts INSERT or V ...

Page 375: ...and restore the clip to the defaults click the Initialize button and click Yes at the prompt Timeline Timecode The Timeline timecode is displayed when the cursor is on a remapping key Entering a timecode creates a key at that timecode location Clip Timecode Displays the clip timecode at the cursor location Entering a timecode creates a key at that timecode location Keys The area in which defined k...

Page 376: ...d Right click on the Time Remap dialog and select Original Source Time from the menu to reset the clip In point timecode to 00 00 00 00 the check mark on the Original Source Time option is removed To set a range in the clip in which the normal playback speed should be retained save the range as a separate clip by using the Add Cut Point button on the Timeline to split the clip Apply the time remap...

Page 377: ...ame Press the K key to move the focus to the Keys area Press the L key to move the focus to the Clip area Press the key to move the key frame forward one frame Note This action is available only when the Timeline cursor is on a key frame or when the focus is in the Keys or Clips area Press the key to move the key frame backward one frame Note This action is available only when the Timeline cursor ...

Page 378: ...erring to the descriptions below of the Video Layout dialog functions 4 Click the OK button on the Video Layout Dialog Figure 415 Video Layout Dialog Many of the controls and functions in the Video Layout dialog accomplish the same tasks but in a different manner Some work in conjunction with others and not all need to be used in order to modify the video layout ...

Page 379: ... Top Based on the original clip height designate the percentage of the area on the top of the clip to be cropped and not displayed Right Based on the original clip width designate the percentage of the area on the right of the clip to be cropped and not displayed Bottom Based on the original clip height designate the percentage of the area on the bottom of the clip to be cropped and not displayed ...

Page 380: ... or Stretch settings are modified If a different position control is selected the position may also be modified with X and Y percentage values based on clip width and height Stretch Stretch controls allow for quick adjustment of aspect ratio Preserve Frame Aspect If this option is selected when one dimension is changed the other is automatically adjusted to preserve the current aspect ratio If thi...

Page 381: ...cut key H Fill Color Sets the color and transparency ratio of the area of the screen that is not filled with the video Figure 417 shows an example of a red fill color set to 50 transparency To change the fill color click the color sample box Figure 417 Layout Fill Color and Transparency Preset Click the Preset button to select a saved preset from the drop down list In addition to user created pres...

Page 382: ...tton Note Standard presets may not be deleted Save as Default The current settings may be saved as the new default settings by clicking the Save as Default button The current settings will be saved to the Default preset Note The original Default preset saves the entire image at maximum size and the aspect ration of the original preserved Show KeyFrame Expand Click the Z button next to the Show Key...

Page 383: ...EDIUS User Reference Guide 383 Timeline Clip Operations Figure 418 Video Layout KeyFrame Expand ...

Page 384: ...ames click the Enable KeyFrame checkbox to enable the KeyFrame operation buttons illustrated in Figure 419 Figure 419 KeyFrame Operation Buttons Note The Add Key Frame and Delete Key Frame buttons in the Keyframe button bar add and delete key frames at the Keyframe Timeline cursor position for all video layout parameters Use the Add and Delete buttons for each video layout parameter to affect that...

Page 385: ...he cursor to the previous or next key frame in the Key Frame window Default Settings Return the selected key frame to default settings Play Pause Clips Play or pause clips to which key frames and filters have been applied The Initialize button deletes all key frames and disables keyframe controls The Save as default button sets a user video layout default with the defined key frames for all projec...

Page 386: ... 5 Timeline Operations Figure 420 Trimming Mode Selection The Preview window switches from the normal mode to the Trim window mode as shown in Figure 421 Dual Mode display and Figure 422 Single Mode display Figure 421 Dual Mode Trim Window ...

Page 387: ...k on a clip and select Trim from the right click menu Any of the following will switch the display from Trim Mode to Normal Mode Select Mode Normal or Mode Trimming from the Preview window menu bar Click the X in the lower right corner of the Trim Mode window Press the F6 key on the keyboard Note F6 toggles Trim Mode on and off Press the F5 key to switch to Normal Mode Figure 423 shows the Trim Mo...

Page 388: ...lay the Event Area Repeatedly play the video around the selected cut point Click again to stop Trim 1 Frame Adjust the trim position by 1 frame from the current position Trim 10 Frames Adjust the trim position by 10 frames from the current position SHIFT Move to Next Edit Point Trim The focus and the Timeline cursor move to the edit point cut point to the right of the current cut point When no cut...

Page 389: ...ow To trim clips at their end points do the following 1 Click at the beginning In point or the end Out point of a clip The color of the cut point changes to green or yellow as illustrated in Figure 424 and trimming is enabled The yellow cut point is the currently selected cut point Figure 424 Trimming at Ends of Clips 2 Move the cursor to the cut point The cursor changes shape as shown in Figure 4...

Page 390: ...trated in Figure 426 Click the cut point to be active for trimming The active cut point is yellow Figure 426 Cut Points Between Clips Alternative Method 1 Click the track where the clip to be trimmed is placed 2 Move the Timeline Cursor to the point to which the clip should be trimmed 3 Press the appropriate shortcut key to trim from the beginning of the clip to the cursor position or from the end...

Page 391: ...27 Trim from Clip End to Cursor When trimming clips the result will be different as clips are extended based on the Overwrite Insert mode setting Examples appear below in Figure 428 and Figure 429 Overwrite Mode Trimming Figure 428 Overwrite Mode Trimming ...

Page 392: ...f the In beginning frame is displayed in the Recorder and the image of the Out end frame is displayed in the Player Note In some trimming operations there may be four displays two for the Recorder and two for the Player In Single Mode the Recorder shows the images at the cut point on two displays Select a clip and press the ALT U keys to display the Duration dialog box enter the desired duration t...

Page 393: ...ect the appropriate trim mode button in the Trim window according to the desired trimming type See Table 5 on page 388 for more information on Trim mode buttons The trimming mode changes according to the selected In and Out points For more information on trimming modes see the following references Ripple Trim on page 399 Split Trim on page 401 Slide Trim on page 403 Slip Trim on page 405 Rolling T...

Page 394: ...ich the cursor is positioned when a trimming drag begins A Out Point Trim B Slide Trim C In Point Trim Note Click the Preview window after Step 1 to select the cut point placed nearest to the Timeline cursor on the selected track The mode is determined by the area A B or C which is clicked in the Preview window Slip Trim or Rolling Trim For slip or rolling trim each frame of the cut point is displ...

Page 395: ...mes mentioned above are displayed only if the Preview window is set to dual mode If the Preview window is set to single mode only two frames are displayed the Out point of the first clip at the cut point and the In point of the second clip Slip Trim Rolling Trim Trimming by Value In Trim mode the sequence timecode is displayed in the Preview window and you can trim by entering anew timecode value ...

Page 396: ...mation on Trim mode buttons The trimming mode changes according to the selected In and Out points For more information on trimming modes see the following references Ripple Trim on page 399 Split Trim on page 401 Slide Trim on page 403 Slip Trim on page 405 Rolling Trim on page 406 3 Enter the desired timecode to trim and press the ENTER key Move the mouse cursor to the timecodes at the bottom of ...

Page 397: ...of the clip 3 Timeline timecode of the focused cut point In point side of the clip 4 The length of the clip to be trimmed Out point side of the clip 5 The length of the clip to be trimmed In point side of the clip 6 Timeline code of the Timeline cursor 7 The length of the Transition audio cross fade to be trimmed Note The timecodes displayed may differ from the above depending upon the Preview win...

Page 398: ...s the active cut point Select the appropriate trim mode button in the Trim window according to the desired trimming type See Table 5 on page 388 for more information on Trim mode buttons The trimming mode changes according to the selected In and Out points For more information on trimming modes see the following references Ripple Trim on page 399 Split Trim on page 401 Slide Trim on page 403 Slip ...

Page 399: ...w cut point is the currently selected cut point Note A cut point may also be selected by clicking the Trim Select IN point or Trim Select OUT point buttons in the Trim Window Figure 438 Ripple Mode Trimming at Ends of Clips 2 Move the cursor to the cut point The cursor changes shape as shown in Figure 439 3 Drag the cursor to the left or right to trim the clip at the end point Note You can fine tu...

Page 400: ... information Alternative Method 1 Click the track where the clip to be trimmed is placed 2 Move the Timeline Cursor to the point to which the clip should be trimmed 3 Press the appropriate shortcut key to ripple trim from the beginning of the clip to the cursor position or from the end of the clip to the cursor position ALT N ripple trim from the beginning of the clip to the cursor posi tion ALT M...

Page 401: ...ps with a margin trimming can only be done up to the length of the margin To perform a split trim execute the following steps 1 While holding down the ALT key click the beginning In point or end Out point of the video or audio portion of a clip The color of the cut point changes to yellow and trimming is enabled See Figure 441 Note Click the In and Out points for each clip while holding down the A...

Page 402: ...int of the video or audio portion of a clip 2 Move the Timeline Cursor to the point to which the clip should be trimmed 3 Press the appropriate shortcut key to split trim from the beginning of the clip to the cursor position or from the end of the clip to the cursor position SHIFT N Split trim from the In point side of the clip SHIFT M Split trim from the Out point side of the clip See Figure 443 ...

Page 403: ...f there is no margin between the clip to be trimmed and adjacent clips When trimming clips with a margin trimming can only be done up to the length of the margin To slide trim a clip do the following 1 Click the border between two clips The color of the cut point change to green or yellow and trimming is enabled See Figure 444 Note You may also select the slide trim cut point nearest to the Timeli...

Page 404: ... using the trim buttons in the trim window or the corresponding keyboard shortcuts See Trim Mode Operation Buttons on page 388 for more details Figure 445 Slide Trim Alternative Method 1 Select the track where the clip to be slide trimmed is placed 2 Move the Timeline Cursor to the point to which the clip should be trimmed 3 Press the appropriate shortcut key to slide trim from the beginning of th...

Page 405: ...e clip to be trimmed and adjacent clips When trimming clips with a margin trimming can only be done up to the length of the margin 1 While holding down the CTRL key click on the beginning In point and end Out point of the clip to be trimmed The color of the cut point changes to green or yellow and trimming is enabled See Figure 447 Note You may also select the cut points of the clip nearest to the...

Page 406: ...gth of the selected clip is not changed nor is the overall length of all the clips When Ripple mode is On rolling trim is not allowed if there is no margin between the clip to be trimmed and adjacent clips When trimming clips with a margin trimming can only be done up to the length of the margin 1 While holding down the CTRL key click the end Out point of the clip before the clip to be trimmed and...

Page 407: ...o the left or right to change the position of the clip As the clip is dragged the neighboring clips are shortened or lengthened but the overall length of all the clips remains unchanged Note You can fine tune trimming by 1 frame or 10 frame units by using the trim buttons in the trim window or the corresponding keyboard shortcuts See Trim Mode Operation Buttons on page 388 for more details Figure ...

Page 408: ...ave no association with a particular clip If a clip is moved on the Timeline Sequence markers may or may not refer to a point in the clip depending upon the position of the clip on the Timeline relative to any Sequence markers Any clips placed on the Timeline are marked by Sequence markers Clip Markers Clip markers are markers that exist in a particular clip only When the clip is moved on the Time...

Page 409: ...indow menu bar Select View Show All Palettes or View Hide All Palettes from the Preview window menu bar Note The Show All Palettes selection displays the Information Effect and Marker Palettes The Hide All Palettes selection hides all of these palettes Press the H key on the keyboard to toggle the Marker Palette display on and off Sequence Marker Palette The Sequence and Clip Marker Palettes are v...

Page 410: ...ner described below Toggle Marker Palettes Toggles the Marker Palette view between the Sequence Marker Palette and the Clip Marker Palette Set Mark Adds a new marker at the position of the Timeline cursor Set Mark In Out Adds the clip segment between the current In Out points to the marker list Previous Marker Moves the Timeline cursor to the previous marker Next Marker Moves the Timeline cursor t...

Page 411: ...plays the marker number In Out and duration timecode and com ments for all markers Clip Marker Palette The Sequence and Clip Marker Palettes are viewed in the Marker Palette window however only one or the other is visible The toggle button see Figure 453 is used to switch between the two marker palettes Note When the Player window is active it is not possible to switch to the Sequence Marker Palet...

Page 412: ...ly to the Clip Marker Palette As shown in Figure 454 clip markers appear in the slider and position bar area under the Player window Note If the Clip Marker Palette is active the Set Mark Set Mark In Out Delete Marker Import Marker List and Export Marker List buttons are not available with the Recorder selected These operations are available only when the Player is selected ...

Page 413: ...ggle Marker Palettes Toggle button is not active Set Mark Adds a new marker at the position of the cursor in the Player position bar Set Mark In Out Adds the clip segment between the current In Out points to the marker list Previous Marker Moves the Player position bar cursor to the previous marker Next Marker Moves the Player position bar cursor to the next marker Delete Marker Deletes the marker...

Page 414: ...er at Specific Location To set a marker at a specific location on a Sequence Timeline or in a clip do the following 1 Move the Timeline cursor Sequence Marker or the Player window position bar slider Clip Marker to the position at which you wish to place a marker 2 Click the Set Mark button on the Marker Palette See Figure 455 Note A Clip marker cannot be set in the same frame as a Sequence marker...

Page 415: ...between In and Out points Alternative Methods Select Marker Set Mark on the Preview window menu bar Select Marker Set Mark In Out on the Preview window menu bar to mark the segment of the clip between the current In and Out points Right click the marker list and select Set Mark If the Add Marker button has been added to the Timeline buttons click this button See Button Settings on page 154 for mor...

Page 416: ...e marker has priority over the Clip marker in the same frame Figure 458 Marker Palette Set Marker Between In and Out Points Button Markers set between the current In and Out points display in the marker list with an In timecode an Out timecode and a Duration The Duration is the time covered by the clip segment between the In and Out points Alternative Methods Select Marker Set Mark In Out on the P...

Page 417: ...s not available Figure 459 Different Video and Audio In and Out Points Figure 460 Different Video and Audio In and Out Points Example 2 Video and Audio Have Same In or Out Point and Different Out or In Point As shown in Figure 461 and Figure 462 if the video and audio portions of a clip have the same In or Out points and different Out or In points the Mark Between In and Out Points operation is no...

Page 418: ...Points Clip Marker and Slider Shortcut Menus Right clicking on any Clip marker in the Player window displays the shortcut menu shown in Figure 464 Select the desired operation from the menu Figure 464 Clip Marker Shortcut Menu Right click on the Player windows Slider display the menu illustrated in Figure 465 ...

Page 419: ...d Clip Markers Figure 465 Player Slider Shortcut Menu Sequence Marker and Timeline Cursor Shortcut Menu Right clicking on a Sequence marker or Timeline cursor display the menu illustrated in Figure 466 Select the desired operation from the menu ...

Page 420: ...tion bar Clip Markers do any of the following Use the Previous Marker and Next Marker buttons in the Marker Pal ette See Figure 467 Note When moving to the Previous or Next marker in the Timeline the cursor is positioned on the In point of and In Out marker With the In Out marker selected the Out point may be selected ny clicking on it however the Pre vious and Next buttons do not select the Out p...

Page 421: ... Marker Go to Previous Sequence marker or Go to Next Sequence marker from the Preview window menu bar Double click the desired marker on the time scale Press the SHIFT PAGE UP keys on the keyboard to go to the previous marker Press the SHIFT PAGE DOWN keys on the keyboard to go to the next marker When a marker is selected the Timeline cursor Sequence Marker or Player slider Clip Marker moves to th...

Page 422: ...ition bar by dragging them to a new location Delete Markers To delete a marker from the marker list do the following 1 Select the marker s to be deleted in the marker list 2 Click the Delete button Alternative Methods Drag the marker to be deleted from the marker list and drop it outside the Marker Palette Drag the marker to be deleted from the marker list and drop it on the Delete Marker button R...

Page 423: ...ck on a marker on the time scale and select Clear Sequence Mark All from the menu Pressing SHIFT ALT V also clears all sequence markers Clip Markers Right click on a marker in Player window position bar and select Clear clip marker from the menu Entering Marker Comments Sequence Marker Palette To add comments to a marker follow these steps 1 Right click a marker on the Timeline and select Edit Seq...

Page 424: ...ments and click the OK button Clip Marker Palette To add comments to a marker follow these steps 1 Right click a marker on the Player window position bar and select Edit clip marker from the menu as illustrated in Figure 474 Figure 474 Marker Menu Edit Clip Marker The Marker Comments dialog shown in Figure 475 appears ...

Page 425: ... the keyboard To enter a comment for the last marker after beginning comment entry press the CTRL HOME PAGE DOWN keys on the keyboard To enter a comment for the previous marker after beginning comment entry press the CTRL K keys on the keyboard To enter a comment for the next marker after beginning comment entry press the CTRL L keys on the keyboard Note Comments already entered are edited in the ...

Page 426: ...as priority and the comments associated with this In Out marker will be displayed If an In Out marker range exists within another In Out marker the inside marker has priority and the comments for this marker will be displayed If In Out marker ranges for clips on multiple tracks overlap the upper track marker comments have priority and will be displayed If the upper track is muted no clip comments ...

Page 427: ...the shorter rang marker has priority and the comments associated with this In Out marker will be displayed If an In Out marker range exists within another In Out marker the inside marker has priority and the comments for this marker will be displayed Export Marker List To export the current marker list to a CSV file do the following 1 Click the Export button on the Marker Palette See Figure 478 ...

Page 428: ... Timeline Operations Figure 478 Marker Palette Export Button The Save As dialog shown in Figure 479 appears Figure 479 Export List Save As Dialog 2 Navigate to the desired destination folder and enter a file name for the exported marker list ...

Page 429: ...Methods Right click a marker in the marker list and select Export marker list from the menu Sequence Markers Right click a marker on the time scale and select Export Sequence marker list from the menu Import Marker List To import a marker list from a saved CSV file do the following 1 Click the Import button on the Marker Palette See Figure 480 Figure 480 Marker Palette Import Button A File Open di...

Page 430: ...these values will be set to 0 Alternative Methods Right click a marker in the marker list and select Import marker list from the menu Sequence Markers Right click a marker on the time scale and select Export Sequence marker list from the menu Clip Markers on the Timeline Clip markers are set in the Player window When a clip in which Clip markers have been set is moved to the Timeline the Clip mark...

Page 431: ...ne cursor back and forth over the Timeline to display the sequence in the Recorder To playback by scrubbing click and hold the mouse button on the Timeline cursor see Figure 483 and drag it over the clips on the Timeline The clips displayed in the Recorder are the clips on the currently selected track Figure 483 Timeline Cursor Note When the cursor is located at the beginning frame of a Timeline s...

Page 432: ...uttons use the buttons and shortcuts as explained in Table 6 Figure 485 Recorder Operation Buttons Table 6 Recorder Operation Button Details Button Function Description Keyboard Shortcut Set In Specifies the beginning point of a section on the Timeline content hat should be included in the project output I Set Out Specifies the end point of a section of the Timeline content that should be included...

Page 433: ... key moves frame by frame in a faster step rewind Play Plays the content in the Recorder ENTER or SPACE Next Frame Goes to the next frame in a clip Each click of the button moves to the next frame Holding down the key moves frame by frame in a faster step forward Fast Forward Fast forwards through the content in the Recorder L see note 2 below Loop Repeatedly plays back the Timeline contents until...

Page 434: ...he Recorder shuttle and slider are illustrated in Figure 486 Use these playback controls as explained below Figure 486 Recorder Shuttle and Slider Shuttle There are 21 speed levels from 1 20x to 16x in the forward and reverse directions Drag the shuttle to the right to play the clip in the normal forward direction The further to the right the shuttle is dragged the faster the playback speed Note P...

Page 435: ...ition Drag the slider along the position bar in either direction The Player shows the frame at the position of the slider Position Slider Shortcut Menu Right clicking on the Slider in the Player window will display the shortcut menu illustrated in Figure 487 Select the desired operation from the menu Figure 487 Player Slider Shortcut Menu ...

Page 436: ...peed Alternative Method Position the mouse cursor in the Recorder window Scroll the mouse wheel towards you for playback in the normal for ward direction Scroll the mouse wheel away from you for reverse playback Note The faster you scroll the mouse wheel the faster the playback speed Note Playback operations with the mouse are not available for non digitized data Playback Between Timeline In Out P...

Page 437: ...tton The area approximately three 3 seconds before and three 3 seconds after the cursor position is played repeatedly until stopped 3 Click the Stop button when you wish to stop playback Playback Around Nearest Cut Point You can also play the area around the cut point nearest to the Timeline cursor position Click the list button V on the Play around cursor area button and select one of the followi...

Page 438: ...to the In point Press the W key on the keyboard to move to the Out point Move by Timecode To position the Timeline cursor by timecode entry follow these steps 1 Click the Cur timecode in the Recorder 2 Using the numeric keypad enter the desired timecode to which to move the cursor in HH MM SS FF Hours Minutes Seconds Frames format See Figure 492 for an example 5000 is the entered value Note Enteri...

Page 439: ...e source is on an external video deck In order to use this function the Match frame Player Recorder button must be added to the Player or the Display Master Clip button must be added to the Timeline or Recorder as it does not appear by default See Button Settings on page 154 for more information on adding buttons Once the button s have been added the feature may be used as explained below Match Fr...

Page 440: ... the list button V on the Match frame Player Recorder button and select Bin Search from the menu Press the SHIFT CTRL F keys on the keyboard Match Frame from Timeline to Player To move to the same frame in the Player whether the source is an external deck or a file as the current frame in the Recorder Timeline do the fol lowing 1 Move the Timeline cursor to the frame to which to move in the Player...

Page 441: ...F keys on the keyboard To display in the Player the clip currently at the Timeline cursor position do one of the following Select Clip Show in Player from the Preview window menu bar Press the SHIFT Y keys on the keyboard Rendering Operations Sometimes the format of source material makes real time playback and editing difficult because of high bandwidth requirements Rendering is the process of con...

Page 442: ...required in certain circumstances Green The area has been rendered to a temporary file Orange The area may not play back in real time this area is considered a loaded area Red Real time playback was attempted for this area but failed this area is considered an overload area Note The need for rendering is detected based on the Rendering decisions setting as defined in the Application Settings Rende...

Page 443: ...b folder of the project folder Make sure there is enough disk space approximately twice the size of the file s to be rendered for rendering before starting the rendering process See Deleting Temporary Files Manually on page 450 for more information on creating more disk space Rendering Sequence Overload Areas To render all of the overload and loaded areas in the entire sequence do any of the follo...

Page 444: ...ine you can render only the area between these points See Rendering Between In an Out Points on page 446 for more information Rendering Overload Area in Entire Project Projects may contain one or more sequences To render overload areas including loaded areas in all sequences in a project do the following Select Render Render Entire Project Render Overload Area from the Preview window menu bar Note...

Page 445: ...ded areas in a sequence do the following On the time scale right click the overload or loaded area you wish to render and select Render from the menu as illustrated in Figure 499 Figure 499 Time Scale Menu Rendering Note Click the Abort button in the Rendering dialog to stop rendering in progress When rendering is complete a green line appears on the time scale above the rendered area ...

Page 446: ...utton highlighted in blue in Figure 500 Figure 500 Timeline Render In Out Render Overload Button Note Click the Abort button in the Rendering dialog to stop rendering in progress When rendering is complete a green line appears on the time scale above the rendered area Alternative Methods Select Render Render In Out Render Overload Area from the Preview window menu bar Click the list button V on th...

Page 447: ... loaded orange line areas between the In and Out points on the Timeline do any of the following Select Render Render In Out Render Loaded Area from the Preview window menu bar Click the list button V on the Render In Out Render overload area button and select Render In Out Render Loaded Area from the menu Right click the time scale and select Render In Out Render Loaded Area from the menu Press th...

Page 448: ...igure 502 Rendered Transition Indicator Note that in the example above the clip before the transition has been ren dered as indicated by the green line above the video and audio portion The transition has also been rendered as indicated by the green line in the center of the transition indicator The clip after the transition has not yet been ren dered Alternative Methods Select Render Rendering fr...

Page 449: ...e list button V on the Render In Out Render overload area button and select Render and Add to Timeline from the menu see Figure 503 Figure 503 Render In Out Menu Render and Add to Timeline Note Click the Abort button in the Rendering dialog to stop rendering in progress When rendering is complete the video clip is placed on a V or VA track on the Timeline If there is no space in the current track ...

Page 450: ...r to be able to use it in other projects Exporting Still Image Clips from the Timeline Any frame in any clip may be exported as a still image To export a frame as a still image do the following 1 In the Recorder or Player display the frame to export as a still image 2 Press the CTRL T keys on the keyboard The frame is saved as a still image clip in the Asset Bin Note Images from an external deck c...

Page 451: ... deletes temporary files that no longer have valid links To delete temporary files manually follow these steps 1 Click the list button V on the Render In Out Render overload area button 2 Select Delete Render Files All Files or Delete Render Files Files that are not Used from the menu See Figure 505 Figure 505 Render In Out Menu Delete Render Files Alternative Methods Select Render Delete Render F...

Page 452: ...ored as Timeline Sequence clips in the Asset Bin as shown in Figure 507 Figure 507 Asset Bin Timeline Sequence Clips Timeline sequences may also be nested A nested sequence is a sequence placed within another sequence for editing Figure 508 shows the Sequence3 Timeline clip placed on the 2VA track of Sequence1 as a clip for editing Note EDIUS prevents sequences from being nested if the result will...

Page 453: ... options Add to Bin add the Sequence as a clip in the Asset Bin Sequence Setting open the Sequence Settings dialog Change Track Height change the height of a track in the Track Panel Close this Sequence close the current sequence tab Close All Other Sequences close all sequence tabs except the current sequence Creating a New Sequence To create a new sequence in the current project do one of the fo...

Page 454: ...he Asset bin but a sequence tab is not displayed in the Timeline window Press SHIFT CTRL N on the keyboard Any of these methods will result in a new sequence tab appearing in the Timeline window as shown in Figure 511 as well as the creation of a sequence clip in the Asset bin as illustrated in Figure 512 Figure 511 New Sequence Tab Note Double right click a sequence tab to change the sequence nam...

Page 455: ...ip 3 Select a Timeline sequence clip in the Asset Bin and click the Add to Timeline button highlighted in blue in Figure 513 Figure 513 Asset Bin Add to Timeline Button The selected sequence clip is added to the Timeline at the location of the cursor as a nested sequence clip gray clip shown in Figure 514 Figure 514 Sequence Clip Added as a Nested Clip Alternative Methods Drag and drop a sequence ...

Page 456: ...e Timeline Right click a Timeline Sequence clip in the Asset Bin and select Open Sequence from the menu Note When a nested sequence is opened the nested sequence clip in the host sequence is also updated If the clips in a nested sequence are trimmed the nested sequence clip length in the host sequence does not change however its display is updated as illustrated in Figure 515 to indicate the total...

Page 457: ... the Timeline between the In and Out points may be saved to the Asset Bin as a sequence After setting the desired In and Out points or selecting the desired clips do one of the following Right click a clip and select Add to Bin as Sequence In Out or Add to Bin as Sequence Selected Clips from the menu as illustrated in Figure 517 Note Select the menu option that saves the desired portion of the Tim...

Page 458: ...e is no space on the Timeline on which to add the nested sequence a new V track is created for the nested sequence The currently opened sequence may be saved to the Asset Bin as a sequence clip by right clciking on the opened sequence tab and selecting Add to Bin from the menu Creating A Blank Sequence Clip on the Timeline To create a blank nested sequence on the Timeline and create a blank sequen...

Page 459: ...nce clips have the original sequence clip name with a sequential number appended to the end For example If Sequence6 is dupli cated the duplicate s name will be Sequence6 X where X is the next available sequential number Multi Cam Mode Multi cam mode makes it possible to display and edit up to eight 8 clips at the same time Each camera displays a separate clip Switching to Multi Cam Mode To switch...

Page 460: ...ti Cam button The Preview window is switched to multi cam mode and a Camera Mapping indicator appears on the Track Panel as illustrated in Figure 522 Figure 522 Camera Mapping in Timeline Track Panel To switch from multi cam mode back to normal mode do any of the fol lowing Select Mode Normal or Mode Multi Cam from the Preview window menu bar Press the F8 key on the keyboard multi cam toggle Press...

Page 461: ...onous Place clips based on the Timeline cursor position on the selected track Clips are placed based on the Asset Bin sorting order Timecode Place clips on each track based on the clip start timecode If no timecode is set for a particular clip 00 00 00 00 is used to place the clip Note Even if clips have different starting timecodes EDIUS will try to align clips in the camera tracks so that matchi...

Page 462: ...ed on the Timeline Figure 524 Add Multiple Clips to Timeline Clips are placed on tracks according to the selected sync point Note If Asynchronous was selected as the sync point in Step 1 above all clips are placed on the selected track If a different sync point is selected the clips are placed on the selected track and the tracks above the selected track If there are no tracks above the selected t...

Page 463: ...s are created The Master display monitor shows the image of the currently selected camera The other display monitors show the clips assigned to each camera Changing the Number of Monitors To change the number of monitors in which to display clips in multi cam mode do one of the following Select Mode Monitors number of monitors from the Preview window menu bar See Figure 526 ...

Page 464: ...f the Multi Cam button has been added to the Timeline click the list button V on the Multi cam button and select the desired number of monitors as illustrated in Figure 527 Figure 527 List Button Menu Monitors Note Regardless of the selected number of monitors there is only one Master monitor ...

Page 465: ...ayed in multi cam mode when no camera is assigned to that track To change the camera mapping assignment for a particular track do the fol lowing 1 Click the Camera mapping indicator on the track panel of the V or VA track for which you wish to change the camera assignment See Figure 528 Note The Camera mapping indicator is only displayed when in multi cam mode Figure 528 Track Panel Camera Mapping...

Page 466: ...play in the multi cam window can be hidden by doing on of the following Select Mode Display Track Name from the Preview window menu bar Note This is a toggle function If the check mark appears by the option the track name display is on If the check mark does not appear by the option the track name is not displayed Click the list button V on the Multi cam button and select Display Track Name from t...

Page 467: ...ollowing 1 Position the Timeline cursor at the point at which you wish to set a switch point 2 Right click the time scale and select Add Cut Point Clear Cut Point Toggle from the menu as shown in Figure 530 Figure 530 Time Scale Menu Add Cut Point Clear Cut Point A camera switch point is set at the cursor location and a cut point is added to the clips on the switch point as illustrated in Figure 5...

Page 468: ...e 531 Cut Switch Point Added to Tracks Alternative Methods Double click on the time scale to set a camera switch point Double click a video from the camera monitor of track in the Recorder multi cam display Note These operations are also available during clip playback ...

Page 469: ...dded is dependent upon the status of the clips before it on the same track If there are multiple enabled clips as is the case in the example above with clips before the added cut point the clip on the top track has the priority and will be displayed in the Master monitor Setting Camera Switch Point During Playback Camera points can be set during clip playback To set a switch point during playback ...

Page 470: ...this sequence from beginning to end would result in the following track cameras displayed in the Master monitor as defined by the switch points 3 is the top track and 1 is the bottom track 3 1 2 3 1 3 Related Operations By default any existing camera switch points between the first added switch point and the end of playback are overwritten and deleted Only the switch points added during playback r...

Page 471: ...ply Video Filter from the menu Note This is a toggle function If the check mark appears by the option Apply Video Filter is on If the check mark does not appear by the option Apply Video Filter is off Moving Camera Switch Points Once set camera switch points may be moved to a new Timeline location To move a camera switch point click and drag the desired switch point to a new location on the Timeli...

Page 472: ...2 Right click the time scale and select Add Cut Point Clear Cut Point Toggle from the menu as shown in Figure 535 Figure 535 Time Scale Menu Add Cut Point Clear Cut Point The camera switch point is deleted Any clips that were cut at that switch point location are merged Note If a clip was divided by a cut point that is removed and part of the clip was disabled the enable disable setting of the mer...

Page 473: ...switch points between the Timeline In and Out points Switching the Selected Camera To switch the camera displayed in the Master view at a particular switch point do the following 1 With playback stopped move the Timeline cursor to the clip to which you wish to switch at a particular switch point Note The Timeline cursor can be at any position in the clip and does need to be positioned as the switc...

Page 474: ...to switch at a particular switch point and press the number 1 to 8 on the numeric keypad of the camera to which you wish to switch Related Operations To set a camera switch point and switch the camera simultaneously do one of the following Move the Timeline cursor to the point at which you wish to set a switch point and switch to the selected camera and press the camera number key 1 to 8 on the nu...

Page 475: ...est to the current Timeline cursor position Play Around Cut Point 1 Sec Play the clip for 1 second before and 1 second after the cut point before and neared to the current Timeline cursor position Play Around Cut Point 2 Sec Play the clip for 2 seconds before and 2 seconds after the cut point before and neared to the current Timeline cursor position Play Around Cut Point 3 Sec Play the clip for 3 ...

Page 476: ...y repeatedly until stopped Note If playback is unable to keep up with the display in multi cam mode you can set a number of frames to be skipped if needed by selecting Mode Skipped Frames number of frames to skip on the Preview window menu bar This setting may also be defined in Playback Settings on page 147 3 Click the Stop button in the Recorder to stop playback of the area around the switch poi...

Page 477: ... Selected Clips Dialog 2 From the Select Output Track drop down list select the track to which to copy the enabled clips Note You can select an existing V or VA track without an assigned camera or a new V or VA track 3 Select the Apply between In Out option if you only want clips between the Timeline In and Out points to be copied to the specified track 4 Click the OK button ...

Page 478: ...valid clips are placed between camera switch points the priority is given to the clip on the highest numbered track In the example above there are valid enabled clips on the 3VA 2VA and 1VA tracks before the first switch point When the clips are copied to the new 4VA track the clip in the 3VA track before the first switch point is copied Undo Redo Operations Undo an Operation To undo a previously ...

Page 479: ...the Preview window menu bar Press the CTRL Z keys on the keyboard Redo a Cancelled Operation To redo a previously cancelled operation and return to the prior state do any of the following Click the Redo button highlighted in blue in Figure 542 on the Time line Figure 543 Timeline Redo Button Click the list button V on the Redo button and select a specific can celled operation to redo from the menu...

Page 480: ...480 EDIUS User Reference Guide Section 5 Timeline Operations ...

Page 481: ...ts and titles have been applied to clips on the Timeline additional editing can cause timing issues Effects Show Hide the Effect Palette To show or hide toggle functions the Effect Palette do one of the fol lowing Click the Toggle palette display button on the Timeline see Figure 544 and select Effect Palette from the menu Figure 544 Toggle Palette Display Button Menu Effect Palette Select View Ef...

Page 482: ...he keyboard to show or hide all palettes Select View Hide All Palettes from the Preview window menu bar to hide the Information Effect and Sequence Marker palettes Effect Palette Effects are applied through the Effect Palette Figure 545 shows the Effect Palette with some of the effect folders expanded Figure 545 Effect Palette Expand Folder View To expand or collapse an effect folder click on the ...

Page 483: ...sitions Audio Cross Fades Title Mixers Keyers To lock the folder view so the folder structure cannot be modified click the Lock Unlock button Effect View Show Hide To Show Hide effects details in a particular category click the Show Effect View button upper right on the Effect Palette window When Show Effect View is active the Effect Palette shows the contents of the selected effect folder as show...

Page 484: ...for quickly opening frequently used folders Add to Timeline Adds the selected effect to a clip on the Timeline Clicking the list button on the Add to Timeline button allows selection of the position IN point OUT point or Both Delete Delete the selected User Preset Effect Property Displays the properties of the selected effect See Effect Properties on page 486 for more information View Change the v...

Page 485: ...d plug in base effects They cannot be deleted from the Effect Palette These effects have an S displayed on their icons See Figure 548 Figure 548 System Preset Effect User Preset Effects These are effects created and saved by users These effects can be custom ized base effects in which parameters are changed and multiple effects are combined These effects have a U displayed on their icon See Figure...

Page 486: ...operties To display and edit effect properties do the following 1 Select the desired effect in the Effect Palette window 2 Right click on the effect and select Properties from the menu as shown in Figure 551 Figure 551 Effect Menu Properties The Properties dialog illustrated in Figure 552 appears ...

Page 487: ... If not in the Effect View click the Show Effect View button 2 Click on the desired effect to select 3 Click the Property button to display the effect properties 4 Edit the properties as desired and click the OK button Applying Effects Effects are applied to clips using the following methods Drag and Drop 1 From either the Effect Tree or the Effect View click to select the folder and desired effec...

Page 488: ...g and drop the desired effect in the Effect Palette to the effect list of the Information Palette See Informa tion Palette on page 566 for more information Right Click Menu 1 Select a clip on the Timeline 2 From either the Effect Tree or the Effect View click to select the folder and desired effect See Figure 553 3 Right click on the effect to be applied and select Add to Timeline from the menu as...

Page 489: ...Effect Palette Add to Timeline Note When applying transitions or audio cross fades you may specify In Out or Both with either From Center or To as the location to which to add the effect See Figure 555 Figure 555 Effect Palette Add to Timeline Options ...

Page 490: ...o Clips Various video and audio filters may be applied to clips Some examples are documented in this section Color Correction Filters The color correction filters adjust color tone to match the previous or next clip adjust brightness and correct color cast and improve highlight detail loss and shadow detail loss The following color correction filters are available YUV Curve Allows adjustment of th...

Page 491: ... be given a monotone look with this filter See In the Information Palette double click the White Balance filter on page 507 for more information Applying Color Correction Filters To apply any color correction filter and make video adjustments with the filter do the following 1 Select the VideoFilters tree in the Effect Palette 2 Select the Color Correction tree to display all color correction filt...

Page 492: ... these steps 1 Select the clip to which the YUV Curve filter has been applied 2 Display the Information Palette For more information concerning the Information Palette see Information Palette on page 566 3 In the Information Palette double click the YUV filter as illustrated in Figure 558 Figure 558 Clip Information Palette YUV Curve Filter The YUV Curve dialog shown in Figure 559 appears ...

Page 493: ...according to the Curve Type setting The numerical value on the left below the Y curve indicates the input value and the output value of the selected curve Curve Type Select the Spline or Linear curve type for each YUV curve Linear A straight line from the end of the curve line to the adjustment point or from adjustment point to adjustment point Spline A curved line from the end of the curve line t...

Page 494: ...on filters See Keyframe Settings on page 497 for more information Master Default Button When clicked the Default button in the lower left of the YUV Curve dialog deletes all key frames and returns all settings to the defaults Preview Settings Preview settings determine how the effects of applying a color correction filter are previewed and verified before they are applied The configuration dialog ...

Page 495: ...the left half unfiltered Top Half show the effects of the filter on the top half of the display and leave the bottom half unfiltered Bottom Half show the effects of the filter on the bottom half of the display and leave the top half unfiltered Note The filter is applied to the entire video Preview settings are for verification of filter effects and do not represent the manner in which the filter i...

Page 496: ...ser Reference Guide Section 6 Effects and Titles Figure 561 YUV Curve Filter and Preview Settings The settings in the YUV Curve dialog above result in the preview display shown below Figure 562 YUV Filter Preview ...

Page 497: ...be set for key frames Click the V button on the filter name panel to hide the parameter panel In the parameter panel for some color correction filters key frames can be added or deleted for specific adjustable parameters For example in the Color Balance KeyFrames parameter panel key frames can be added for Chroma Brightness Contrast and color ranges Add Key Frame Adds a key frame at the position o...

Page 498: ...e to default settings Play Pause Clips Play or pause clips to which key frames and filters have been applied Adjusting Color Balance Once the Color Balance filter has been applied to a clip you can adjust the Color Balance filter settings by following these steps 1 Select the clip to which the Color Balance filter has been applied 2 Display the Information Palette For more information concerning t...

Page 499: ...s Figure 565 Color Balance Dialog 4 Adjust the Color Balance filter settings as explained below 5 Click the OK button to apply the settings and close the dialog Sliders Move the slider for Chroma Brightness Contrast or the color range you wish to adjust The results are previewed according to preview settings ...

Page 500: ...ommon to many of the color cor rection filters See Keyframe Settings on page 497 for more information Default Button When clicked the Default button in the lower left of the Color Balance dialog deletes all key frames and returns all settings to the defaults Color Wheel Adjustments Once the Color Wheel filter has been applied to a clip you can adjust the Color Wheel filter settings by following th...

Page 501: ...ained below 5 Click the OK button to apply the settings and close the dialog Color Wheel Point Drag the color wheel point from the center of the circle to the outer right edge to adjust the saturation chroma The chroma increases as the color point approaches the outer edge and decreases when moved toward the center point Wheel Rotate the wheel by dragging toward the desired color tone ...

Page 502: ...me settings are common to many of the color correction filters See Keyframe Settings on page 497 for more information Default Button When clicked the Default button in the lower left of the Color Wheel dialog deletes all key frames and returns all settings to the defaults White Balance Adjustments Once the White Balance filter has been applied to a clip you can adjust the White Balance filter sett...

Page 503: ...hite Balance settings as explained below 5 Click the OK button to apply the settings and close the dialog Balance Color Wheels and Sliders Drag the point in the center of each wheel to correct white balance high lights black balance shadows and grey balance intermediate The color wheel point adjusts the hue The sliders adjust saturation chroma and contrast ...

Page 504: ...it Tools Figure 571 illustrates the sliders and the text fields to which they corre spond Figure 571 Color Balance Limit Sliders Note Although the sliders shown in Figure 571 are for setting hue limits the sliders on the Saturation and Luminance limit bars function in the same manner Scale Range The Hue scale has a range of 0 to 359 The Saturation scale has a range of 0 to 100 The Luminance scale ...

Page 505: ...ents will be gradually decreased from 100 to 0 Details are presented in Figure 572 Figure 572 Color Balance Hue Limit Sliders Detail Key Display Click the Key Display button to display the applied limit effects The area with effects applied at 100 is white The area with no effects applied 0 is black See Figure 573 for an example Figure 573 Color Balance Key Display ...

Page 506: ...to provide the pre ferred filter effect verification method Preview Settings are common to many of the color correction filters See Preview Settings on page 494 for more information KeyFrame Settings The White Balance can be adjusted at each key frame to provide the pre ferred filter effect Keyframe settings are common to many of the color cor rection filters See Keyframe Settings on page 497 for ...

Page 507: ... Recorder select the color which you wish to correct to the color selected in the color picker The color is corrected Note Colors may also be adjusted by using the Black Gray or White balance color circles and the Saturation and Contrast sliders For example select White from the color picker and then click a color point in the color wheel that you want to adjust to white To correct colors in a spe...

Page 508: ...ng these steps 1 Select the clip to which the Monotone filter has been applied 2 Display the Information Palette For more information concerning the Information Palette see Information Palette on page 566 3 In the Information Palette double click the Monotone filter as illustrated in Figure 568 Figure 576 Clip Information Palette Monotone Filter The Monotone dialog shown in Figure 569 appears ...

Page 509: ...ned below 5 Click the OK button to apply the settings and close the dialog Sliders The color tone can be adjusted by moving the U and V sliders to get the desired color tone effect as illustrated in Figure 578 and Figure 579 Figure 578 Monotone Sliders These slider settings result in the color tone effect shown in Figure 579 ...

Page 510: ... provide the preferred filter effect Keyframe settings are common to many of the color correction filters See Keyframe Settings on page 497 for more information Apply Video Filters To apply an video filter to a clip follow these steps 1 Select the VideoFilters tree in the Effect Palette to display all video filters as illustrated in Figure 580 Figure 580 Select Video Filter ...

Page 511: ...ethod Use the right click method explained in Right Click Menu on page 488 Combining Multiple Filters Some video filters allow a combination of two or more filters to be applied and configured from a single filter dialog These filters highlighted in Figure 581 are Region Chrominance Combine Filters Blend Filters Figure 581 Combination Filters ...

Page 512: ... in these filters however the Region filter does not allow selection of the Old Movie Film and Tunnel Vision filters or any user preset or combined presets that use these filters Figure 582 Blend Filter Select Filter List Figure 583 shows an example of the Combine Filters filter applied and the selection of five filters to apply to the clip In this example the Soft Focus filter has been assigned a...

Page 513: ...Palette to display all video filters as illustrated in Figure 584 Figure 584 Select Audio Filter 2 Drag and drop the selected filter on the desired audio clip on the Timeline Note When applying an audio filter to an audio clip the waveform may be dis played to check the results of the effect See Adjusting Volume and Pan on page 643 for more information on displaying the waveform Alternative Method...

Page 514: ...een clips Note When adding transitions and cross fades the length of the clips and the sequence changes depending upon the current editing mode Extend or Fix No margin is present if the Out point of the first clip is set at the end of the clip and the In point of the second clip is at the beginning of the clip If there is no margin between clips the black triangles illustrated in Figure 585 are pr...

Page 515: ...view see Figure 587 or the Effect Transitions tree if the effect view is hidden Figure 587 Effect Palette Transitions Effect View 3 Drag and drop the selected transition effect at the point where the clips touch each other on the Timeline The transition indicator is added between the clips as illustrated in Figure 588 Note The default audio cross fade is also added when a video transition is added...

Page 516: ...f the transition indicator is small and there is no area to double click to open the settings dialog right click the transition indicator and select Settings from the menu or double click the transition effect in the Information Palette Figure 589 Dissolve Transition Settings Dialog 5 Make any desired changes to the transition effect settings and click the OK button to close the dialog Track Trans...

Page 517: ...nsitions tree if the effect view is hidden Figure 590 Effect Palette Transitions Effect View 3 Drag and drop the selected transition effect to the mixer area at the point where the clips touch each other on the Timeline The transition indicator is added to the mixer area as illustrated in Figure 591 Figure 591 Track Transition Indictor in Mixer Area ...

Page 518: ...the effect view is hidden Figure 592 Effect Palette Transitions Effect View 3 Drag and drop the selected cross fade effect at the point where the audio clips touch each other on the Timeline Note By default the default video transition is not added automatically when an audio cross fade is added between clips If you wish to enable the automatic addition of the video transition when a cross fade is...

Page 519: ...e indicated by a blue D on the effect icon See Default Effects on page 485 for more infor mation To apply a default effect follow these steps 1 Select a clip to which to apply a default effect Note The clip on either side of the desired transition point may be selected 2 Click the Set default transition button highlighted in blue in Figure 594 on the Timeline Note An alternative method is to press...

Page 520: ...eate Clip Out ALT P Add default transition s at the Out point of the currently selected clip Changing Default Effects The video transition audio cross fade and title mixer effects assigned as the defaults may be changed To change the defaults do the following In the Transitions AudioCrossFades or TitleMixers tree in the Effect Pal ette or in the Effect View right click the effect to be set as the ...

Page 521: ...change the length of a transition or audio cross fade between two clips do the following 1 Move the cursor to the end of the transition or audio cross fade The cursor changes shape as shown in Figure 597 for a clip transition or audio cross fade and as shown in Figure 598 for a track transition Figure 597 Change Transition Length Cursor Clip Transition Audio Cross Fade Figure 598 Change Transition...

Page 522: ...s adjusted you can see the results in the Player and Recorder Figure 599 Change Transition Length Preview Note In Extend mode the transition length may be shortened or lengthened by only the clip margin Title Mixer transition lengths are changed in the same manner as described above and as illustrated in Figure 600 Figure 600 Change Transition Length Cursor Title Mixer Related Operations In the Mi...

Page 523: ... Duration from the menu as illustrated in Figure 601 Figure 601 Effect Palette Right Click Menu Duration 2 Select the effect type Transition Cross Fade or Title Mixer for which you wish to change the default duration A Duration dialog appears as shown in Figure 602 Figure 602 Effect Duration Dialog 3 Enter the desired duration and click the OK button Creating Video Composites Video composites are ...

Page 524: ...cupies the picture in picture window as illustrated in Figure 603 Figure 603 Video Overlay Priority Composition A composition video is created by layering two video sources in a blend effect To create a composition video do the following 1 Select the Keyers tree from the Effect Palette as shown in Figure 604 2 Select the Blend tree and drag and drop the desired blend effect to the Mixer area of a ...

Page 525: ...Figure 605 Keyer Effects In Mixer Area Picture in Picture A picture in picture effect is where one video is overlaid over another with one serving as the background video while the other is confined to a certain area of the screen over the background as shown in Figure 603 on page 524 To create picture in picture effect follow these steps 1 Select the Keyers tree from the Effect Palette as shown i...

Page 526: ...icture Effect Clips with Keyer effects applied display an aqua blue line at the top of the mixer area Configuring Picture in Picture Effects To configure a Picture in Picture effect that has been applied to a clip do the following 1 Click the Mixer area of the clip to which the Picture in Picture effect has been applied 2 Display the Information Palette see Show Hide the Information Palette on pag...

Page 527: ...own in Figure 608 appears Figure 608 Picture in Picture Configuration Dialog 4 Configure the effect settings per the explanations below and click the OK button to close the dialog Preview Window The preview window shows the effects of configuration settings such as position size and motion in the overlay window Note Right click the preview window and select Layout menu options shown in Figure 609 ...

Page 528: ...ion settings specify a number of pixels from the top left corner of the screen at which to anchor the top left corner of the overlay window The size settings specify the width and height in pixels of the overlay window beginning at the position defined in the positions settings as the top left corner of the overlay window For example if the Position and Size settings are as follows Left 100 Top 10...

Page 529: ...isplay Shadow Tab Select the Enable option to define a shadow for the overlay window When enabled the position color and transparency of the shadow may be defined To top and Left numbers represent the offset of the shadow from the top left corner of the overlay window Figure 611 shows the example of a black shadow with 60 transparency offset 50 pixels from the top of the overlay window and 50 pixe...

Page 530: ... motion to the overlay window See Adding Motion to the Overlay Window on page 530 for more information Copy Background Select this option to copy the overlay window image to the background with the specified color See Figure 612 for an example of the overlay window image copied to the background with a light blue tint Figure 612 Picture In Picture Copy Background with Color Quality Enable this opt...

Page 531: ...ow to set the end E position keyframe for the overlay window motion You may drag this end position keyframe to position it more precisely See Figure 613 for an example Figure 613 Picture in Picture Motion Keyframe Detail 3 Select the Motion Keyframe tab The motion plot chart shown in Figure 614 appears ...

Page 532: ... Chart Detail The vertical axis represents the position and the horizontal axis represents time 4 Click an area on the chart to set a keyframe position point 5 Right click the position point and select Speed from the menu as illustrated in Figure 615 Figure 615 Picture in Picture Motion Keyframe Menu Speed ...

Page 533: ...6 Picture in Picture Motion Keyframe Chart For a more detailed discussion of 2D Picture in Picture effects and a proce dure for configuring a keyframeable 2D Picture in Picture effect see Appendix B Special Procedures 3D Picture in Picture A picture in picture effect is where one video is overlaid over another with one serving as the background video while the other is confined to a certain area o...

Page 534: ... Figure 618 Figure 618 Keyer Effects In Mixer Area Configuring 3D Picture in Picture Effects To configure a 3D Picture in Picture effect that has been applied to a clip do the following 1 Click the Mixer area of the clip to which the 3D Picture in Picture effect has been applied 2 Display the Information Palette see Show Hide the Information Palette on page 566 for more information as shown in Fig...

Page 535: ... click the 3D Picture in Picture effect in the Information Palette Note You may also select the 3D Picture in Picture effect and click the Settings button highlighted in blue in Figure 619 in the Information Palette The Picture in Picture dialog shown in Figure 620 appears Figure 620 3D Picture in Picture Configuration Dialog ...

Page 536: ...orm the button function Change overlay window position Rotate horizontally and vertically Rotate around the Z axis Change overlay window size Change shadow position To use this function Drop Shadow must be enabled in the Light and Shadow Tab Keyframe Timeline Timeline on which keyframes are added to specify the location and timing of motion and other effects The Keyframe Timeline has four lines on...

Page 537: ...lay and review the effect in order to fine tune effect settings Move to the Beginning Places the Timeline cursor at the beginning of he Keyframe Timeline Move to Previous Keyframe Positions the Timeline cursor at the previous keyframe in the Keyframe Timeline Play Pause Plays the Keyframe Timeline at the beginning at the Timeline cursor position When playing is in progress the Pause button is avai...

Page 538: ...he Keyframe Timeline to show a larger segment of the Time line As this button is clicked repeatedly the Timeline segment in the Timeline display represents a larger time slice Interpolation Buttons After selecting a keyframe in the Keyframe Timeline window the desired interpolation method is selected by clicking the appropriate interpolation button The selected interpolation method applies to the ...

Page 539: ... 1 Select the desired preset motion effect from the preset list 2 Click the Custom button 3 Click the Save button to add the preset to the custom group 4 Click the Preset button to return to the preset list and select additional preset effects 5 Repeat the above steps until all desired preset effects are saved in the custom group Click the Delete button to delete a motion effect from the Custom gr...

Page 540: ...elect the Enable Light option to add a light reflection effect during overlay window rotation motions If the light effect is enabled set the light intensity with the slider or by direct numeric input Select the Enable Drop Shadow option to add a shadow to the overlay window If drop shadow is enabled use the sliders or direct numeric entry to set the shadow offset and intensity parameters Figure Fi...

Page 541: ...try to set the border width and height and select the rounding and smoothing options if desired Figure Figure 624 shows some sample borders settings and results in the Preview window Figure 624 3D Picture in Picture Borders Tab Crop Tab Crop the left right top and bottom edges of the video in the overlay window Use the sliders or direct numeric entry to set the crop parameters in pixels Select the...

Page 542: ...if you wish to swap the background video and overlay window video Figure Figure 626 shows some sample option settings and results in the Preview window Figure 626 3D Picture in Picture Options Tab Keyers The two keyer effects available in EDIUS are the Chroma Key and the Luminance Key Chroma Key Chroma key provides the ability to eliminate parts of a video based on color selection and have those p...

Page 543: ...te If the Effect view is hidden the keyer effects will be listed under the Keyers tree in the Effect Palette Figure 627 Chroma Key Effect Clips with Keyer effects applied display an aqua blue line at the top of the mixer area as illustrated in Figure 628 Figure 628 Keyer Effects In Mixer Area Configuring Chroma Key Effects To configure a Chroma Key effect that has been applied to a clip do the fol...

Page 544: ...y Effect 3 Double click the Chromakey effect in the Information Palette Note You may also select the Chromakey effect and click the Settings button high lighted in blue in Figure 629 in the Information Palette The Chromakey dialog shown in Figure 630 appears Figure 630 Chromakey Configuration Dialog ...

Page 545: ...or selection See Figure 631 for an example based on the eye dropper color selection of the blue water in the background Figure 631 Chromakey Key Display Select the Histogram Display option to display a histogram of the colors that can be selected for elimination Note The Histogram Display option is not available with the eye dropper color selector See Figure 632 for an example of a histogram displ...

Page 546: ... background video There are four color selection methods Each of the examples below shows the selection of the water as the key color using the four selection methods highlighted in blue in each example and the results in the Recorder Figure 633 Chromakey Eye Dropper Color Selector Figure 634 Chromakey Color Wheel Color Selector Figure 635 Chromakey Color Segment Color Selector ...

Page 547: ...ton shows detailed keyer settings which can be modified to fine tune the key color parameters These settings vary based on the color selector method Figure 637 Shows the Detail Settings for the Color Wheel Selector Figure 637 Chromakey Color Wheel Selector Detail Rectangle Selecting the Rectangle enable option allows chromakey settings to be applied to a selected rectangular area of the video inst...

Page 548: ...ral gray range Use the sliders or direct numeric entry to adjust the cancellation range and power of the selected key color and its opposite in the areas where the selected key color is bounded by other colors Autofit Tracking Enable autofit tracking to adjust key color variation automatically CG Mode Select this option to set the parameters for CG generated images This option should not be enable...

Page 549: ...When this tab is selected the settings shown in Figure 639 appear Figure 639 Key Frame Setting Tab Fade Settings Enable the fade setting to add fade in and fade out effects to the key color area The fade In and Fade Out durations are designated by entering a number of frames for the effect KeyFrame Settings Enable this option in order to increase or decrease the chromakey effect Click on the line ...

Page 550: ...ess level rather than a specific color To create a luminance key effect do the following 1 Select the Keyers tree from the Effect Palette as shown in Figure 641 2 Drag and drop the Luminancekey effect to the Mixer area of the clip that will be in the overlay window Note If the Effect view is hidden the keyer effects will be listed under the Keyers tree in the Effect Palette Figure 641 Luminance Ke...

Page 551: ...nance Key effect has been applied 2 Display the Information Palette see Show Hide the Information Palette on page 566 for more information as shown in Figure 643 Figure 643 Information Palette Luminancekey Effect 3 Double click the Luminancekey effect in the Information Palette Note You may also select the Luminance effect and click the Settings button high lighted in blue in Figure 629 in the Inf...

Page 552: ...e range over which luminance key settings apply move the slope minimum and maximum sliders or enter the desired numeric values directly into the corresponding entry fields Figure 645 Luminance Key Range Selection Luminance settings are applied to the selected area of the video as follows Gradual Increase The range between the first Slope slider and the Minimum slider is range over which luminance ...

Page 553: ...d in Figure 646 Figure 646 Luminance Slope Shape Refresh Histogram Button Click the button to refresh the video histogram in the Luminance Range Settings window Auto Fit Button Click this button to automatically apply luminance keyer settings Make manual adjustments with the slider or numeric entry fields to change the auto fit settings Bypass Enable this setting to return the image to the origina...

Page 554: ...o Figure 647 Luminancekey Rectangle Enabled Invert Selecting this option inverts the range to which luminancekey settings are applied The histogram will show that the settings are applied to the areas outside the slope lines All Calculation Select this option to calculate the area outside the range specified by Out side Rect Enable KeyFrame Setting Tab When this tab is selected the settings shown ...

Page 555: ...e fade In and Fade Out durations are designated by entering a number of frames for the effect KeyFrame Settings Enable this option in order to increase or decrease the luminancekey effect Click on the line at the points to add key frames and drag the points to change the effect setting Select Linear or Curve as the manner in which to apply the effect adjustments See Figure 649 for an example ...

Page 556: ... of a video do the following 1 In the Track Panel click the Expand2 button on the track containing the video for which you wish to adjust the transparency See Figure 650 Figure 650 Expand2 Button in Track Panel 2 Click the Mixer button to activate the Mixer area See Figure 651 Figure 651 Mixer Button in Track Panel 3 Click a point on the rubber band at which you wish to set a key frame See Figure ...

Page 557: ... Transparency While dragging the key frame point the transparency setting is displayed in the lower left corner of the Timeline window as illustrated in Figure 654 The video is completely transparent when the setting reaches 0 Note Adjusting deleting and initializing rubber band points for transparency key frames is done utilizing the same procedures as the audio rubber band See Entering Value Adj...

Page 558: ... fade in and fade out effects follow these steps 1 Select a clip on the Timeline to which you wish to apply fade in or fade out effects 2 Position the Timeline cursor at the end frame for a fade in effect or at the beginning frame for a fade out effect 3 Click the Fade in or Fade out button on the Timeline See Figure 655 Note An aqua blue line appears at the top of the mixer area the clip with a f...

Page 559: ...re a fade in ends and a fade out begins as illustrated in Figure 656 Timeline Fade In and Fade Out Key Frames Related Operations To delete a fade in or fade out effect delete the audio and video parts sep arately by doing the following To delete the audio fade in fade out Right click the clip and select Delete Parts Audio RubberBand Volume from the menu Note An alternative method is to press the S...

Page 560: ...e Figure 657 Video clip only applies the fade in or fade out to the video only Audio clip only applies the fade in or fade out to the audio only Video clip only unlink applies the fade in or fade out to the video portion of only the selected clip if the clip is linked or part of a group Audio clip only unlink applies the fade in or fade out to the audio portion of only the selected clip if the cli...

Page 561: ...spect ratio Field order Top or Bottom Field First and Progressive are supported No combination of Top Field First and Bottom Field First is supported One or both clips has no defined duration Note The aspect ratio and field order of a clip is visible in the Information Palette To create an Alpha Channel composite clip follow these steps 1 Save the clips that will be the Fill and Key clips in the A...

Page 562: ...562 EDIUS User Reference Guide Section 6 Effects and Titles Figure 661 Clip Menu Alpha Matte as A Save As dialog appears as illustrated in Figure 662 Figure 662 Alpha Matte Save As Dialog ...

Page 563: ...an alpha channel that will be applied to the Fill clip Alpha Matte Invert Select this format when the Key clip includes an alpha channel but the channel should be inverted when applied to the Fill clip Luminance Matte Select this format when applying the luminance 0 to 100 level of the Key clip as the alpha channel for the Fill clip where a luminance level of 100 signifies 100 transparency Luminan...

Page 564: ...ects and Titles Figure 663 Alpha Channel Clip Saved to Asset Bin 6 Place the Alpha Channel clip and background clip on the Timeline to create the video composite as illustrated in Figure 664 Figure 664 Background and Alpha Channel Clip Composite ...

Page 565: ...t Palette Title Mixers 3 Drag and drop the desired title mixer to the mixer area of the title clip Note Separate title mixers can be added to the In and Out points of a title clip The yellow triangle on the title clip indicates a title mixer has been added See Figure 666 Figure 666 Title Mixer added to a Title Clip Note The length of a title mixer effect can be changed after placing it on the titl...

Page 566: ...7 Toggle Palette Display Button Menu Information Palette Select View Information Palette on the Preview window menu bar Select View Show All Palettes on the Preview window menu bar Note This function simultaneously shows or hides the Effect Information and Sequence Marker palettes For more information on the Effect Palette see Effect Palette on page 482 For more information on the Marker Palette s...

Page 567: ...t and the total number of applied effects e g 3 3 in the example above and the number of the currently selected effect e g 3 in the example above Settings Button Click the Settings button to display the configuration dialog for the cur rently selected effect in the effects list Delete Button Click the Delete button to delete the currently selected effect in the effects list Effect Enable Disable T...

Page 568: ...indicators noted in each example below show which effect types have been applied to clips on the various tracks VA Track Figure 669 V A Track Effects Indicators V Track Figure 670 V Track Effects Indicators A Track Figure 671 A Track Effect Indicators T Track Figure 672 T Track Effects Indicators ...

Page 569: ...he effect as desired For more information see the section on applying each effect type Note Effects can be modified and saved under a different name as user preset effects See Customizing the Effect Palette on page 577 for more information Enabling Disabling Effects To enable or disable effects that have been applied to clips do one of the fol lowing after selecting the desired clip on the Timelin...

Page 570: ...d select effect type item to delete from the menu as illustrated in Figure 674 Figure 674 Timeline Delete Button Menu Filter Note The effect you wish to delete may be under the Transition Mixer Filter or Audio Rubber Band menu Alternative Methods Right click a clip and select Delete Parts effect type item to delete from the menu Select Edit Delete Parts effect type item to delete from the Preview ...

Page 571: ...and Adjusting Effects on page 568 for more information 2 From the effects list in the Information Palette select the effect name you wish to delete and click the Delete button highlighted in blue in Figure 675 Figure 675 Information Palette Delete Button Alternative Methods Drag the effect name out of the Information Palette Drag and drop the effect name on the Delete button in the Information Pal...

Page 572: ...erifying and Adjusting Effects on page 568 for more information 2 From the effects list in the Information Palette select the effect name you wish to copy and drag and drop it directly to the target clip on the Timeline as shown in Figure 677 Figure 677 Drag and Drop Effect from Information Palette to Another Clip Note Clip transitions track transitions audio cross fades and keyers can be copied b...

Page 573: ...list button V of the Set default transition button and select the paste method from the following options Paste Cursor pastes the transition on the clip on the In side of the tran sition the clip on the Out side of the transition or on both clips depending upon the cursor location Paste Clip In pastes the transition on the clip on the In side of the tran sition or on both clips depending on the cu...

Page 574: ...t you wish to copy and click the Copy to clipboard Timeline button See Figure 681 Figure 681 Timeline Copy to Clipboard Timeline Button 2 Select the clip on which you wish to paste the copied effect 3 Click the list button V of the Replace clip Timeline button and select Filter or Mixer from the menu depending upon the type of effect that was copied See Figure 682 Figure 682 Timeline Replace Clip ...

Page 575: ...Folders in the Effects Palette on page 577 3 From the Information Palette right click on the effect name to be saved and select Save as Current User Preset from the menu as illustrated in Figure 683 Figure 683 Information Palette Effect Menu Save as Current User Preset The effect is saved in the currently selected folder in the Effects Palette As shown in Figure 684 user preset effect have a yello...

Page 576: ...cts are saved as sep arate effects in the selected folder in the Effect Palette Deleting Effects from the Effect Palette To delete an Effect from the Effect Palette do one of the following In the Effect Palette effect view or tree view right click on the user preset effect to delete and select Delete from the menu Note Only user preset effects can be deleted System preset effects and plug in base ...

Page 577: ...e do the following 1 Right click on the existing folder in which you wish to create the new folder and select Create New Folder from the menu as illustrated in Figure 686 Figure 686 Effect Palette Menu Create New Folder 2 Enter the desired name for the New folder that appears in the Effect Palette tree Renaming Effects and Folders To rename an effect or folder do one of the following Right click t...

Page 578: ...ucture The Effect Palette folder structure can be locked so that changes to the folder structure are not allowed When the Effect tree is unlocked folders may be moved To lock or unlock the folder structure check the status of the lock indicator on the Effect Palette In Figure 688 the lock indicator is highlighted in blue Note Figure 688 shows the location of the lock indicator if the effect view i...

Page 579: ...page 582 for more information Changing the Folder Structure The folder structure of the Effect Palette can be reorganized Note Before changing the folder structure check the folder lock indicator to verify that the folder structure is unlocked To change the location of a folder drag and drop it to a new location in the folder tree as illustrated in Figure 690 Figure 690 Effect Palette Folder Drag ...

Page 580: ...ssigned to a folder in the Effect Tree as indicated below If there is no folder associated with a shortcut the icon is greyed out System Presets Video Filters Audio Filters Video Filters Audio Filters Transitions Audio Cross Fades Title Mixers Keyers Clicking the shortcut icon opens the linked folder in the Effect tree Shortcut Assignments with Drag and Drop If you wish to assign a different folde...

Page 581: ...ult all the top level folders in the expanded Effect tree already have shortcut links If you wish to assign a shortcut to a sub folder expand the appropriate folder tree and select the desired folder 2 Click the Folder Link button and select Add Link from the menu as illustrated in Figure 692 Figure 692 Effect Palette Select Folder The selected folder is added to the Folder Link button list as sho...

Page 582: ...hortcut do the following 1 Click the Folder Link button and select Arrange from the menu The Arrange dialog shown in Figure 694 appears Figure 694 Effect Palette Folder Link Arrange Dialog 2 Select the folder link to delete and click the Delete button 3 Click the Close button to exit the Arrange dialog Resetting Effect Palette to Defaults To reset the Effect Palette to its default state right clic...

Page 583: ...en upgrading to a new version of EDIUS or after a reinstallation of EDIUS exported user preset effects can be imported into the system To export user preset effects do the following 1 Right click on the user preset effect or folder containing user preset effects which you wish to export and select Export from the menu as shown in Figure 696 Figure 696 Effect Palette Right Click Menu Export ...

Page 584: ...installing EDIUS exported user preset effects can be imported into EDIUS To import user preset effects do the following 1 In the Effect Palette right click on the folder into which you wish to import user preset effects and select Import from the menu See Figure 697 Figure 697 Effect Palette Right Click Menu Import A File Open dialog appears 2 Navigate to the location contain the tpd file to be im...

Page 585: ...s To adjust the video display with the Vector Scope Waveform do the fol lowing Note Displaying the Vector Scope Waveform increases the CPU load Display it only when necessary 1 Move the Timeline cursor to the position at which you wish to check the video display properties 2 Click the Toggle vector scope waveform display button on the Timeline highlighted in blue in Figure 698 Note An alternative ...

Page 586: ...atte Clip on page 259 Note that it measures IRE7 5 IR7 5 is com monly used as the black reference level in North America IRE0 is used in Japan Figure 700 Vector Scope Waveform Dialog Black Matte Clip A clip with high luminance will have a waveform such as the one illus trated in Figure 701 In this example a large portion of the clip is at an IRE level greater than 100 and some portions exceed IRE ...

Page 587: ...rge portion of the clip is at an IRE level lower than IRE 7 5 IRE 0 in Japan and some portions are lower than the IRE 20 level Figure 702 Low Luminance Clip Waveform To adjust the IRE of a clip within the safe range of IRE 7 5 IRE 0 in Japan to IRE 100 do the following 1 Apply the Color Balance filter to the clip 2 Open the Color Balance dialog by double clicking the Color Balance filter in the In...

Page 588: ... Color Balance dialog shown in Figure 703 select the Safe Color option to automatically adjust the clip to the safe range of IRE 7 5 to IRE 100 Figure 703 Color Balance Dialog Note The Brightness slider may also be used to further refine the IRE levels of the video clip ...

Page 589: ...s of that location Vector Scope The color distribution of the image displayed in the Recorder is shown in the Vector Scope display To zoom in click on a area of the Vector Scope you wish to magnify To zoom out right click on the Vector Scope display Waveform Chroma and luminance levels of the image displayed in the Recorder are shown in the Waveform display To zoom in click on a area of the Wave f...

Page 590: ...pe display as dots this is the default display method Line Button Clicking this button changes the Vector Scope display to show the color dis tribution by connecting the dots with lines Show Hide Vector Scope Button This button toggles the display of the Vector Scope on and off Chroma Button Clicking this button changes the Waveform display to show all color ele ments centered around 7 5 IRE 0 IRE...

Page 591: ...Settings on page 151 To use QuickTitler 1 Position the Timeline cursor at the point at which you wish to insert a title 2 Click the Create Title button on the Timeline 3 From the menu select the track to which to add the title See Figure 705 for an example Create Title in Current Track Place the title clip in the currently selected track Create Title in T X track Place the title clip in the specif...

Page 592: ...QuickTitler from the Preview window menu bar Note The title clip is placed with the Timeline cursor position of the active track as the In point If In and Out points exist on the Timeline The clip is placed between the In and Out points Define In and Out points on the Timeline and right click on the track on which you wish to place a title clip select New Clip QuickTitler from the menu Note The cl...

Page 593: ... Grid Line Grid from the QuickTitler menu bar to display the desired grid type Title Object Property Bar Sets the properties of the selected title object Background properties text properties image properties and object properties may be displayed from this property bar Video Settings When the QuickTitler application is launched as an independent applica tion not from within EDIUS from the Windows...

Page 594: ...bjects can be defined by selecting and object and selecting Layout Order or Layout Align from the QuickTitler menu bar 5 Click the Save button see Figure 708 to save changes and close the QuickTitler window Note An alternative method is to select File Save from the QuickTitler menu bar Figure 708 QuickTitler Save Button The title is added to the clip at the Timeline cursor location see Figure Note...

Page 595: ...er a title is created select View Preview on the QuickTitler menu bar to render the currently displayed area Double click a title clip on the Timeline or in the Asset Bin to start QuickTilter and edit the selected clip Note When QuickTitler is started from the Asset Bin the title clip is saved to the Asset Bin Entering Text To enter text in a title object do the following 1 Click the Horizontal Te...

Page 596: ...Horizontal Text Button Select Vertical Text 2 Click on the location in the title creation window at which you wish to begin text entry The cursor appears at the selected location ready for text entry 3 Enter the desired text from the keyboard Alternative Methods Select View Text Input Bar from the QuickTitler menu bar Select Insert Text Horizontal or Insert Text Vertical from the Quick Titler menu...

Page 597: ...nges such as changing text size moving text and rotating text use the text handles illustrated in Figure 712 Figure 712 QuickTitler Text Handles Text properties are changed using the controls shown in Figure 713 and explained below Figure 713 QuickTitler Text Properties ...

Page 598: ...e drop down list select and available font for the text Size Select the desired font size from the drop down list or by entering the desired font point size directly Horizontal Vertical Select the desired text orientation horizontal or vertical Bold Italic Underline Select the desired font effects such as bold italic or underline Left Tab Center Right Tab Specify the desired alignment of text with...

Page 599: ... the object frame to a new location when the cursor shape changes as illustrated in Figure 715 Figure 715 QuickTitler Text Move Cursor Rotating Text To rotate a text object do the following 1 Move the cursor to a rotate expand contract handle on the object frame while holding down the CTRL key 2 Click and hold the left mouse button and drag the object frame to rotate the object when the cursor sha...

Page 600: ... angle To shift the axis of rotation move the centering point handle Click any area outside the object frame and click the object again to return the rotating axis to the center Changing Text Color To change the color of the text follow these steps 1 Select the text object for which you wish to change the color 2 If the Fill Color tree is not already expanded click the to expand the Fill Color tre...

Page 601: ...exture File option is checked the color change is not applied to the text Applying Transparency to Text Applying transparency to text objects see Figure 719 for an example allows the background to be visible through the text Figure 719 QuickTitler Text Transparency To apply transparency to an object do the following 1 Select the text object to which to apply transparency 2 If the Fill Color tree i...

Page 602: ...ect Applying Color Gradations Applying color gradations to text objects see Figure 721 for an example add a color changing effect to the text Figure 721 QuickTitler Text Color Gradations To apply color gradations to an object do the following 1 Select the text object to which to apply color gradation 2 If the Fill Color tree is not already expanded click the to expand the Fill Color tree See Figur...

Page 603: ... The ColorSelect dialog box appears 5 Select the desired text color or enter the desired numeric values to select a text color 6 Repeat Step 4 and Step 5 to select a color value for each gradation step 7 Drag the direction arrow or enter a numeric value to set the direction of the color gradation See Figure 723 for sample text gradation settings Figure 723 QuickTitler Color Text Color Gradation Se...

Page 604: ...es contained in the file Figure 724 QuickTitler Text Texture To apply texture to an object do the following 1 Select the text object to which to apply a texture file 2 If the Fill Color tree is not already expanded click the to expand the Fill Color tree See Figure 725 Figure 725 QuickTitler Text Properties Fill Color Note To apply an image on the edge of the text expand the Edge tree See Figure 7...

Page 605: ...xture files and select the texture file you wish to apply to the text object 5 Click the Open button to apply the texture file The following file formats are supported for texture files Bitmap bmp GIF gif JPEG jpeg jpg PNG png TIFF tiff Windows Enhanced Metafile emf wmf Photoshop psd Targa tga targa vda icb vcf Adding a Text Border Edge Borders edges may be added to text objects see Figure 727 to ...

Page 606: ...bject do the following 1 Select the text object to which you wish to add the border 2 If the Edge tree is not already expanded click the to expand the Edge tree Figure 728 QuickTitler Text Properties Edge Tree 3 Enable the Edge settings 4 Click the color palette see Figure 728 The ColorSelect dialog shown in Figure 729 appears ...

Page 607: ... gradations and textures may also be applied to borders See Applying Color Gradations on page 602 and Applying Texture to a Text Object on page 604 for more information 7 Apply transparency or texture to the edge if desired Adding Shadows to Text Shadows add a three dimensional effect to text and make the text stand out more against the background Figure 730 QuickTitler Text Shadow To add a shadow...

Page 608: ...tree is not already expanded click the to expand the Shadow tree 3 Enable the Shadow settings Figure 731 QuickTitler Text Properties Shadow Tree 4 Click the color palette see Figure 731 The ColorSelect dialog shown in Figure 732 appears Figure 732 QuickTitler ColorSelect Dialog ...

Page 609: ...sparency Note Color gradation may also be applied to shadows See Applying Color Grada tions on page 602 Rolling or Crawling Text Text can be configured to move across the screen in a vertical roll or hori zontal crawl direction To configure text rolls or crawls do the following 1 Select a title type from the drop down list in the Background Properties bar as illustrated in Figure 733 Figure 733 Qu...

Page 610: ... across the screen With a roll type selected if there is more text than will fit in the text object creation window a vertical scroll bar appears A white dotted line is also displayed on the screen at the page break posi tion however this line is not displayed in the video output See Figure 734 Figure 734 QuickTitler Text Roll Crawl Text moves horizontally across the screen from left to right or r...

Page 611: ... Time line Shorten the length of the clip to speed up the roll or crawl Lengthen the clip to slow down the roll or crawl Embossing Text Embossing text makes it appear to stand out from the background Figure 736 QuickTitler Embossed Text To emboss text do the following 1 Select the text object to emboss 2 If the Emboss tree is not already expanded click the to expand the Emboss tree See Figure 737 ...

Page 612: ...he edge to emboss 5 Enter the desired values in the emboss settings fields Blur Text Blurring text makes it blend in more with the background Figure 738 QuickTitler Blurred Text To blur text do the following 1 Select the text object to blur 2 If the Blur tree is not already expanded click the to expand the Blur tree See Figure 737 Figure 739 QuickTitler Text Properties Blur Tree ...

Page 613: ...d in conjunction with text styles and are explained in the next section Applying Text Styles To apply a text style from the Object Style bar do the following 1 Select the text object to which to apply the style 2 Select a style sample from the Object Style Bar See Figure 740 for an example Figure 740 QuickTitler Text Styles 3 Select Style Apply Style from the QuickTitler menu bar Note The style sa...

Page 614: ...yle to be Saved 2 Select Style Save As New Style from the QuickTitler menu bar 3 Enter a name for the saved style Note If the entered style name already exists you will be prompted to enter a dif ferent name for the style As illustrated in Figure 743 a new style sample is created in the Object Style Bar which represents the saved style Figure 743 QuickTitler New Text Style Saved Changing Text Styl...

Page 615: ... from the Object Style Bar Note Default styles installed with QuickTitler may not be deleted To delete a saved text style do the following 1 Select the text style sample you wish to delete in the Object Style menu bar 2 Select Style Delete Style from the QuickTitler menu bar Note An alternative method is to select the style sample and press the Delete key on the keyboard Image and Graphic Styles I...

Page 616: ...ple in Figure 744 Style examples for the selected image tool appear in the Object Style Bar as illustrated in Figure 745 Figure 745 QuickTitler Image Tool Styles 2 Select the object style to apply 3 Click on the Title Object Creation window The selected object style is added to the object creation window as shown in Figure 746 and can be modified as needed Note After adding an object to the object...

Page 617: ...style Changing Image or Graphic Settings The size of an image can be adjusted by dragging an edge of the object frame using the Rotate Expand Contract handles illustrated in Figure 747 Figure 747 QuickTitler Graphic Object Handles The object size and position can also be changed by entering the desired values directly into the X Y Width and Height fields in Transform tree in the Image Properties B...

Page 618: ...owing 1 Move the cursor to the desired rotate expand contract handle on the graphic object frame 2 Click and hold the left mouse button and drag the cursor when its shape changes see Figure 749 to increase or decrease the text size by increasing or decreasing the size of the graphic object frame Figure 749 QuickTitler Object Resize Cursor Moving Graphic Objects To move a graphic object to a new lo...

Page 619: ...he ALT key to rotate the graphic object and center it on the opposite angle To shift the axis of rotation move the centering point handle Click any area outside the object frame and click the object again to return the rotating axis to the center Applying Transparency to Images and Graphics Transparency can be applied to graphic objects as illustrated in Figure 752 Figure 752 QuickTitler Graphic T...

Page 620: ... Borders can be applied to graphic objects as illustrated in Figure 754 Figure 754 QuickTitler Graphic Border 1 Select an image or graphic to which to add a border 2 If the Borders tree is not already expanded click the to expand the Border tree See Figure 755 Note If the selected object is a graphic Rectangle Oval Triangle or Line object expand the Border Line Shape tree in the Object Properties ...

Page 621: ...eference Guide 621 Titles Figure 755 QuickTitler Image and Object Properties Border Tree 4 Click the color palette A ColorSelect dialog as illustrated in Figure 756 appears Figure 756 QuickTitler ColorSelect Dialog ...

Page 622: ...idth Note Color gradations can also be applied to the border See Applying Color Gra dations on page 602 for more information Applying Shadows Shadows can be applied to graphic objects as illustrated in Figure 757 Figure 757 QuickTitler Graphic Shadow 1 Select an image or graphic to which to add a shadow 2 If the Shadow tree is not already expanded click the to expand the Shadow tree in the Image o...

Page 623: ...EDIUS User Reference Guide 623 Titles Figure 758 QuickTitler Image and Object Properties Shadow Tree 4 Click the color palette A ColorSelect dialog as illustrated in Figure 759 appears ...

Page 624: ...o specify the shadow width 7 Move the Horizontal and Vertical sliders to adjust the shadow position as an offset from the graphic object 8 If desired move the shadow Transparency slider to adjust the transparency of the shadow Note Color gradations can also be applied to the shadow See Applying Color Gra dations on page 602 for more information Blur a Graphic or Image The blur effect can be applie...

Page 625: ...he Image or Object Properties bar See Figure 761 Figure 761 QuickTitler Image or Object Properties Blur Tree 3 Enable the Blur settings 4 Adjust the blur settings by moving the sliders or entering values directly to Image Border Shape Border Border or Shadow to blur the respective image or graphic element Changing Line Styles The style of a line object can be changed as illustrated in Figure 762 ...

Page 626: ...click the to expand the Style tree in the Object Properties bar See Figure 763 Figure 763 QuickTitler Line Styles 3 Enable the Style settings 4 Select the desired line style start style arrowhead or no arrowhead and end style arrowhead or no arrowhead by selecting styles from the drop down lists The Line Style drop down list is shown in Figure 763 Embossing Graphics Emboss effects may be applied t...

Page 627: ...ct to which to apply emboss effects 2 If the Emboss tree is not already expanded click the to expand the Emboss tree in the Object Properties bar See Figure 765 Figure 765 QuickTitler Object Propertied Emboss Tree 3 Enable the Emboss settings 4 Select Inside or Outside to specify the edge to emboss 5 Enter the desired values in the emboss settings fields ...

Page 628: ...object may be adjusted by the following operations Front moves the selected object forward one layer Back moves the object back one layer Top makes the object the top layer over all others Bottom makes the object the bottom layer under all others Unless object overlap each other the object order is not important as all objects are layered on top of the background image However object layer is impo...

Page 629: ...ect at bottom with respect to each other Center horizontally center selected objects horizontally with respect to each other See Center in Screen below to center objects horizontally on the screen Center vertically center selected objects vertically with respect to each other See Center in Screen below to center objects vertically on the screen Figure 767 shows three title objects selected in thei...

Page 630: ...use the Center in Screen menu Same Space This option is available only when three or more objects are selected I t pro vides tools for evenly spacing or aligning objects with respect to each other Align at right and left adjust three or more objects so they are aligned at their right and or left edges Align at top and bottom adjust three or more object so they are evenly spaced from top to bottom ...

Page 631: ...e Guide 631 Titles Figure 769 Objects Note Evenly Spaced from Top to Bottom Figure 770 shows these same objects after being aligned from top to bottom in the same space Figure 770 Objects Evenly Spaced from top to Bottom ...

Page 632: ... s vertically on the screen Title Mixer Effects Title mixer effects determine how a title appears and disappears in a video project Title mixer effects are found in the Effect Palette To add a title mixer effect to a title clip do the following 1 In the Effect Palette select the desired Title Mixer effect See Figure 771 Figure 771 Effect Palette Title Mixer Effects 2 Drag the effect to the mixer t...

Page 633: ...t the add point In Out or Both Select the mixer area of a Title clip and drag and drop the desired title mixer effect from the Effect Palette to the Information Palette Note When a Title clip is placed on the Timeline the default title mixer effect is added automatically The default effect can be changed as can the default Title clip duration See Changing Default Effects on page 520 and Duration S...

Page 634: ...es Figure 773 Timeline Title Clip Layout Menu The LAYOUT dialog shown in Figure 774 appears Figure 774 Title Layout Dialog 2 Drag the title to change its position and position precisely by using the title layout guides and tools explained below See Figure 775 ...

Page 635: ...en the check mark is present the boundary is displayed Over Scan Area The Over Scan area boundaries are displayed by enabling OVER SCAN AREA in the bottom left corner When the check mark is present the boundary is displayed Centering Cornering Button This button contains five small buttons that correspond to the outside corners and the center positions of the area selected as the BASIC AREA Clicki...

Page 636: ...ectly to reposition the title Editing a Linked Title Clip If the same Title clip is used multiple times on the Timeline all instances of the Title clip are linked Editing one instance changes all the linked instances as they refer to the same clip To edit a single instance of a clip used more than once on the Timeline do the following 1 On the Timeline double click the instance of the clip you wis...

Page 637: ...ile extension of etl Those created with TitleMotion Pro have an icg extension Importing Background Files An image may be imported and used as the background for editing Title clips Note The background image is used in the editing process only It is not saved with the Title clip To import a background image for title editing do the following 1 If the Background tree is not already expanded click th...

Page 638: ...n containing the image you wish to import select the image file and click the Open button 4 Select the Still Image background type in the Background tree See Figure 777 Note Video displays the video at the position of the Timeline cursor White or Black sets the editing background to one of these colors The selected image is applied as the editing background as illustrated in Figure 778 ...

Page 639: ...port the title object as a still image do the following 1 In QuickTitler select the title object to be exported and select File Export from the QuickTitler menu bar as illustrated in Figure 779 Figure 779 QuickTitler File Export A Save As dialog appears 2 Navigate to the location in which to save the file specify the desired file name and format and click the Save button ...

Page 640: ...osition the Timeline cursor at the point at which you wish to insert a title 2 Click the Create Title button on the Timeline 3 From the menu select the track to which to add the title See Figure 780 for an example Create Title in Current Track Place the title clip in the currently selected track Create Title in T X track Place the title clip in the specified title track where X is the number of a ...

Page 641: ...the desired title s using the TitleMotion Pro tools and click the Save and Exit button see Figure 782 to save changes and close the TitleMotion Pro window Figure 782 TitleMotion Pro Save and Exit The title is added to the clip at the Timeline cursor location See Figure 783 ...

Page 642: ... User Reference Guide Section 6 Effects and Titles Figure 783 TitleMotion Pro Title Added For more information concerning TitleMotion Pro and it capabilities see the TitleMotion Pro documentation and Help files ...

Page 643: ... balance The shape of the rubber bands controls the volume and pan along the time axis To adjust volume and pan do the following 1 Click the Expand button in a track containing audio See Figure 784 Figure 784 Audio Track Expand The track expands to the display the volume and pan rubber bands and an audio waveform Note The first time the track is expanded an audio waveform cache is created On long ...

Page 644: ... an adjustment point is to right click on the rubber band and select Add Delete from the menu 4 Drag the point vertically or horizontally to adjust the shape of the rubber band Note Regardless of the display mode linear or logarithmic dB of the audio rubber bands node to node adjustments are always linear When VOL is selected drag the point upwards to increase the volume and downward to decrease t...

Page 645: ...sing the SHIFT ALT keys and dragging the rubber band adjusts the entire rubber band vertically Pressing the ALT key and clicking on the rubberband where no adjustment point exists add points and adjusts the rubber band between these new points To delete a point from the rubber band right click on the point and select Add Delete from the menu Entering Value Adjustments Volume and pan can also be ad...

Page 646: ...t on the rubber band to the same value Add Points and Move Adds two points at the location of the selected point and the next point and adjusts them to the entered value Move All Other points move vertically to maintain their relative position to the entered value Move All On Scale Adjust the volume pan of all points by the same amount An entry dialog appears for either Volume or Pan depending on ...

Page 647: ...2 Click the Volume Pan button to switch to Pan mode 3 Right click the Pan rubber band 4 Select Center from the menu The Pan rubber band is returned to the center position on the audio wave form Deleting or Initializing Rubber Band Points Initializing the Rubber Band All points on a rubber band can be deleted and the rubber band returned to its default state initialized by doing the following 1 Sel...

Page 648: ...ete Parts Audio Rub berband Volume or Edit Delete Parts Audio Rubberband Pan Select a clip and press SHIFT ALT H on the keyboard to delete all points and initialize the Volume rubber band Select a clip and press CTRL ALT H on the keyboard to delete all points and initialize the Pan rubber band Delete Selected Rubber Band Points To delete all or selected rubber band points or to initialize return t...

Page 649: ... without deleting the points Normalize Audio The normalize function simultaneously adjusts the audio level of one or more clips to the level specified Audio normalization cannot be applied to the following clip types Timeline sequence clips Clips created by time remap editing Proxy clips To normalize audio do the following 1 Select one or more clips on the Timeline 2 Right click on one of the sele...

Page 650: ...alog 3 Enter the audio level to which all selected clips will be normalized and click the OK button Note The maximum allowable audio gain is 24dB 400 Audio in the selected clips is normalized If a gain value other than 0 dB was applied normalized clips will have an aqua line under the audio portion of the clip as illustrated in Figure 797 Audio Normalization Applied ...

Page 651: ...e 798 Figure 798 Audio Info Normalized Clip The calculated gain value can be changed by entering another value When the Apply button is clicked to apply the change the dialog shown in Figure 799 appears Figure 799 Apply Gain Change Dialog If the Yes button is clicked the gain values is applied to all channels in the clip If the No button is clicked the gain values is applies to only the channel se...

Page 652: ...hat may be selected for viewing in the Asset Bin detailed view Audio Mixer Operations Adjusting Audio in the Mixer To adjust audio using the audio mixer perform the following actions 1 Click the Toggle Audio Mixer Display button in the Timeline Window The Audio Mixer see Figure 800 appears Figure 800 Audio Mixer 2 Move the fader on the Master controls up and down to adjust the volume of all audio ...

Page 653: ...IFT L Playing Clips From the Audio Mixer Click the Play button in the Audio mixer The clip at the position of the Timeline cursor begins to play and the appro priate audio meters are displayed See Figure 801 for an example Figure 801 Playing Clips in the Audio Mixer While playing clips from the audio mixer the sliders can be used to adjust volume to the desired level Switching the Indicator Displa...

Page 654: ...ume balance of each track Full Scale 0 in the scale represents the maximum allowable sam pling value Audio Reference Scale Specifies the value 0 in the scale as the sampling value preset in Audio Reference Level in the project set tings Audio Track Operations To change track operations do the following 1 In the audio mixer click the Operation button under the track for which you wish to change the...

Page 655: ...to the end of playback Touch Apply the changes to the Timeline from the position at which you start dragging the fader until the fader is released Write Apply the changes to the Timeline through the entire play back This mode overwrites all previously set volume values irre spective of and fader dragging actions Note Track operation set to Latch Touch and Write all return to None when playback end...

Page 656: ...rs and fader From left to right these are Gang1 Gang2 and Gang3 To gang tracks and adjust them simultaneously do the following 1 On any audio track you wish to gang click the Gang button Gang1 Gang2 or Gang3 to which you wish to assign the track The gang button and audio track fader change to the color of the selected gang yellow red or blue 2 Adjust the fader on one of the ganged tracks All gange...

Page 657: ...d as the fader on one of the tracks is moved When one of the faders other than the one being adjusted reaches the upper or lower scale limit its movement stops but the other faders in the gang continue to move towards the limit Playing or Muting a Specified Track Each audio track has a Solo button and a Mute button See Figure 806 Figure 806 Audio Mixer Solo and Mute Buttons ...

Page 658: ...lected Applying V Mute V mute allows you to specify a point on the audio waveform Timeline at which the audio should be muted This is useful for eliminating small amounts of unwanted audio noise This noise will likely be visible in the audio waveform To V mute audio do the following 1 If the audio waveform is not currently displayed for the track on with you wish to set a V mute click the Expand b...

Page 659: ...sor is set to 0 See Figure 810 Figure 810 V Mute Set on Audio Volume Rubberband Note The default duration of a V Mute can be adjusted in the Duration Settings dialog See Duration Settings on page 137 and V Mute on page 139 for more information Adding Voice Overs and Sound Effects Voice overs narrations and sound effects can be added to clips placed on the Timeline ...

Page 660: ...on Timeline on page 326 for more information 2 Click the Toggle Voice Over Display button highlighted in blue in Figure 811 Note Selecting Capture Voice Over from the Preview window menu bar also display the Voice Over dialog Figure 811 Toggle Voice Over Display Button The Voice Over dialog illustrated in Figure 812 appears Note Depending upon the audio card installed in the EDIUS computer the Voi...

Page 661: ...Bin Track Add the audio clip to the A track specified in Step 1 7 In the File name field enter the desired name for the audio clip and select the location in which to store the clip by clicking the button 8 Prepare the source microphone line in aux etc and click the Start button Note When the Start button is clicked the button name changes to End In the upper left corner of the Recorder window a w...

Page 662: ...e Guide Section 7 Audio Operations The white bars shown in Figure 814 at the right end of the level meters change to red if the volume exceeds 0 dB Click the bars to return to the default settings Figure 814 Peak Level Reset ...

Page 663: ...ort process make sure the following settings are configured per your preferences Set IN and OUT points to specify the export range if only a portion of the project is to be exported If exporting still images make sure still image plug in settings are set according to your preferences If chapters are desired make sure the appropriate chapter marker points are set See Setting Markers on page 414 Usi...

Page 664: ...Uncompressed YUY2 AVI iPod HD P2 Clip Infinity MPEG MPEG Elementary Stream MPEG Generic MPEG HDV AVCIntra MXF MPEG2 MXF QuickTime Windows Media Audio Windows Media Video XDCAM HD XDCAM EX To use the Exporter do the following this example shows exporting to Windows Media Video format procedures for other formats may vary 1 Click the Export button in the Recorder as shown in Figure 815 ...

Page 665: ... Exporting in Various File Formats Figure 815 Export Button Menu The Export menu appears 2 Select Print to File from the menu The Select Exporter Plug In Dialog appears as illustrated in Figure 816 Figure 816 Exporter Plug In Dialog ...

Page 666: ...4 Select any of the desired optional export parameters Export between In and Out Exports only the portion of the Timeline contents between the In and Out points De select this option to export the entire Timeline contents ignoring the In an Out points Display timecode Displays the timecode in the exported file Enable conversion If selected video and audio conversion parameters may be adjusted indi...

Page 667: ... the location to which to save the Video and Audio Elementary streams as illustrated in Figure 818 Note The location for the elementary streams is selected for both Video and Audio streams by browsing with either Select button When the file name is entered the m2v extension is automatically added for the video stream and mpa is added for the audio stream ...

Page 668: ... Basic Settings tab set the desired Video and Audio encoding parameters from the available options in the drop down lists Note If Linear PCM is the selected audio format it is exported as a WAV file with timecode included 8 Select the Extended Settings tab Illustrated in Figure 819 to define additional export parameters ...

Page 669: ... selected format Note Procedures from Step 3 to the end may differ substantially depending upon the selected export format Advanced Exporter Settings If the Enable conversion option is selected in the Exporter advanced video and audio conversion parameters may be defined To use advanced settings after selecting the Enable conversion option click on the button in the Exporter Plug In dialog The Exp...

Page 670: ...670 EDIUS User Reference Guide Section 8 Exporting Project Output Figure 820 Advanced Conversion Settings ...

Page 671: ... the aspect ratio defined in the project settings from which the current project will be exported If you wish to export the project in a different aspect ratio select it from the list Letterbox Crop Settings Select the type of letterbox or cropping to take place when the project is displayed on a screen that does not have the same aspect ratio as the project Crop Overscan If an overscan was design...

Page 672: ...t output Sampling Rate From the drop down list box select the desired audio sampling rate Current project setting is the sampling rate defined in the project set tings from which the current project will be exported If you wish to export the project with a different sample rate select it from the list Sample Format From the drop down list box select the desired audio sample format Export Audio Sel...

Page 673: ...e from the menu The Select Exporter Plug In dialog in appears Figure 822 Select Exporter Plug In Dialog Save Preset As Default Any Exporter preset may be set as the default exporter With the Select Exporter Plug In dialog open do the following to save a preset as the default 1 Select the desired default Exporter preset from the Preset list ...

Page 674: ...default from the menu on the left See Figure 824 for an example Figure 824 Exporter Preset Default Selected Save Preset The list of available presets in EDIUS is very extensive however your proj ects may commonly use only a few file formats and Exporter presets To save your commonly used presets to the My presets list on the menu do the following 1 Select the Preset you wish to save 2 Click the Sa...

Page 675: ...m the example in Figure 825 Different formats have different available settings Figure 825 Save Preset Dialog 3 Modify the name and description if desired 4 Modify any settings or parameters that may be associated with the selected Preset 5 Click the OK button The Preset is saved in the My presets list in the menu as shown in Figure 826 ...

Page 676: ...ort Preset Exporting presets is particularly useful in preparation for an upgrade to a new version of EDIUS Any custom user presets that you may want to use in the new version may be exported from the current version It is also useful to export these presets should EDIUS need to be reinstalled To export Exporter presets as a tpd file do the following 1 Select the preset to be exported from the My ...

Page 677: ...location in which exported preset files are located 3 Select the preset file tpd to be imported 4 Click the Open button The preset is imported Add to Batch List Sequence or portions of a sequence may be added to a batch list for batch processing and export at a later time Sequences in the batch list may use the same or different Exporter Presets It is also possible to export multiple ranges from t...

Page 678: ...on Menu The Export menu appears 3 Select Print to File from the menu The Select Exporter Plug In dialog in appears 4 Select an Exporter and click the Add to Batch List button Note Some Exporters do not support batch export If one of these Exporters is selected the Add to Batch List button is disabled A File Save dialog appears with the name of the selected Exporter 5 Navigate to the folder in whic...

Page 679: ... scale and select Add Batch Export Item Note If a default Exporter has been set the menu option Add Batch Export Item Default Exporter is available If this menu option is selected the file name and destination are set automatically File name Exp month date _000 extension based on Exporter type The three digit number increments for each file and is sequential Sample file name with MPEG Generic Expo...

Page 680: ...information Delete from Batch Export List To delete an entry previously added to the batch export list do the fol lowing 1 Click the Export button in the Recorder as shown in Figure 815 Figure 830 Export Button Menu The Export menu appears 2 Select Batch Export from the menu The Batch Export dialog appears 3 In the batch export list right click the entry to be deleted and select Delete from the me...

Page 681: ...alog 3 Make any desired changes to the batch export list See Modifying the Batch Export List for more information 4 Select or de select sequences in the export list as desired Note All sequences in the list may be selected by right clicking on the export list and selecting Select All from the menu Note Sequences de selected for export remain in the batch list however they are not exported 5 Click ...

Page 682: ...er may be selected for adding and additional item to the batch export list The portion of the current sequence between the In and Out points is automatically added to the list As explained below these set tings may be adjusted in the batch export list Figure 834 Add Batch Export Item Button Highlighted Add Batch Export Item Default Exporter Clicking the Add Batch Export Item default exporter butto...

Page 683: ...em Render Format Button Highlighted Delete Batch Export Item Clicking the Delete Batch Export Item render format button highlighted in blue in Figure 837 deletes the selected item s from the batch export list Figure 837 Delete Batch Export Item Button Highlighted The confirmation dialog shown in Figure 838 appears Click the Yes button to confirm deletion of the selected item s Figure 838 Delete Ba...

Page 684: ...the range of the clip the timecode is displayed in red text and export of the clip is disabled Note A new export range may be specified and added to the batch list by right clicking on the export list and selecting New from the menu Show TC Select this option if you wish the timecode to be displayed on the exported sequence Waveform Cache Enable this option if an audio waveform is desired with the...

Page 685: ... items can be added New and deleted In addition all items in the list can be selected and the designated exporter changed for all selected items Export to DVD or Blu Ray EDIUS projects can be exported to DVD or Blu Ray with the Burn to Disc application Burn to Disc allows you to create title and chapter menus define menu backgrounds and create menu buttons Sources that can be output to disc with t...

Page 686: ...the size of the file to be exported To export a project to disc do the following 1 Click the Export button in the Recorder See Figure 840 Figure 840 Export Button Menu 2 Select Burn to disc from the menu Note You may also select File Print Burn to disc on the Preview window menu bar The Burn to Disc application starts up with the Movie tab selected as illustrated in Figure 841 ...

Page 687: ...ill be saved The Title tab s show the movie s currently included in the project as well as the current aspect ratio frame size encoding bit rate and file size on the disc 3 If you wish to add more titles to the project click the Add File or Add Sequence Button in the blank Add tab and select the desired title s to be added Note Add File allows you to add files in supported formats such as MPEG VOB...

Page 688: ...ny title click the Setting button in the appropriate Title tab The Encode Parameters dialog shown in Figure 842 appears Figure 842 Encode Parameters Note In order to change the Video or Audio encoding parameters the Auto set tings must be de selected as shown in Figure 842 5 Make any desired changes to the video an audio encoding parameters and click the OK button 6 If more than one title is inclu...

Page 689: ...to which to burn the project DVD or BD Blu Ray Use Menu If you want a menu created for the project select this option If you want no menu de select this option If this option is de selected all other menu options are disabled and the menu preview window goes black Auto Layout Select Auto if you want Burn to Disc to automatically arrange title and chapter buttons on the menus If this option is de s...

Page 690: ...is only one chapter in the movie This will create a title menu only with no chapter menu No Title Menu only one title Select this option if there is only one title in the project This will create a chapter menu only for the single title with no title menu Select the menu style from the tabs across the bottom of the screen The available categories are Simple Image Business Travel Wedding Seasons Po...

Page 691: ...he Edit Design dialog 10 Make any desired changes to the menus using the Edit Design controls and buttons Page Selection Use these buttons to select the menu page to be displayed in the Preview Edit window The drop down list provides a list of the title and chapter menus in a project The right and left arrow buttons allow you to chose the menu page if the selected menu has multiple pages ...

Page 692: ...ed the Item Setting dialog appears See Item Settings below for more information Placement Size Controls Menu element placement and size may be modified by entering values for the X Left and Y Up coordinates and the Width and Height All values are expressed in pixel measurements Show Item Grid Displays grid lines around the selected item as an aid in aligning and placing that item in the menu Adjus...

Page 693: ...olid Color Select the color by clicking on the color box Gradation Color Select a beginning and ending color from the color boxes as well as the number of gradations steps count between the colors Set the gradation angle by holding down the mouse button while rotating the arrow Texture File select a texture file to be used by clicking the button and navigating to the desired file name Enter the fo...

Page 694: ...er Right and one of Top Centered Bottom may be selected simultaneously Click the Effect tab to add effects to the text Click the tab for each desired effect select the Enable option to enable the effect and set the desired effect parameters for the following effects see Figure 846 Edge Shadow Frame Embossing Figure 846 Burn to Disc Item Setting Text Effects Dialog Click the OK button to close the ...

Page 695: ...as the thumbnail appears in the EDIUS Preview window Return to the Item Setting dialog and click the Set button to change the image Select the Set Image File option to import an image from an external file Click the button to browse for an image file Move the Zoom slider to zoom in or zoom out on the picture to select the portion of image to use as the thumbnail Click the Effect tab to add a borde...

Page 696: ...Project Output Figure 848 Burn to Disc Item Setting Picture Effect Dialog Click the OK button to close the Item Setting dialog 11 Click the Write tab to set the project output parameters The Burn to Disc Output to DVD dialog shown in Figure 849 appears ...

Page 697: ...s Volume Label Enter the volume label for the disc Number of Discs Enter the number of copies of the disc you wish to burn Note A prompt to insert another disc will appear as each copy is successfully burned When all copies are burned the message burn to disc completed will appear Drive Select an installed burner to be assigned to each drive number ...

Page 698: ...der that can be burned to disc or mounted as a virtual drive Export Also as Disc Image File Created a disc image file in addition to burning the content to disc Note Files saved by selecting this option are overwritten by the next disc output operation If you need to keep the files in this directory either specify a dif ferent work directory for subsequent output operations or move the existing fi...

Page 699: ...action after playing a title Back to menu Play next movie title Select the desired action after playing the last title on the disc this selection is only available if Play next movie title is selected in the previous option Back to menu Repeat play from the first movie title Stop playing 13 Click the Burn button to output the project to disc using the parameters and options selected in the previou...

Page 700: ... image or scene is located 2 Click the Export button in the Recorder See Figure 851 Figure 851 Export Button Menu 3 Select Print to File from the menu Note Alternative methods are pressing F11 on the keyboard and selecting File Print Print to File from the Preview window men bar The Select Exporter Plug In dialog appears 4 Select the Others from the category list on the left and Still Image from t...

Page 701: ...User Reference Guide 701 Exporting in Various File Formats Figure 852 Still Image Exporter 5 Click the Export button The Still Image Save dialog shown in Figure 853 appears Figure 853 Still Image Save Dialog ...

Page 702: ... as a still image Save Between In Out in Sequential Files Exports all frames between In and Out points on the Timeline as still image files 8 digit sequential numbers are added to the end of each file name Images are exported as explained above depending on the selected file save button 9 Click the Close button to close the Still Image Exporter Export to Tape Projects may be exported to tape on an...

Page 703: ...see the instruction manual for the HDV device 2 Select Capture MPEG TS Writer on the Preview window menu bar See Figure 855 Note An alternative method is to click the Tools button in the Asset Bin and select MPEG TS Writer from the menu Figure 855 Capture Menu MPEG TS Writer The MPEG TS Writer dialog in Figure 856 appears Figure 856 MPEG TS Writer Dialog ...

Page 704: ... button 5 Select the m2t output file and click the Open button The file is added to the file list see Figure 857 Figure 857 MPEG TS Writer Output File List 6 Click the Write button Note To output the video is from the HDV device component output for previewing without recording to tape click the Preview button 7 Click the OK button 8 Click the Exit button to close the MPEG TS Writer dialog Output ...

Page 705: ...rrent Setting button The Project Settings dialog shown in Figure 858 appears Figure 858 Project Settings Dialog 5 Select Generic OHCI SD NTSC in the Output Device section and select the desired output format 6 Click the OK button to close the Project Settings dialog 7 Click the Export button in the Recorder See Figure 859 ...

Page 706: ...om the menu Note Alternative methods are pressing F12 on the keyboard and selecting File Print Print to Tape or Print to Tape Display Timecode from the Preview window men bar The Tape Export Wizard dialog in Figure 860 appears Figure 860 Tape Export Wizard 9 Click the Next button The Tape Export Wizard Confirmation dialog illustrated in Figure 861 appears ...

Page 707: ...Not Controlled by Deck Settings Some external playback recording devices cannot be controlled started stopped etc from EDIUS Deck Settings see Deck Settings on page 142 for more information do not apply to these devices and all source control operations must be performed manually on the device To export to a device not controlled by deck settings do the following 1 Connect the device to the EDIUS ...

Page 708: ...708 EDIUS User Reference Guide Section 8 Exporting Project Output ...

Page 709: ...ger EDIUS SP SDI displays as SHX E2 The settings for both are identical with the only difference being the name SHX E1 or SHX E2 Settings are accessed by selecting Settings Hardware Settings from the Preview window and then selecting SHX E1 or SHX E2 Settings Note If the Hardware Settings tree is collapsed click the to expand the tree System Settings To define System Settings for an SHX E1 or SHX ...

Page 710: ...he system may run out of physical memory which will degrade real time playback performance Adjust the RT buffers with caution Note After changing the size of RT buffers EDIUS must be restarted for the change to take effect 4 From the Sync Signal drop down list select the desired Sync Signal type The choices are REF input sync Input sync and OFF free run Note If the selected reference method does n...

Page 711: ...en though the setting remains at Input Sync If an input sync source is then supplied the system will con tinue to operate in Off free run mode To force the detection of the sync source Click on the Player and then the Recorder in the Preview window Switching the active preview window will force the system to recognize the sync signal and operate in Input Sync mode 7 Click the OK button to save set...

Page 712: ...matically recognize SD and HD input sources and switch accordingly HD for monitors with HD input only and SD for monitors with SD inputs only 4 Select the Mute if this setting does not match the output format option if you wish to mute output when the monitor format is different than the format selected on the Timeline 5 Select the desired setup level black level for NTSC format Note 0 IRE is comm...

Page 713: ...log Audio Monitoring drop down list box select the desired channel for audio monitoring Choices are Ch 1 2 Ch 3 4 or Ch 1 3 2 4 10 If applicable select the two VBI lines on which VITC vertical interval timecode data is present Typically this is lines 14 and 16 for NTSC and lines 19 and 21 for PAL video 11 Click the OK button to save the settings and close the General I O Settings dialog While in t...

Page 714: ...ng adjustment in number of frames when recording on a VCR is stopped Zero 0 no adjustment 5 In the Record Position field enter the position adjustment in number of steps when beginning to record Zero 0 no adjustment 6 Select the Use cueup command if DV deck has option if the DV deck supports the cueup feature 7 Click the OK button to save the DV Device settings and close the dialog While in the DV...

Page 715: ...lection only appears in the Hardware Settings tree for a device if that device is selected in the Capture menu in the Preview window To define input settings for any device do the following 1 If necessary click the to expand the settings tree for the device 2 Select Input Settings from the settings tree A dialog similar to that in Figure 865 appears Figure 865 Input Settings ...

Page 716: ... the value the less saturated lighter the color A value of zero 0 produces grey scale images Sharpness The smaller the value the more blur in the image out line The larger the value the sharper the image 4 Click the Image Adjustment button The dialog in Figure 866 appears Figure 866 3D 2D Visual Processing Dialog 5 Select the desired noise reduction NR setting from the drop down list for 3D Visual...

Page 717: ...wn lists and sliders Black Gain Strengthens the gain in low luminance areas of the luminance signal The higher the setting the more the emphasis on black gain Adaptation Level Not available if Black Gain is set to None Sets the adjustment limit for black expansion The higher the level the more emphasized the black gain Threshold Not available if Black Gain is set to None Sets the level of luminanc...

Page 718: ...r white gain A higher level results in less white gain adjustment Threshold Not available if White Gain is set to None Sets the level of luminance towards which white gain will be adjusted The higher the number the darker the level of white 12 Click the Apply button to apply the changes 13 Click on the Outline Enhancement tab The dialog in Figure 868 appears Figure 868 Outline Enhancement Dialog 1...

Page 719: ... available on all hardware devices 20 From the Control Mapping drop down list select RS422 REMOTE if you wish to enable remote control through the RS422 serial port Note This option is not available in all hardware devices 21 Select the Use TC Input Terminal option if you want to use the timecode terminal for remote control Note This option is not available in all hardware devices 22 Click the OK ...

Page 720: ... can produce large file sizes select this setting when high quality image capture is needed Online Standard default Offline not currently available Custom Note Only the Custom selection allows you to adjust the Q and Max size min sliders 4 If the Custom codec setting was selected adjust the Q and Max size min sliders as desired Note The scale on the Q slider is from 4 to 19 The lower the number th...

Page 721: ...bps If you want the upper limit to be 200 Mbps for example set the Max size min slider at 27 200 is approximately 27 of 750 Clicking the Default button resets all settings to the defaults 5 Click the OK button to save settings and exit the settings dialog Video Overlay Settings Video playback on the EDIUS computer monitor is performed using video overlay To define Video Overlay Settings for any de...

Page 722: ...not appear for all hardware devices 3 From the drop down list select the desired Video Display Type Choices are DirectDraw Overlay displays video using the DirectDraw Overlay surface Direct3D9 displays video using Graphics Processing Unit GPU func tions default 4 From the drop down list select the desired Update Period screen refresh rate ...

Page 723: ... the highest speed default Lock Unlock relatively high speed video processing Update Overlay lowest speed video processing 6 Click the OK button to save changes and exit the dialog Note EDIUS must be restarted for any changes in Video Overlay settings to take effect EDIUS NX NX Express NHX Settings Depending upon the type of NX board installed in the EDIUS Computer the device will display as NHX E...

Page 724: ...ack buffer from which frames are then taken for playback Memory reserved for the RT buffer is not avail able to other programs If the RT buffer is too large the system may run out of physical memory which will degrade real time playback performance Adjust the RT buffers with caution Note After changing the size of RT buffers EDIUS must be restarted for the change to take effect 4 Click the OK butt...

Page 725: ...the Monitor Format drop down list select the appropriate monitor format Choices are Multi format for a monitor that can automatically recognize SD and HD input sources and switch accordingly HD for monitors with HD input only and SD for monitors with SD inputs only 4 Select the Mute if this setting does not match the output format option if you wish to mute output when the monitor format is differ...

Page 726: ...be displayed on televisions that support WSS with automatic aspect ratio 4 3 or 16 9 switching 8 Click the OK button to save the settings and close the General I O Settings dialog While in the System Settings dialog clicking the Default button returns all settings marked with an to their default values DV Device Settings 1 If necessary click the to expand the NHX E1 NHX E2 Settings tree 2 Select D...

Page 727: ...ming adjustment in number of frames when recording on a VCR is stopped Zero 0 no adjustment 5 In the Record Position field enter the position adjustment in number of steps when beginning to record Zero 0 no adjustment 6 Select the Use cueup command if DV deck has option if the DV deck supports the cueup feature 7 Click the OK button to save the DV Device settings and close the dialog While in the ...

Page 728: ...1 Settings EDIUS RX E1 hardware is available in either an SD or HD version The SD and HD settings dialogs vary however both versions display as RX E1 in the Hardware Settings dialog and the Windows Device Manager System Settings SD and HD To define System Settings for an RX E1 device do the following 1 If necessary click the to expand the RX E1 Settings tree 2 Select System Settings from the RX E1...

Page 729: ...stem may run out of physical memory which will degrade real time playback performance Adjust the RT buffers with caution Note After changing the size of RT buffers EDIUS must be restarted for the change to take effect 4 From the Sync Signal drop down list select the desired Sync Signal type The choices are REF input sync Input sync and OFF free run Note If the selected reference method does not su...

Page 730: ...tomatically used even though the setting remains at Input Sync If an input sync source is then supplied the system will con tinue to operate in Off free run mode To force the detection of the sync source Click on the Player and then the Recorder in the Preview window Switching the active preview window will force the system to recognize the sync signal and operate in Input Sync mode 8 Click the OK...

Page 731: ...and SD for monitors with SD inputs only 4 Select the Mute if this setting does not match the output format option if you wish to mute output when the monitor format is different than the format selected on the Timeline 5 Select the desired setup level black level for NTSC format Note 0 IRE is commonly used in Japan and 7 5 IRE is commonly used in North America 6 Select the desired component level ...

Page 732: ... down list box select the desired channel for audio monitoring Choices are Ch 1 2 Ch 3 4 or Ch 1 3 2 4 11 Click the OK button to save the settings and close the General I O Settings dialog While in the General I O Settings dialog clicking the Default button returns all settings marked with an to their default values HD Balanced Audio Settings HD Only 1 If necessary click the to expand the RX E1 Se...

Page 733: ...el dBm Output Headroom dB and Output Level dBm settings 4 Click the OK button to save the settings and close the Balanced Audio Settings dialog While in the Balance Audio Settings dialog clicking the Default button returns all settings marked with an to their default values Input Settings HD Only See Input Settings on page 715 Canopus HQ Codec Settings SD and HD See Canopus HQ Codec Settings on pa...

Page 734: ...e RX E1 Settings tree 2 Select Downconverter Settings from the RX E1 Settings tree The dialog in Figure 877 appears Figure 877 RX E1 Downconverter Settings Dialog 3 Select the desired method for downconverting and scaling HD content to SD The scaler selections are Squeeze Letter box Side cut 14 9 and 13 9 4 Move the detail enhancement slider to the appropriate level of detail sharpening as desired...

Page 735: ...an to their default values Upconverter Settings HD Only 1 If necessary click the to expand the RX E1 Settings tree 2 Select Upconverter Settings from the RX E1 Settings tree The dialog in Figure 878 appears Figure 878 RX E1 Upconverter Settings Dialog 3 Select the desired method for upconverting and scaling SD content to HD The scaler selections are Stretch Top Bottom cut Side panel 4 Overscan and...

Page 736: ... blur but can increase jagginess diagonal lines 7 If Side Panel is the selected scaler setting enable Side panel color and select the desired color for the side panels 8 Enable or disable Chroma upsampling error correction Note If enabled chroma upsampling can reduce common upsampling artifacts such as streaky lines through the chroma channel This error is usually con fined to MPEG 4 2 0 compressi...

Page 737: ...le to other programs If the RT buffer is too large the system may run out of physical memory which will degrade real time playback performance Adjust the RT buffers with caution Note After changing the size of RT buffers EDIUS must be restarted for the change to take effect 4 For Analog Audio Monitoring select the desired channels for monitoring purposes Choices are Ch 1 2 Ch 3 4 and Ch 1 3 2 4 5 ...

Page 738: ...to expand the HXQ E1 Settings tree 2 Select Analog Output Settings from the HXQ E1 Settings tree The dialog in Figure 880 appears Figure 880 HXQ E1Analog Output Settings Dialog 3 From the Output Signal drop down list select the desired output signal type 4 Select the desired setup level black level from the Setup Level drop down list Note In analog video 0 IRE is commonly used in Japan and 7 5 IRE...

Page 739: ...ttings on page 719 Video Overlay Settings See Video Overlay Settings on page 721 HDSPARK HSX Settings EDIUS HDSPARK hardware displays as HSX E1 in the EDIUS settings screen and the Windows Device Manager HSX E1 settings are accessed by selecting Settings Hardware Settings from the Preview window and then selecting HSX E1 Settings Note If the Hardware Settings tree is collapsed click the to expand ...

Page 740: ...If the RT buffer is too large the system may run out of physical memory which will degrade real time playback performance Adjust the RT buffers with caution After changing the size of RT buffers EDIUS must be restarted for the change to take effect 4 From the Audio Monitor drop down list select the desired channel s for audio monitoring 5 If audio is output via HDMI select the desired audio channe...

Page 741: ...er HTX E1 settings are accessed by selecting Settings Hardware Settings from the Preview window and then selecting HTX E1 Settings Note If the Hardware Settings tree is collapsed click the to expand the tree System Settings To define System Settings for an HTX E1 device do the following 1 If necessary click the to expand the HTX E1 Settings tree 2 Select System Output Settings from the HTX E1 Sett...

Page 742: ...the system may run out of physical memory which will degrade real time playback performance Adjust the RT buffers with caution After changing the size of RT buffers EDIUS must be restarted for the change to take effect 4 Select the desired Sync Mode from the Sync Mode drop down list Note SYNC OK illuminates if the selected reference signal is detected on the HTX E1 If No signal is detected the NO ...

Page 743: ...s marked with an to their default values General I O Settings 1 If necessary click the to expand the HTX E1 Settings tree 2 Select General I O Settings from the HTX E1 Settings tree The dialog in Figure 883 appears Figure 883 HTX E1 General I O Settings Dialog 3 Select the desired setup level black level from the Setup Level drop down list 4 Select the desired component level from the Component Le...

Page 744: ...annel output 8 Enter the vertical blanking interval line s on which VITC vertical interval timecode is output 9 Click the OK button to save the settings and close the General I O Settings dialog While in the General I O Settings dialog clicking the Default button returns all settings marked with an to their default values Input Settings 1 If necessary click the to expand the HTX E1 Settings tree 2...

Page 745: ...ect the desired setup level black level from the Setup Level drop down list 5 Select the desired component level from the Component Level drop down list 6 Adjust the Gain Control by moving the slider to select the desired value 7 If available select the desired audio mapping from the Audio Mapping drop down list 8 For control purposes select the desired control mechanism from the Control Mapping d...

Page 746: ...ces have been configured the device is available for selection as an Input device in the Input Settings dialog Direct Show Device Settings are accessed by selecting Settings Hardware Settings from the Preview window and then selecting DirectShow Device Settings Note If the Hardware Settings tree is collapsed click the to expand the tree There are two settings dialogs for DirectShow Devices Canopus...

Page 747: ...the current selection The Search for devices button is clicked to force detection of all attached devices if a new device is attached after opening the Hardware Settings dialog 4 Select the desired video frame rate calculation method by selecting or de selecting the Set video frame rate from audio sampling rate check box Default Checked Checked calculate the video frame rate from the number of sam...

Page 748: ...dec Settings on page 719 Video Overlay Settings See Video Overlay Settings on page 721 EDIUS Generic OHCI Settings Generic OHCI Settings are accessed by selecting Settings Hardware Set tings from the Preview window and then selecting Generic OHCI Settings Note If the Hardware Settings tree is collapsed click the to expand the tree There are three settings dialogs for Generic OHCI devices System Ou...

Page 749: ...for the RT buffer is not avail able to other programs If the RT buffer is too large the system may run out of physical memory which will degrade real time playback performance Adjust the RT buffers with caution Note After changing the size of RT buffers EDIUS must be restarted for the change to take effect 3 From the drop down list select the desired encoding format Choice are DVCAM default and DV...

Page 750: ...annel 1 2 default Channel 3 4 Channel 5 6 Channel 7 8 7 Set the setup black level as desired Choices are 0IRE default or 7 5IRE Note 0 IRE is used in Japan and 7 5 IRE is used in North America Click the Default button to return all settings to their defaults 8 Click the OK button to save changes and exit the dialog DV Device Settings To define DV Device Settings for a generic OHCI device do the fo...

Page 751: ...nd Timing by entering the desired timing adjustment in frames when stopping recording Default 6 4 Set the Record Position adjustment in steps when beginning recording Default 0 5 Select Use cueup command if DV deck has to speedup the cueup operation if the deck supports this function Click the Default button to reset all settings to their defaults 6 Click the OK button to save changes and close th...

Page 752: ...752 EDIUS User Reference Guide Appendix A Hardware Settings ...

Page 753: ...re effect do the following 1 Place a clip in the Timeline on a track above the track containing a color bar clip as illustrated in Figure 888 Note The color bar clip is not required you could use any clip you desire as the background clip however the color bar clip as the background makes some actions easier to see as you experiment with and learn this procedure Figure 888 Keyframeable 2D PIP Clip...

Page 754: ...able 2D PIP Recorder Preview 4 Open the Picture in Picture effect settings by double clicking the Picture in Picture effect in the effects list of the Information Palette The Picture in Picture settings dialog shown in Figure 890 opens Figure 890 Picture in Picture Settings Dialog ...

Page 755: ...button and drag the image to the desired position 7 Click the location in the preview window at which you want to position the center of the end location A checkerboard representation of the PIP image appears with a square in the middle and an E under the square This is the End position The image at the Start position has a point in the center with an S above it A line connects the two points This...

Page 756: ... the orange outline appears and select Delete from the menu or press the DELETE key on the keyboard As illustrated in Figure 892 there are several layout options on the right click menu which affect the selected keyframe These may be used to set the keyframe position Figure 892 Keyframeable 2D PIP Right Click Layout Menu 10 Move the Timeline cursor back and forth to see the image move and scale be...

Page 757: ... the clip does not correspond to the intermediate keyframe position With the Timeline cursor positioned in the middle of the clip the middle of the clip is at the center point of the motion path as illustrated in Figure 893 Figure 893 Keyframeable 2D PIP Intermediate Keyframe 13 Click on the Motion Keyframe tab in the Picture in Picture settings dialog The dialog now looks like the example in Figu...

Page 758: ...ntermediate keyframe there will be a red horizontal line for each intermediate keyframe Point at Bottom Left Corner Start Keyframe S Point at Upper Right Corner End Keyframe E Horizontal Axis Beginning to end of clip Vertical Axis Movement of image over the length of the clip Diagonal Grey Line Motion progression of the PIP image 14 Move the Timeline cursor and watch the vertical red line change p...

Page 759: ...re the red lines intersect This will create a new node highlighted in orange on the grey line 17 Move the node until it touches the red horizontal line 18 Move the Timeline cursor towards the point at which the new node touches the red horizontal line Notice how the position of the PIP image moves towards the intermediate keyframe position and meets it when the vertical and horizontal red lines in...

Page 760: ... progression from the Start point to the End point changes When the grey line crosses a horizontal red line the PIP images hits a defined keyframe 19 Add another node to the grey line by clicking somewhere else on the line 20 Click on the new node and move it until it touches the red horizontal line The grey line should now be riding horizontal and on top of the red hor izontal line as illustrated...

Page 761: ...ontal line 22 Click on the graph between the two existing nodes and add another node to the grey 23 Drag the new node to a position under the red horizontal line 24 Move the Timeline cursor through the clip Notice that the PIP image moves toward the intermediate keyframe posi tion and then backtracks as it moves towards the node that is under the red line It then continues its progression towards ...

Page 762: ...me position becomes an inter mediate keyframe The position at which you added the new keyframe is now the new End keyframe position The red horizontal line representing the first key frame has now moved Adding the new End keyframe changed the length of the motion path it is now longer Since the vertical axis represents the beginning to the end of the motion path the position of the keyframes red h...

Page 763: ...nts at which the grey line intersects the red horizontal lines These intersection points correspond to timecodes in the clip at which the PIP image hits keyframes The best strategy is to define all the keyframe hit points first and then enter the Motion Keyframe tab and adjust the grey line so that the PIP image hits the keyframe points at the desired clip timecodes ...

Page 764: ...764 EDIUS User Reference Guide Appendix B Special Procedures ...

Page 765: ...80 29 97p HDV Sony Canon 1280x720 59 94p HDV JVC Infinity AVC Intra100 1280x720 29 97p over 59 94i HDV JVC 1280x1080 59 94i DVCPRO HD 1280x1080 29 97p over 59 94i 960x720 59 94p DVCPRO HD AVC Intra50 960x720 29 97p over 59 94p DVCPRO HD Table 9 Generic OHCI HD 50Hz Output Format Video Device 1920x1080 50i AVCHD Infinity HD D5 AVC Intra100 HDCAM SR 1920x1080 25p AVC Intra 100 HDCAM SR 1440x1080 50i...

Page 766: ...C Input Output Formats 1440x1080 50i 48kHz 2ch DVCPRO HD 1440x1080 25p over 50i 960x720 50p DVCPRO HD AVC Intra50 960x720 25p over 50p DVCPRO HD 960x720 50p over 60p 960x720 25p over 60p Table 9 Generic OHCI HD 50Hz Output Format Video Device ...

Page 767: ...59 94p 960x1080 24p over 60p Table 11 Generic OHCI SD NTSC Output Format Video Device 720x486 59 94i 4 3 D1 720x486 59 94i 16 9 720x480 59 94i 4 3 DVD DVD 720x480 59 94i 16 9 DVD 720x480 59 94i 4 3 48kHz 4ch DVCPRO50 720x480 59 94i 16 9 48kHz 4ch 720x480 59 94i 4 3 48kHz 2ch DV DVCAM 720x480 59 94i 4 3 44 1kHz 720x480 59 94i 4 3 32kHz 2ch 720x480 59 94i 4 3 32kHz 4ch 720x480 59 94i 16 9 48kHz 2ch ...

Page 768: ...76 50i 4 3 44 1kHz 720x576 50i 4 3 32kHz 2ch 720x576 50i 4 3 32kHz 4ch 720x576 50i 16 9 48kHz 2ch 720x576 50i 16 9 44 1kHz 720x576 50i 16 9 32kHz 2ch 720x576 50i 16 9 32kHz 4ch 720x576 25p over 50i 4 3 720x576 25p over 50i 16 9 720x576 50p 4 3 HDV JVC 720x576 50p 16 9 720x576 25p 16 9 Table 13 Generic OHCI SD 24Hz Output Format Video Device 720x480 23 98p over 59 94i 4 3 48kHz DV DVCAM 720x480 23 ...

Page 769: ... DVCPRO HD 960x720 Constant Rate Shooting over 60p DVCPRO HD 960x720 50p DVCPRO HD 960x720 29 97p DVCPRO HD 960x720 25p DVCPRO HD 960x720 23 98p Table 15 Generic HDV Input Input Format Codec Video Device Canopus HQ 1920x1080 59 94i Canopus HQ ADVC HDM1 Canopus HQ 1440x1080 59 94i HDV Sony Canon Canopus HQ 1440x1080 50i Canopus HQ 1440x1080 29 97 Canopus HQ 1440x1080 23 98p over 59 94i Canopus HQ 1...

Page 770: ...ng is not allowed if the codec is DirectShow DIF Stream Single File C M D T QuickTime Single File C M D WAVE Single File C M D Ogg Vorbis Single File C M D AIFF Single File C M D DirectShow Audio FIle Single File C M D Still Single File C M D QuickTitler Single File C M D Inscriber ICG File Single File C M D Windows Media Video WMV Single File C M D Window Media Audio WMA Single File C M D DirectS...

Page 771: ... Single File C M D T HD 960x720 24p over 60i Single File C M D HD 1280x1080 60i 50i 30p 25p 24p Single File C M D T HD 1280x1080 24p over 60i Single File C M D HD 1440x1080 60i 50i 30p 25p 24p Single File C M D T HD 1440x1080 24p over 60i Single File C M D HD 1920x1080 60i 50i 30p 25p 24p Single File C M D T HD 1920x1080 24p over 60i Single File C M D HDV 1280x720 24p over 60p JVC Single File C M ...

Page 772: ... Keyboard Shortcut Settings on page 172 Asset Bin Shortcuts Table 19 Asset Bin Shortcuts Function Shortcut Function Shortcut Add clip in Player to Asset Bin SHIFT CTRL B Open project CTRL O Open clip source file SHIFT CTRL P Delete unused rendered files ALT Q Add file to Recorder SHIFT CTRL O Save as SHIFT CTRL S Print to Tape F12 New sequence SHIFT CTRL N Search frame Player SHIFT CTRL F New proj...

Page 773: ...HIFT INSERT Move focus Up SHIFT CTRL ALT UP Paste to Timeline cursor position CTRL V Duration track transition Out CTRL ALT U Clip properties ALT ENTER Mute SHIFT S Clip enable disable 0 Monaural channel 1 selected track 1 Release clip channel audio 8 Monaural channel 2 selected track 2 Release clip channel all 9 Monaural channel 3 selected track 3 Set clip channel video 7 Monaural channel 4 selec...

Page 774: ...lter SHIFT CTRL ALT F Table 22 Edit Select Shortcuts Function Shortcut Function Shortcut Select from Timeline cursor posi tion to the start point of all tracks SHIFT HOME Add focus left SHIFT ALT LEFT ARROW Select from Timeline cursor posi tion to the end point of all tracks SHIFT HOME Add focus right SHIFT ALT RIGHT ARROW Move selected track Up UP Move selected focus up ALT UP Move selected track...

Page 775: ...et Bin window B Time scale undo CTRL U Expand mixer track ALT W Time scale 1 frame CTRL 1 Toggle Player Recorder TAB Time scale 1 min CTRL 6 Switch to Player CTRL ALT P Time scale 1 hour CTRL 9 Switch to Recorder CTRL ALT R Time scale 1 sec CTRL 3 Display waveform CTRL W Time scale 15 min CTRL 8 Clip channel setting stereo chan nel SHIFT CTRL X Time scale 15 sec CTRL 5 Set group G Time scale 5 fra...

Page 776: ...to audio In SHIFT U Slide trim In CTRL ALT N Set audio In U Slide trim Out CTRL ALT M Move to audio Out SHIFT P Shift cut point to cursor transition SHIFT CTRL T Set audio Out P Paste transition to Out point ALT K Clear In Out X Set transition to In point SHIFT ALT P Set In I Set transition to Out point ALT P Go to In Q Trim In point N Go to In SHIFT I Trim Out point M Clear In ALT I Add marker V ...

Page 777: ...sert overwrite INSERT Split ripple trim Out SHIFT ALT M Normal F5 Mode Multi Cam Multi cam F8 Mode Capture Capture F9 Input preset 2 F3 Add to batch capture list CTRL B Input preset 3 F4 Input preset 1 F2 Mode Render Render In Out render loaded area orange CTRL ALT Q Render and add to Timeline SHIFT Q Render In Out all SHIFT ALT Q Render all render loaded area orange SHIFT CTRL ALT Q Render In Out...

Page 778: ...778 EDIUS User Reference Guide Appendix C Input Output Formats ...

Page 779: ...bin deleting search results 301 search for clips 296 search for unused clips 299 asset bin window 121 audio adjusting pan 643 adjusting volume 643 audio mixer adjusting audio 652 audio track operations 654 ganging audio tracks 656 playing clips 653 playing or muting a specific track 657 switching the indicator display 653 eliminating small amounts of audio noise 658 normalize 649 sound effects add...

Page 780: ...tus 332 start of clip transition 333 transparency rubber band 333 clips adding effects between 514 adjusting audio in out points 271 adjusting video in out points 271 audio 251 audio cross fades 518 audio or video only on timeline 334 capture 207 capture from DV or HDV device 208 capture settings 207 change order 344 change playback speed 369 checking clip storage location 281 clip margin 514 clip...

Page 781: ...ions 516 transitions 515 trimming at ends 389 trimming by value 395 trimming mode 385 trimming with keyboard shortcuts 398 trimming supported file formats 770 types stored in asset bin 249 ungroup 348 unlink video and audio 346 video 250 color bar create 256 modify properties 258 262 color bar clip 252 color correction filter white balance 491 color correction filters keyframe settings 384 497 pre...

Page 782: ...tion online 4 dual mode preview 109 duration settings 137 rubberband point 139 still image 138 title 138 v mute 139 DVD contents 21 E editing clip settings for multiple clips 279 EDIUS JC1p jog device 195 EDIUS JC1p settings 195 EDL file export 88 EDL file import 73 effect operations 566 copy 572 copy transitions 572 delete effects 570 delete effects from the effect palette 576 enable disable effe...

Page 783: ... export 680 add to batch export list 677 batch list menu 685 delete from batch export list 680 modifying the batch export list 682 still images 700 exporter advanced audio settings 672 exporter advanced settings 669 exporter advanced video settings 671 exporter delete preset 676 exporter export preset 676 exporter import preset 677 exporter save preset 674 exporter save preset as default 673 expor...

Page 784: ...lders 238 in and out points adjusting 328 deleting 329 information palette 122 566 initializing rubber band points 647 input formats generic HDV 769 generic OHCI 769 insert mode 130 303 insert mode trimming 392 J jog device select 193 K keyboard shortcut assignments 176 keyboard shortcut settings 172 keyframeable 2D picture in picture 753 L layout apply saved 108 customizing screen 105 multi monit...

Page 785: ...99 online documentation 4 out point trim 394 output formats generic OHCI HD 24Hz 767 generic OHCI HD 50Hz 765 generic OHCI HD 60Hz 765 generic OHCI SD 24Hz 768 generic OHCI SD NTSC 767 generic OHCI SD PAL 768 output to DV device 704 output to HDV device 702 overlay settings 164 overwrite mode 130 304 overwrite mode trimming 391 P P2 playlist import 80 palette window clip marker 123 sequence marker...

Page 786: ...roject folder location 27 project preset change current settings 55 save current settings as new preset 57 project presets 45 change settings of existing preset 57 create 45 Q QuickTitler 591 application details 593 background 593 grid 593 object style bar 593 status bar 593 title creation window 593 title object property bar 593 title safe area 593 tool bars 593 video settings 593 editing a linke...

Page 787: ...tore offline clip settings 145 docking margin 146 restore default import EDL file 147 restore default load project file 146 restore offline clips 96 RGB clip color range 140 ripple mode 132 306 ripple trim 399 rolling trim 394 406 S save custom layout 107 save clips as sequence in asset bin 457 save project 61 screen layouts restoring defaults 109 screen layouts saving 107 scrubbing 431 SD HD RX E...

Page 788: ...et effects 485 system requirements 20 T three point editing 338 timeline capture clips to 227 change clip order 344 change clip playback speed 369 combine divided clips 357 copy clips 348 cut clips 349 delete clip audio or video only 362 delete clips 360 delete clips between in out points 361 delete gaps between clips 367 divide clips at cursor position 355 divide clips at in out points 357 enable...

Page 789: ... 591 QuickTitler 591 QuickTitler application details 593 title mixer effects 565 title adjust position 633 TitleMotion Pro 640 track add 320 copy 318 move 319 track lock 312 track panel 120 311 add tracks 320 audio channel toggle 312 audio mute toggle 314 copy tracks 318 delete tracks 322 expand buttons 314 MIX transparency toggle 314 move tracks 319 title toggle 315 track lock 312 track panel hei...

Page 790: ...hroma key 542 composition 524 luminance key 550 picture in picture 525 video display layout 377 video fade in out 558 video in out points 269 video layout keyframe settings 384 video mute toggle 312 video transparency adjustments 556 VMF importer 183 VOL PAN toggle 314 VST plug in bridge settings 202 VST plugin bridge settings 202 W watch folder managing 246 settings 243 watch folder settings 243 ...

Reviews: