390
EDIUS — User Reference Guide
Section 5 — Timeline Operations
Note
You can fine tune trimming by 1-frame or 10-frame units by using the trim
buttons in the trim window or the corresponding keyboard shortcuts. See
Trim Mode Operation Buttons
on page 388
for more details.
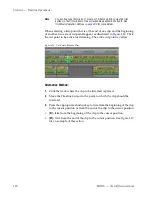
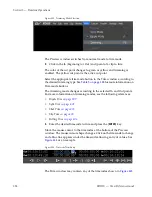
When selecting a trim point that is at the end of one clip and the beginning
of another, two sets of cut points appear as illustrated in
Figure 426
. Click
the cut point to be active for trimming. The active cut point is yellow.
Figure 426. Cut Points Between Clips
Alternative Method:
1.
Click the track where the clip to be trimmed is placed.
2.
Move the Timeline Cursor to the point to which the clip should be
trimmed.
3.
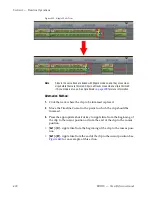
Press the appropriate shortcut key to trim from the beginning of the clip
to the cursor position or from the end of the clip to the cursor position:
•
[
N]
- trim from the beginning of the clip to the cursor position.
•
[
M
] - trim from the end of the clip to the cursor position. See
Figure 427
for an example of this action.
Summary of Contents for EDIUS
Page 22: ...22 EDIUS User Reference Guide Preface ...
Page 124: ...124 EDIUS User Reference Guide Section 1 Getting Started Figure 111 Sequence Marker Palette ...
Page 173: ...EDIUS User Reference Guide 173 Customize Settings Figure 153 Keyboard Shortcut Settings ...
Page 248: ...248 EDIUS User Reference Guide Section 3 Capturing and Importing Clips and Stills ...
Page 302: ...302 EDIUS User Reference Guide Section 4 Clip Operations and Management ...
Page 480: ...480 EDIUS User Reference Guide Section 5 Timeline Operations ...
Page 708: ...708 EDIUS User Reference Guide Section 8 Exporting Project Output ...
Page 752: ...752 EDIUS User Reference Guide Appendix A Hardware Settings ...
Page 764: ...764 EDIUS User Reference Guide Appendix B Special Procedures ...
Page 778: ...778 EDIUS User Reference Guide Appendix C Input Output Formats ...

