KARRERA — User Manual
153
Bus Linking
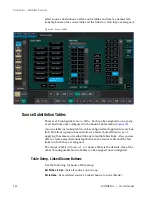
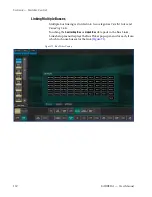
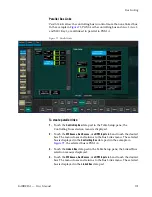
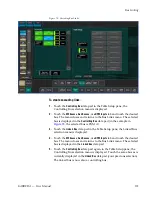
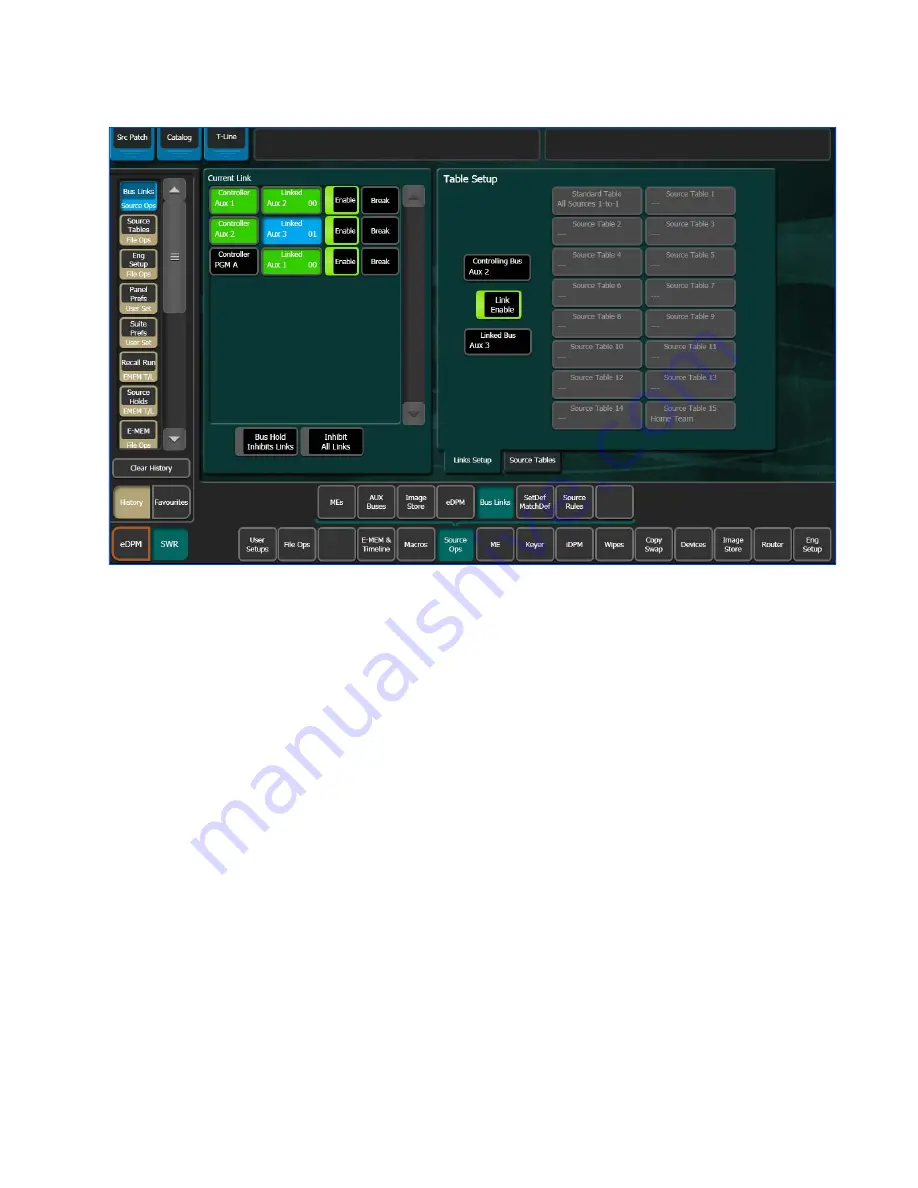
Figure 73. Cascading Bus Links
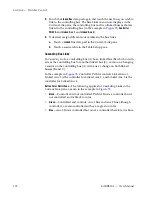
To create cascading links:
1.
Touch the
Controlling Bus
data pad in the Table Setup pane; the
Controlling Bus selection menu is displayed.
2.
Touch the
ME busses
,
Aux Busses
, or
eDPM Inputs
tab and touch the desired
bus. The menu closes and returns to the Bus Links menu. The selected
bus is displayed in the
Controlling Bus
data pad (in the example in
, the selected bus is PGM A).
3.
Touch the
Linked
Bus
data pad in the Table Setup pane; the Linked Bus
selection menu is displayed.
4.
Touch the
ME busses
,
Aux Busses
, or
eDPM Inputs
tab and touch the desired
bus. The menu closes and returns to the Bus Links menu. The selected
bus is displayed in the
Linked Bus
data pad.
5.
Touch the
Controlling Bus
data pad again, in the Table Setup pane; the
Controlling Bus selection menu is displayed. Touch the same bus as is
currently displayed in the
Linked Bus
data pad (your previous selection).
The linked bus is now also a controlling bus.
Summary of Contents for KARRERA
Page 1: ...KARRERA VIDEO PRODUCTION CENTER User Manual Software Version 4 0 071880500 MARCH 2012 ...
Page 3: ...KARRERA VIDEO PRODUCTION CENTER User Manual Software Version 4 0 071880500 MARCH 2012 ...
Page 14: ...14 KARRERA User Manual Contents ...
Page 16: ...16 KARRERA User Manual Preface ...
Page 52: ...52 KARRERA User Manual Section 2 User Setups and Preferences ...
Page 126: ...126 KARRERA User Manual Section 3 Video Mix Effects ...
Page 156: ...156 KARRERA User Manual Section 4 Switcher Control ...
Page 216: ...216 KARRERA User Manual Section 6 Switching Basics ...
Page 286: ...286 KARRERA User Manual Section 7 Advanced Operations Figure 157 Copy Swap Menu ...
Page 315: ...KARRERA User Manual 315 Image Store Stills Figure 184 Freeze Mode Button ...
Page 352: ...352 KARRERA User Manual Section 7 Advanced Operations ...
Page 360: ...360 KARRERA User Manual Glossary ...

