Kayenne XL Package — User Manual
109
Transition Control
Performing Transitions
The
Cut
and
Auto
Trans
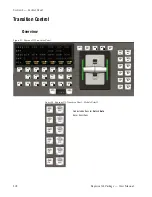
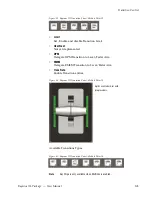
buttons and the Transition Lever Arm are used to
perform main transitions. After a transition completes, the background
source selections flip-flop, readying the PST bus for the next source selec-
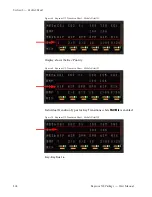
tion. The progress of a transition is indicated by the LED bars beside the
lever arms.
The
Cut
button instantaneously replaces the selected elements with their
new sources or states, regardless of the transition type selected. The button
will light briefly to confirm the operator's action.
The
Auto Trans
button starts an automatic transition of a predetermined
rate. The button will light during the transition. Pressing
Auto Trans
a
second time during a transition stops the transition at that point. The tran-
sition can then be completed by pressing the button a third time or by
moving the
Transition Lever Arm
to its opposite limit or by pressing the
Cut
button.
The
Transition Lever Arm
is used to manually perform a transition. You can
move the lever in either direction to run a transition due to the flip-flop
architecture of the buses. Moving the lever from one limit to the other per-
forms a complete transition. It is possible to start a transition with the lever,
then stop moving the lever at any point, reverse its direction, and even
return it to the original limit without completing the transition.
If the
Transition Lever Arm
is not in an end position when recalling an effect
or performing an
Auto Trans,
the lever arm is resynchronized by recalcu-
lating the resting lever arm way to complete the transition in the direction
of the arrow. Moving the lever arm in the opposite direction enable the
operator to resynchronize the arm to an end position without affecting the
output signal.
Preset Black
The
Preset Black
button modifies a main transition so that it will go through
black, instead of going directly to the new state. This is an alternate action
button (pressed to turn it either on or off). The
Preset Black
button lights
when it has been selected.
Two successive transition commands (
Auto Trans
button, or
Transition Lever
Arm
action) are used for a complete preset black transition.
The first command transitions the switcher to black (first stage). When in
black, both the
PGM
and
PST
bus selections will go low tally. The second
command transitions from black to the final stage, completing the preset
black transition.
The preset black function is canceled automatically at the end of the second
transition.
Summary of Contents for Kayenne XL Package
Page 82: ...82 Kayenne XL Package User Manual Section 2 Concepts ...
Page 264: ...264 Kayenne XL Package User Manual Section 4 Menu Overview ...
Page 275: ...Kayenne XL Package User Manual 275 Status Menu M E Mapping Submenu In Preparation ...
Page 285: ...Kayenne XL Package User Manual 285 Install Menu Figure 217 Install E Box Tally In Assign ...
Page 347: ...Kayenne XL Package User Manual 347 Config Menu Figure 282 Config Copy Simple Menu ...
Page 352: ...352 Kayenne XL Package User Manual Section 5 Menu Summaries Figure 285 Example ...
Page 434: ...434 Kayenne XL Package User Manual Section 5 Menu Summaries Figure 345 Chroma Key Main ...
Page 435: ...Kayenne XL Package User Manual 435 Key Menu Figure 346 Chroma Key Main Cursor ...
Page 437: ...Kayenne XL Package User Manual 437 Key Menu Figure 348 Chroma Key Suppression Cursor ...
Page 462: ...462 Kayenne XL Package User Manual Section 5 Menu Summaries ...
Page 487: ...Kayenne XL Package User Manual 487 RamRecorder Menu Figure 405 Export Dialog 2 ...
Page 509: ...Kayenne XL Package User Manual 509 Scaler Menu ...
Page 583: ...Kayenne XL Package User Manual 583 EMEM Menu Figure 472 EMEM Edit Insert Trigger Macro Number ...
Page 590: ...590 Kayenne XL Package User Manual Section 5 Menu Summaries ...
Page 618: ...618 Kayenne XL Package User Manual Glossary ...

