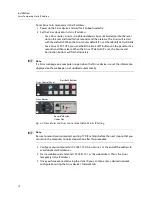
17
Sirius Compact Routers
Installation and User Manual
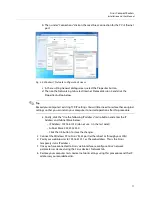
b Then, under “Connections” click on the Local Area Connection for the PC’s Ethernet
port.
Fig. 2-5: Windows 7 Network Configuration Screens
c In the resulting General dialog screen, select the Properties button.
d Then on the Networking tab, select Internet Protocol Version 4 and click the
Properties button below.
+ ✎
Tip
Record your computer's existing TCP-IP settings. You will later need to restore these original
settings so that you can return your computer to normal operation after this procedure.
e Finally, click the “Use the following IP address:” radio button and enter the IP
Address and Subnet Mask below:
• IP Address: 192.168.101.X (do not use .1 in the last octet).
• Subnet Mask: 255.255.255.0
• Click the OK button to store the changes.
3 Connect the Windows PC to Sirius’ RJ-45 port (either direct or through your LAN)
4 Point your web browser to 192.168.101.1 as the web address. This is the Sirius
temporary static IP address.
5 Once you have connected to Sirius’ web interface, reconfigure Sirius’ network
parameters as desired using the Sirius device’s Network tab.
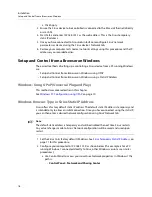
6 Restore your computer to its normal network settings using this procedure and the IP
addresses you recorded earlier.
Summary of Contents for SIRIUS SCR 1616-12G
Page 2: ...ii Notices ...
Page 24: ...6 Introduction In This Manual ...
Page 40: ...22 Installation Identify Button ...

