Zodiak Installation and Service Manual
101
Setting IP Addresses
4.
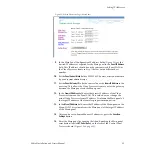
Enter information appropriate for your system as follows:
•
Change the
Ethernet IP
address to place the Remote Aux panel on the
Menu LAN. If you are using the factory default settings, you may
change the third octet (currently set to 0) to 54. Leave the Host IP set
to 250 or change it to whatever number desired as long as the
number is different than the other devices on the Menu LAN and
does not exceed 255.
•
Set the
Subnet Mask
to 255.255.255.0.
•
Set the
Gateway IP
to 0.0.0.0 unless a Gateway address is specified by
your system administrator.
•
The
Panel Device Name
is used to name the panel, for user conve-
nience. This field does not affect the operation of the unit.
•
The
Server Ethernet IP
field should match the IP address of the Zodiak
Video Processor frame on the Menu LAN (192.168.54.18 is the
factory default).
Note
Do not change the Server Port Number or Server Port Type fields. These set-
tings need to remain at their defaults.
5.
Check the
Do reset
box at the bottom of the screen, then click on
Save New Settings
. The new IP addresses will be saved and the Remote
Aux panel will reset. You should label the panel with its IP address and
keep a record of all IP addresses for future reference.
6.
Disconnect the PC, and connect the Remote Aux panel to the Zodiak
Menu LAN network.
7.
Repeat this procedure on all the 32-Crosspoint Remote Aux panels to be
used with your Zodiak system, entering a unique IP address for each
32-Crosspoint Remote Aux panel.
See
Remote Aux Panel Configuration on page 115
regarding additional con-
figuration steps required.
Restoring the Default IP Address
You need to know the current IP address of the 32-Crosspoint Remote Aux
panel in order to change it using the Web browser. If a panel’s IP address
has been changed and its new value not recorded, it will be impossible to
change its IP address. You can restore the panel to its factory default
address, if necessary, with the following procedure.
1.
Disconnect the Ethernet cable and the AC power cable from the Remote
Aux panel.
2.
Reconnect only the AC power cable. The panel will enter a diagnostic
mode.


