Zodiak Installation and Service Manual
145
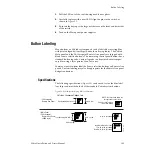
Button Labeling
3.
Extract any existing film from inside of the lens. If the parts are wedged
inside, use sticky tape to remove them. Avoid using sharp tools that can
scratch the lens material.
4.
Insert the new film label into the lens, label first, and replace the lens on
the base. Orient the label so the slots in the base are located on the front
and back.
5.
Re-insert the keycap so the button slots are on the front and back sides
of the switch.
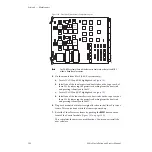
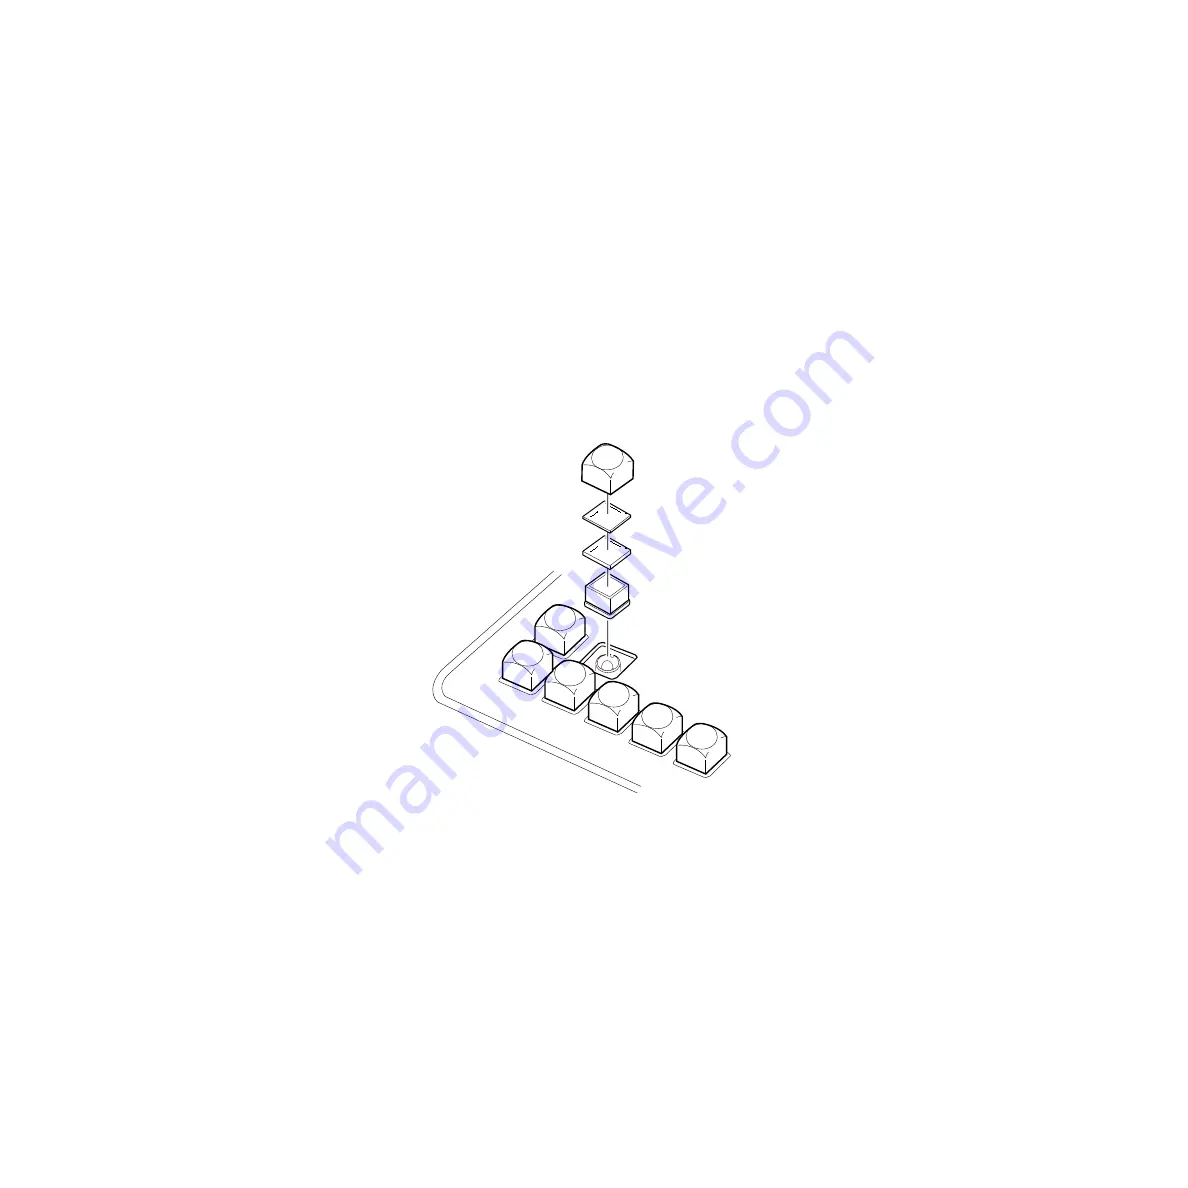
32-Crosspoint Aux Panel Button Label Replacement
1.
Pull the keycap out of the panel, using your fingers or adjustable jaw
pliers (
Figure 98. 32-Crosspoint Aux Panel Button Label Replacement
2.
Extract the diffuser and any existing film from inside of the lens. If the
parts are wedged inside, you can use sticky tape to remove them. Avoid
using sharp tools that can scratch the lens material.
3.
Insert the new film label and diffuser into the lens, label first, and
replace the lens on the base.
4.
Re-insert the keycap into the switch. The keycap fits into the switch in
any orientation.
Lens
Switch
0646_05_65_r1
Base
Diffuser
Film Label
CAM
1


