200
Zodiak Installation and Service Manual
Section 5 — Troubleshooting and Diagnostics
6.
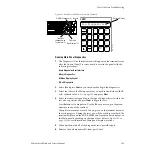
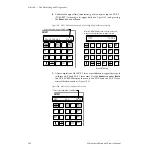
Calibrate the upper limit (maximum) position by moving the M/E 3
(PGM/PST) lever arm to its upper limit (see
) and pressing
the
Run
button under
Press
.
Figure 143. M/E 2 E-MEM and Master E-MEM High Range Calibration Displays
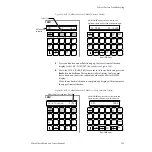
7.
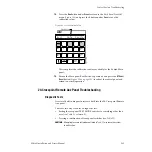
After completion of the M/E 3 lever arm calibration, repeat the steps to
calibrate M/E 2 and M/E 1 lever arms. Use the
Run
button under
Next
in
the M/E 2 E-MEM display to move to the M/E 2 and the M/E 1 lever
arm calibration routines (
Figure 144. Move to Next Calibration Procedure
Undo
Learn
Lock
Bank
1
2
3
4
5
6
7
8
9
0
Run
Seq
Bank
0
Effects
Dis
Bank
1
Tran
Rate
Enter
E-MEM
8125_01_17_r1
Undo
Learn
Lock
Bank
1
2
3
4
5
6
7
8
9
Stop
Next
KF
Seq
Bank
0
Effects
Dis
Bank
1
Tran
Rate
Hold
Input
Reverse
Rewind
Run
Master E-MEM Display
MoveToUpper Press
Master E-MEM display shows current value and
moves to actual maximum as lever is raised
After setting low range select Press
ME3 14200
Trim
Enter
+/-
0
Undo
Learn
Lock
Bank
1
2
3
4
5
6
7
8
9
0
Run
Seq
Bank
0
Effects
Dis
Bank
1
Tran
Rate
Enter
E-MEM
ME3 Cal Next
To enter next calibration, select Next
8125_01_13r0


