86
Detail program description - Base setup models | Winged models
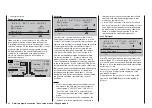
completed. Your model-memory to receiver
combination is now operationally ready. At this time the
screen will now display " bind " (bound) instead of "n/a"
(not attached).
Model name
Stick mode
1
bind
B A S I C S E T T I N G , M O D E L
Info
n/a
n/a
Module
bind
HoTT
Starlet
1234g/111111
SEL
BD1
BD2
BD3
BD4
On the other hand, should the LED on the receiver
blink red for longer than about 10 seconds, the
binding process has failed. In this case the screen
will continue to show the status as "n/a". If this should
happen, try changing the position of antennas then
repeat the entire procedure.
Binding other receivers
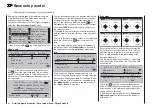
The binding channel you have chosen is already
bound (as indicated by the "bind" status). with
another binding channel. If, after initiating the RF bind
process, the message shown below appears in the
screen instead of displaying "BINDING"
Model name
Stick mode
1
geb.
B A S I C S E T T I N G , M O D E L
Info
n/a
n/a
Module
geb.
HoTT
Starlet
1234g/111111
SEL
BD1
BD2
BD3
BD4
RF
off
OK
is tur ned
Drop down two lines in the screen and switch off the
RF module, as described several columns further
below in the section "RF module". Afterward, return
again to the "Module" line and restart the binding
process as described on the previous page.
Alternatively you can briefl y switch off the transmitter
then, after switching it back on again, respond to the
message window that appears …
OFF
ON
Please select
RF on/off?
… with "OFF" …
ON
Please select
RF on/off?
OFF
… then confi rm the selection with a brief tap on the
center
SET
key of the right touch pad. From the
base screen jump again into the "Module" line of
the »
Basic settings, model
« menu and restart the
binding process.
Dissolving a bond
Proceed as described above to initiate the binding
process but WITHOUT fi rst putting a receiver in
binding readiness.
EXT. PPM
Important notice:
With the activation of the value fi eld in the context
of the following described changeover, any
existing bonds to HoTT receivers which may be
effective for the currently active model memory
will be lost.
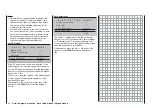
Activate the fi rst value fi eld in the "Module" line with a
tap on the center
SET
key of the right touch pad then
use the selection keys to choose "EXT. PPM" instead
of "HoTT". In parallel with the selection of "EXT.
PPM", the other four value fi elds will be replaced by
the type of modulation pre-selected in the line »DSC
Output«, see page 88.
Model name
Stick mode
1
B A S I C S E T T I N G , M O D E L
Info
Module
Starlet
1234g/111111
SEL
PPM10
EXT. PPM
This change also suppresses the lines for the options
(described below): »HoTT«, »Rcv Ch Map«, »RF
module« and »RF range test« and, in the basic
display, "PPM" will be displayed instead of "HoTT".
#02
0:00h
Stop watch
Flight tim
K78
0:00.0
4.1V
0:00.0
0
0
0
0
00:00h
M
V
Starlet
PPM
H-J Sandbrunner
Receiver channel mapping
Stick Mode
Module
1
bind
B A S I C S E T T I N G , M O D E L
bind
Info
n/a
n/a
HoTT
SET SET SET SET
2345g/090911
Rcv Ch Mapgang
R16
R08
n/a
n/a
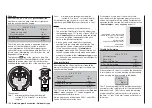
As mentioned in the introduction to the "Binding
receivers" section, this menu item of the
mc-20
HoTT
offers both the opportunity to freely divide up the
transmitter's control channels
within a receiver
as well
Summary of Contents for 32032
Page 1: ...33020 mc 20HoTT 2 en Programming Manual o Pro Pro mc 20 mc 20...
Page 15: ...15 For your notes...
Page 21: ......
Page 27: ...27 For your notes...
Page 41: ...41 For your notes...
Page 53: ...53 For your notes...
Page 59: ...59 For your notes...
Page 63: ...63 For your notes...
Page 93: ...93 For your notes...
Page 97: ...97 For your notes...
Page 141: ...141 How is a ight phase programmed...
Page 145: ...145 For your notes...
Page 155: ...155 For your notes...
Page 175: ...175 For your notes...
Page 203: ...203 For your notes...
Page 219: ...219 For your notes...
Page 253: ...253 For your notes...
Page 283: ...283 For your notes...
Page 321: ...321 For your notes...
Page 322: ...322 For your notes...
Page 323: ...323 For your notes...


