159
Program description: Trainer system
–P
T
2 3 4 5 6 7 8
BIND: N/A
SW: –––
1
TRAINER/Pupil
Teacher transmitter
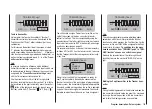
Up to eight of the Teacher transmitter’s (“Teacher”)
transmitter control functions
can be transferred to the
Pupil transmitter (“Pupil”), either individually or in any
combination.
For this reason the bottom line of the screen, marked
“L”, indicates those
function inputs
which are perma-
nently associated with control functions 1 … 4 (dual-axis
stick functions on fixed-wing models and helicopters), as
well as the freely assignable inputs 5 … 8 of the “
Trans-
mitter control settings
” menu.
Note:
In principle it makes no difference which individual
transmitter controls are assigned to the inputs which are
to be transferred to the pupil. However, they can only be
assigned in the “
Transmitter control settings
” menu
with the Trainer connection switched off.
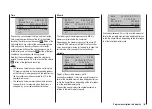
Use the arrow buttons
of the left or right-hand
touch-key to select the
transmitter controls 1 to 8
(
)
to
be transferred to the pupil
, and briefly press the central
SET
button of the right-hand touch-key in each case, so
that they switch from “T (Teacher)” ( ) to “P (Pupil)” ( ):
–P
T
1 2 3 4
6 7 8
5
BIND:
SW: –––
N/A
TRAINER/Pupil
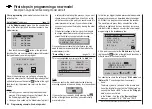
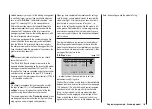
You still have to assign a Trainer transfer switch on the
right of the screen so that you can actually transfer
control to the Pupil. This is accomplished by using the
arrow buttons of the left or right-hand touch-key to place
the marker frame next to “SW” at bottom left, and assign
a switch as described on page 49.
We recommend that you use one of the two momentary
switches SW 1 or SW 9 as the transfer switch, to ensure
that the Teacher transmitter can regain control instantly
at any time:
T
1
7 8
BIND:
SW:
N/A
9
TRAINER/Teach
–P
No
student
signal
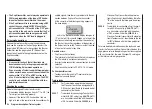
Since it is very unlikely that a prepared (i. e. ready for
use) Pupil transmitter will already be connected to a
Teacher transmitter at this early stage of programming a
Trainer system, the transmitter will generate appropriate
visual and audible warnings when the switch is operated
as part of the switch assignment procedure. You should
therefore re-open the switch once you have assigned it:
T
1 2 3 4 5 6 7 8
P
BIND:
SW:
N/A
9
TRAINER/Teach
Note:
The switch assignment procedure described above
determines which transmitter provides the Teacher
function, and which provides the Pupil function. For this
reason a switch must NEVER be assigned to the Pupil
transmitter in this menu.
To underline this, the menu
headline switches from “TRAINER / pupil” to “TRAI-
NER / teacher” as soon as a switch is assigned.
Now use the arrow buttons of the left or right-hand
touch-key to move the marker to “BIND: N/A” on the
right:
T
1 2 3 4 5 6 7 8
P
BIND:
SW:
N/A
9
TRAINER/Teach
Binding the Pupil transmitter to the Teacher trans-
mitter
Note:
During the binding procedure the distance between the
two transmitters should not be too great. You may need
to change the relative position of the two transmitters
and initiate the binding process a second time.
Summary of Contents for mx-12 Hott
Page 1: ...Programming Manual 33116 mx 16 HoTT 3 en mx 16...
Page 35: ...35 For your notes...
Page 49: ...49 For your notes...
Page 55: ...55 For your notes...
Page 59: ...59 For your notes...
Page 63: ...63 For your notes...
Page 69: ...69 For your notes...
Page 91: ...91 For your notes...
Page 101: ...101 For your notes...
Page 123: ...123 For your notes...
Page 181: ...181 For your notes...
Page 193: ...193 For your notes...


