107
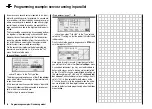
This means that the throttle servo has switched to a
fi xed value, which can be adjusted as follows:
Press
ESC
to return to the menu list. New sub-menus
will now be listed, provided that you are still in the auto-
rotation phase.
The important line is “Throttle”, where you should set a
value of 125% or -125%, depending on the di-
rection of servo rotation.
This setting ensures that the motor stops reliably in the
autorotation phase (to cope with an emergency). Later,
when you have gained suffi cient experience to practise
autorotation landings, the setting should be changed to
a value which provides a reliable idle.
At present the remaining sub-menus are of no interest.
Simply switch “Autorotation” off, and move back to the
fi rst menu list.
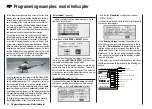
Call up the set-up page of the “
Ch1
tail rotor
” menu:
this is where you set static torque compensation (DMA)
ion (DMA)
for the tail rotor. Once again, please use only the three
default reference points; everything else is reserved for
the experienced pilot. For the moment you can safely
accept the pre-set values of -30% at Point 1 and +30%
at Point 5, although you may fi nd it necessary to adjust
the settings slightly later.
Now switch back to the autorotation phase for a mo-
ment. The set-up curve is disabled here, with the result
that the tail rotor servo no longer responds to collective
pitch commands (when the main rotor is not powered,
there is no torque to be corrected).
If your gyro features gain control from the transmitter –
unlike the model we are using in this example – you will
need another free proportional control for it, e.g. the INC
/ DEC button CTRL 5.
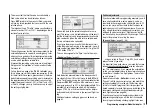
This can be assigned to the “Gyro” input in the menu ...
»Control settings«
(page 54)
Hold the button pressed forward; the beep sound will
rise steadily. When it falls silent, move to the
ASY
fi eld
in the “Travel” column using the right-hand rocker button.
Now press
SELECT
, and you will be able to set a maxi-
mum gyro gain such as 50% in the highlighted fi eld. This
represents a safe fi xed value which is maintained as
long as CTRL 5 is at its forward end-stop. You will pro-
bably need to adjust the value in the course of fl ight-tes-
ting.
Additional notes on setting up gyros can be found on
page 69.
Programming examples: Model helicopter
Further adjustments
If you have followed this programming example, you will
have a helicopter which is set up properly, and in an
ideal state for hovering practice and simple circuits. Of
course, you may wish to activate further functions de-
pending on your skill and fl ying experience. If you wish
to fl y using different rotor speeds and trim set-ups, you
will need to activate a series of “fl ight phases”, which
can be called up via switches which you assign. The fi rst
step in this process is to call up the menu ...
»Base settings«
(page 42 ... 46)
… assign a switch to “Phase 2”, e.g. SW 3, and enter a
relevant name (if you wish).
It is important to be quite clear in your mind that autoro-
tation always has absolute priority over any other pha-
ses. This simply means: if you operate the autorotation
switch, you immediately move to the autorotation phase
from either of the other two fl ight phases (“normal” pha-
se and “phase 2”).
Now move back to the »
Heli mixer
« menu, switch to
“Phase 2” (which you have just set up), and modify the
settings accordingly. Since the mx-16s features digi-
tal trims, in the Heli program all four trim positions are
stored separately for each fl ight phase, in addition to the
other menu settings which you entered separately for
each fl ight phase (see page 66).
If you have set up your helicopter as described in this
programming example, you will fi nd that it is capable
of carrying out extremely challenging fl ight tasks even
Summary of Contents for MX-16S
Page 1: ...1...
Page 17: ...17...
Page 31: ...31 Fixed wing models Installation and connections...
Page 35: ...35 Program description Reserving a new memory...
Page 47: ...47 Base settings Model helicopter...
Page 83: ...83 Fail safe...
Page 89: ...89 Programming examples Fixed wing model...
Page 109: ...109 Programming examples Model helicopter...
Page 112: ...112 112...
Page 116: ...116...


