19
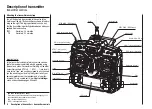
CLEAR
(reset to standard
value)
ENTER
button
(confi rm)
ESC
button (inter-
rupt / back)
SELECT
button
Larger – up button
(+)
Smaller – down
button (-)
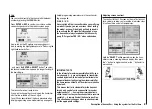
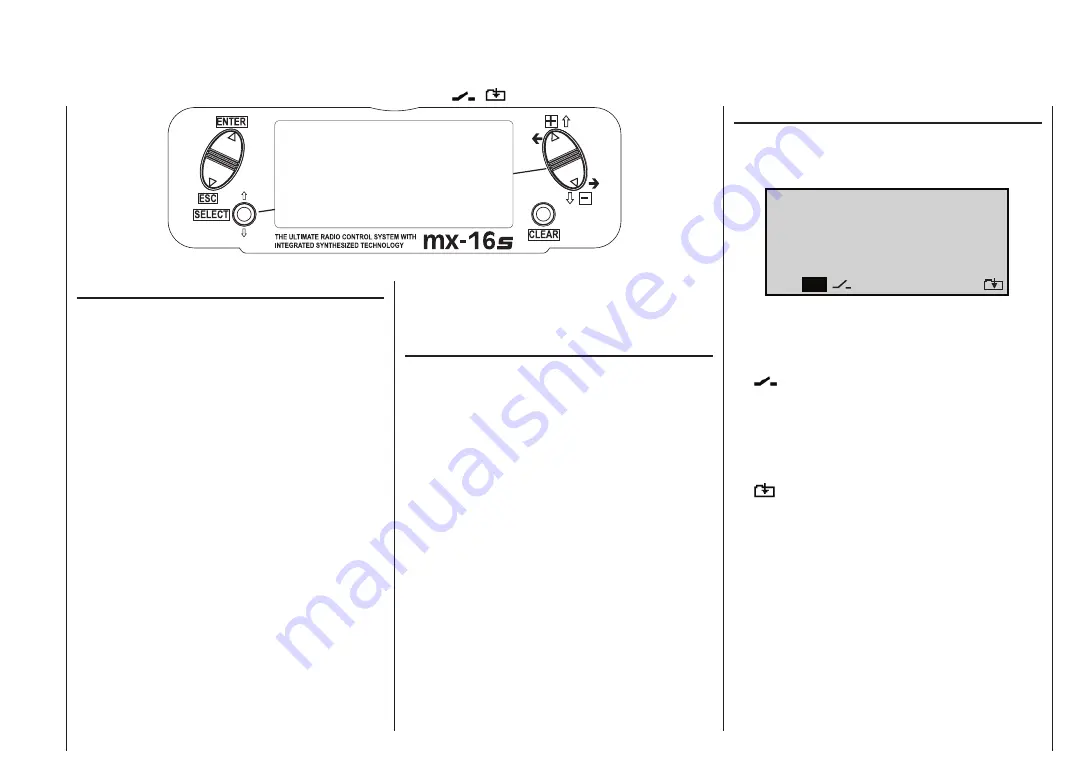
Controlling the “Data Terminal”
Input buttons and function fi elds
ENTER, ESC, SELECT, +, -, CLEAR ... SEL, STO, CLR, SYM, ASY,
,
Buttons to the left of the screen
• ENTER
button, left-hand rocker button
Pressing
ENTER
takes you from Channel Select
(which appears when you switch the transmitter on)
to the basic display, and then on to the multi-function
menus. You can also call up a selected menu using
ENTER
.
• ESC
button, left-hand rocker button
Pressing
the
ESC
button returns you step by step
within the function select system, taking you right
back to the basic display. If you make a change in the
meantime, the change is retained.
• SELECT
The
SELECT
button is used for several tasks:
1. A brief press switches from the basic transmitter
display to the »
Servo display
«; see page 27.
2. Hold the button pressed in to display the current
positions of the two INC / DEC buttons CTRL 5 +
6 in the basic display. The information is shown for
the duration of the button-press. See page 27.
3. Within the set-up menus press the
SELECT
but-
ton to activate the adjustment fi elds, and then
press
SELECT
again to return to the function
fi elds at the bottom edge of the screen.
4. If you hold the
SELECT
button pressed in, you
can “leaf through” the menu lines within the indi-
vidual set-up menus using the right-hand rocker
button – symbolised by
above and below the
two buttons.
Buttons to the right of the screen
•
“+” and “-“ buttons, right-hand rocker button
1. “Leaf through” the menu lines within the individual
menus when the
SELECT
button is held pressed
in – symbolised by
above and below the two
buttons.
2. “Leaf through” lists, e.g. the model select or multi-
function list – symbolised by
on both sides
of the right-hand rocker button.
3. Change between the function fi elds, most of
which are located at the bottom edge of the
screen; see right-hand column – symbolised by
on both sides of the right-hand rocker but-
ton.
4. Select and adjust parameters in the adjustment
fi elds, after activating them by pressing the
SE-
LECT
button – symbolised by + and – above and
below the right-hand rocker button.
• CLEAR
Resets a changed parameter value in the active input
fi eld to the default value.
Function fi elds
Function fi elds appear in the bottom line of the screen
in certain menus; they can be selected using the right-
hand rocker button –
.
Press the
SELECT
button to activate a function fi eld.
Function fi elds
• SEL
select
•
switch symbol fi eld
(assigning switches of all kinds)
• STO
store
(e.g. transmitter control position)
• CLR
clear
reset to default value
• SYM
adjust values symmetrically
• ASY
adjust values asymmetrically
•
switch to second page (next menu) within a
menu
Description of transmitter – Operating buttons
A S Y
S Y M
S E L
S T O C L R
Summary of Contents for MX-16S
Page 1: ...1...
Page 17: ...17...
Page 31: ...31 Fixed wing models Installation and connections...
Page 35: ...35 Program description Reserving a new memory...
Page 47: ...47 Base settings Model helicopter...
Page 83: ...83 Fail safe...
Page 89: ...89 Programming examples Fixed wing model...
Page 109: ...109 Programming examples Model helicopter...
Page 112: ...112 112...
Page 116: ...116...

