107
Program description:
Timers
Switching between “count-up” and “count-down”
Stopwatch mode (count-up timer)
If you assign a switch to any of the timers, and then
program it to start running at the initial value “0:00”,
it will count “up” until max. 999 min. and 59 sec., at
which point it will start again at 0:00.
“Timer” (count-down timer)
Use the left-hand
SEL
fi eld in the “Timer” column to
set a start time within the range 0 to 180 minutes, and
use the right-hand
SEL
fi eld to set a start time bet-
ween 0 and 59 seconds.
(Pressing
CLEAR
= “0” or “00”.)
Procedure:
1. Select the
SEL
fi eld using the rotary control,
2. Brief press on the rotary control,
3. Set the pre-set time in the highlighted min. / sec.
fi eld using the rotary control (not pressed in),
4. A brief press on the rotary control concludes the
process.
When the assigned switch is operated, the timer
starts from this pre-set initial value and counts back-
wards (“timer function”). If necessary, pressing
CLEAR
in the basic display resets the timer to the
starting time. When the pre-set time has elapsed,
the timer does not stop; instead it continues running
so that you can read off the over-run, i. e. the time
elapsed after zero.
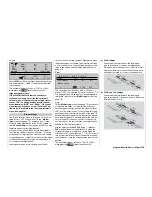
Count-down timers
are identifi ed in the basic display
by a fl ashing colon (:) between the minutes and the
seconds fi elds.
Model name
#01
H-J.Sandbrunner
10.2V
0:30h C62
0
0
0
0
Stop watch
Flight tim
31
12
1
12
:
:
:
:
0:30h SPCM20
“Alarm” timer
In the “Alarm” column you can defi ne a time within the
range 5 to 90 seconds in 5-second increments. At the
set time before zero you will hear an audible signal,
eliminating the need for the pilot constantly to check
the screen.
(Pressing
CLEAR
= 0 s.)
Audible signal sequence:
90 sec. before zero: every 10 seconds
30 sec. before zero: triple tone
20 sec. before zero: double tone
10 sec. before zero: every second
5 sec. before zero: every second, at higher fre-
quency
zero:
long
tone
Press
CLEAR
with the timer stopped to reset the “Ti-
mer”.
Notes:
• An example of “Operating the timer via the C1
stick” can be found on page 170.
• If you alter the function of a timer, the new mode
only becomes active when you stop the timer and
reset it by pressing
CLEAR
.
• If you have set up multiple flight phases, the ap-
propriate flight phase name appears on the screen
in place of the GRAUPNER/JR logo.
• A “Flight phase timer” assigned to a flight pha-
se in the »
Phase settings
« menu appears in the
vacant line above the GRAUPNER/JR logo. For
more details of this please read the section on the
follow ing pages describing the »
Flight phase ti-
mers
« menu.
Resetting
stopped
timers
Provided that you have already
stopped
the timers,
pressing the
CLEAR
button in the basic display re-
sets them to their starting value.
Note:
If the “Auto timer reset” function in the »
Base setup
model
« is set to “yes”, then all timers (except the mo-
del time and battery time) are automatically reset to
the appropriate starting value when the transmitter is
switched on.
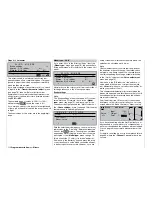
Typical application:
The “stop watch” and “flight timer” are both to be star-
ted simultaneously using the C1 stick as soon as the
user-defined switching point is exceeded.
In the »
Control switches
« menu (see page 94) the
two control switches “G1” and “G2” are already pre-
configured, with switching points at -75% for “G1” and
+75% for “G2”. Simply move the C1 stick to the positi-
on at which the timers are to be switched off.
“Top: stop watch” and “Centre: fl ight timer”.
Activate the switch assignment point in the “Upper”
line, then move the C1 stick beyond the switching
point in the direction of switch “on”. On the right of
the screen you will now see “G1” or “G2”, depending
on the direction of the movement. Move the C1 stick
back to the starting point, and repeat the assignment
in the “Centre” line:
0s
Alarm
SEL
SEL
SEL
3 : 43h
6 : 05h
Timer
0:00
SEL
0:00
G1
G1
Model time
Batt. time
Stop watch
Flight tim
Top :
Centr:
The stopwatch will now stop when the stick is below
the switching point, and resume running above the
switching point. In contrast, the flight timer, which also
started running when the set switching point was ex-
ceeded, can only be stopped by pressing the
ESC
button. It can then be reset to the starting value by
pressing
CLEAR
.
Summary of Contents for mx-24s
Page 1: ...1...
Page 19: ...19 For your notes...
Page 35: ...35 For your notes...
Page 41: ...41 41 For your notes...
Page 57: ...57 For your notes...
Page 63: ...63 63 For your notes...
Page 69: ...69 69 For your notes...
Page 85: ...85 85 For your notes...
Page 99: ...99 For your notes...
Page 143: ...143 For your notes...
Page 191: ...191 For your notes...
Page 212: ...212 212 For your notes...
Page 213: ...213 213 For your notes...
Page 214: ...214 For your notes...
Page 216: ...216...


