12
Operating notes
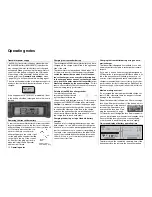
Transmitter power supply
The
mx
-24s transmitter is fi tted as standard with a
9.6 Volt NiMH battery (8NH-2000TX) (specifi cation
may change). However, this battery is not charged
as supplied. When you are using the transmitter you
can monitor the battery voltage on the LCD screen.
If the voltage of the transmitter battery falls below a
certain point (see »
General basic settings
« menu
– page 154) you will hear an audible warning signal.
The screen then displays the following message to re-
mind you that the transmitter battery needs to be re-
charged:
If this happens, cease operations immediately; ideal-
ly the battery should be recharged before this level is
reached.
Removing the transmitter battery
To remove the transmitter battery fi rst remove the bat-
tery compartment cover on the rear face of the trans-
mitter by sliding it in the direction of the arrow, then lift
it off. Carefully disconnect the con-
nector at the main circuit board –
either pull gently on the cable or pull
out the plug with a fi ngernail, pulling
on the lug on the top of the connec-
tor. Don’t pull the plug up or down
when removing it; keep it parallel
with the circuit board.
Operating notes
Batt must
be re-
charged!!
Charging the transmitter battery
The rechargeable NiMH transmitter battery can be re-
charged via the charge socket fi tted to the right-hand
side of the case.
The transmitter
must
be switched off and left at “OFF”
for the whole period of the charge process.
Never
switch the transmitter on when it is still connec-
ted to the charger; even a very brief interruption
in the charge process can cause the charge volta-
ge to rise to the point where the transmitter is im-
mediately damaged by the excess voltage.
For this
reason check carefully that all connectors are secure
and are making really good contact.
Polarity of the
mx
-24s charge socket
Commercially available bat-
tery charge leads produced
by other manufacturers are
often made up with reversed polarity. For this reason
use genuine
GRAUPNER
charge leads exclusively.
Caution:
it is essential to connect the banana plugs
on the charge lead to the charger fi rst, and only then
to connect the other end of the lead to the charge
socket on the transmitter; this avoids the danger of
short-circuits. Never allow the bare ends of a connec-
ted charge lead to touch each other!
Charging the battery using a standard battery
charger
The basic rule for charging the battery using a stan-
dard charger, i. e. one without automatic charge ter-
mination, is to start with a discharged pack and char-
ge it for fourteen hours at a current corresponding to
one tenth of the capacity printed on the label. In the
case of the standard transmitter battery this means
200 mA. It is up to you to terminate the charge pro-
cess at the correct time.
Charging the transmitter battery using an auto-
matic charger
The transmitter is designed as standard for use with
automatic battery chargers to recharge the transmit-
ter pack.
If you wish to use an automatic charger designed for
NiCd batteries to recharge the NiMH pack which is fi t-
ted to the transmitter as standard, please carry out
a series of test charges and check carefully that the
charger terminates the process correctly. If your char-
ger provides a facility for adjusting the Delta Peak ter-
mination voltage, you may well need to adjust this va-
lue.
Maximum charge current
Do not exceed the maximum permissible charge cur-
rent of
1.0 A
, otherwise there is a danger of causing
damage to the transmitter.
Fuse:
the transmitter is fi tted with a 20 mm cartridge
fuse (type: 3 Ampere, fast-blow). If the battery will not
accept a charge, or the transmit-
ter cannot be switched on, ple-
ase check this fuse (see “Ope-
ning the transmitter” on page
14). Never by-pass (bridge) the fuse. Replacement fu-
ses can be obtained from any electrical supplies shop.
Ensure that the fuse is fi rmly and correctly seated;
you may need to bend the spring contacts slightly.
On-screen display of battery operating time
#01 0:00h SPCM20
10.9V
0:00h
C62
0 0 0
0
Stop watch
Flight tim
0 00
0 00
:
:
This timer shows the cumulative operating time of the
transmitter since the last time the transmitter battery
Polarity of trans-
mitter battery plug
brown or
black
red
Summary of Contents for mx-24s
Page 1: ...1...
Page 19: ...19 For your notes...
Page 35: ...35 For your notes...
Page 41: ...41 41 For your notes...
Page 57: ...57 For your notes...
Page 63: ...63 63 For your notes...
Page 69: ...69 69 For your notes...
Page 85: ...85 85 For your notes...
Page 99: ...99 For your notes...
Page 143: ...143 For your notes...
Page 191: ...191 For your notes...
Page 212: ...212 212 For your notes...
Page 213: ...213 213 For your notes...
Page 214: ...214 For your notes...
Page 216: ...216...


