179
179
Programming examples: Fixed-wing model
have already selected for switching between the fl ight
phases, for example SW 9 + 10, and move it back
from its centre position, i. e. in the direction of SW 9.
The next step is to move the C1 stick approximate-
ly to its centre position, then use the rotary control to
move to the right-hand
fi eld and activate switch
assignment with a brief press on the rotary control.
Move the C1 stick to its end-stop in the direction of
“brakes retracted”. The switch will now appear as “G1”
or “G2”, depending on the direction of the stick move-
ment.
Leave the default “AND” link of these two switches un-
changed; if you see an “OR” in the appropriate menu
line, set the selected logical switch to this setting:
L1
L2
L2
L3
L4
SEL
9
G1
L1
L3
L4
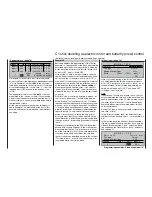
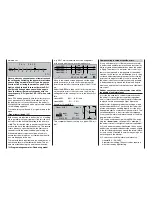
L O G I C A L S W I T C H E S
AND
AND
AND
AND
If you now leave the C1 stick in the “brakes retrac-
ted” position, AND have not also moved the selected
fl ight phase switch when assigning it, THEN the logi-
cal switch is closed, as indicated by the symbol at far
right. On the other hand, if only one of the two swit-
ches is open – i. e. if the stick is positioned past the
offset point in the direction of “brakes extended”, or if
the fl ight phase switch has been operated, then the
logical switch also opens.
After these preparations please move to the menu …
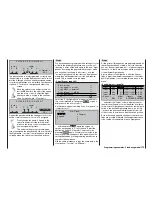
»Phase settings« (page 100)
Phase 1
Phase 2
1.0s
Phase 3
1.0s
Phase 4
SEL
Normal
1.0s
Thermal
0.1s
SEL
-
Speed
+
+
SEL
Name
Fl.ph.Tim
Sw. time
… and activate the
SEL
fi eld under the “Name” co-
lumn with a brief press on the rotary control.
Now assign the name “Normal” to Phase 1 – the nor-
mal phase – by selecting it with the rotary control.
This is the phase which contains the settings you
have entered thus far. (Alternatively you can create
your own phase name in the »
Basic settings
« menu,
if you prefer this to the default names.)
Phase 2 is to be assigned the name “Thermal”, and
Phase 3 the name “Speed”. In the right-hand column
set a “Switch time” from
any other phase into the cur-
rent phase
, in order to avoid an abrupt phase shift,
i. e. sudden changes in control surface positions. We
suggest that you try out different transition times. In
this example we have selected a value of one second.
In the menu …
»Phase assignment« (page 104)
… the appropriate switches are assigned to these
fl ight phases; these are the switches you will use to
shift between the three phases.
Since no particular priority is required, we suggest
that you choose switch assignment “C” in the display
and select the logical switch “L1” as the switch – as
set up earlier, and described on page 178. With this
step complete, activate the switch assignment under
“D” and operate the three-position switch (which we
have selected for our example) forward from its centre
position, i. e. in the direction of SW 10.
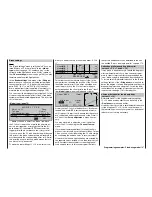
After completing the switch assignment, use the rota-
ry control to move to the
SEL
fi eld at far right, and ac-
tivate the phase name assignment with a brief press
on the rotary control. Close “L1” by moving the se-
lected three-position switch back, AND moving the
C1 stick to the “brakes retracted” position. Assign the
name “<2 Thermal>” to this switch position, and as-
sign the name “< normal>” to the “OFF position”.
A
B
C
D
E
F
SEL
L1
<1
>
2 Thermal
10
P H A S E A S S I G N M E N T
p r i o r
combi
A
B
C
D
E
F
SEL
L1
<1
>
Normal
10
P H A S E A S S I G N M E N T
p r i o r
combi
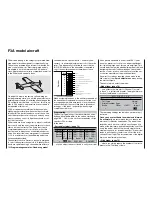
Finally move the three-position switch forward, in the
direction of SW 10, and assign the name “<3 Speed>”
to this switch position.
A
B
C
D
E
F
SEL
L1
<1
>
3 Speed
10
P H A S E A S S I G N M E N T
p r i o r
combi
From this point on, the selected phase names will be
superimposed during all further programming work in
all the fl ight phase specifi c menus – see the table on
page 98 – in accordance with the position of the pha-
se select switches.
Since we have already entered some settings in fl ight
phase specifi c menus, e. g. in the wing mixer menu,
we can copy these settings into the “Thermal” fl ight
phase as the next step.
Summary of Contents for mx-24s
Page 1: ...1...
Page 19: ...19 For your notes...
Page 35: ...35 For your notes...
Page 41: ...41 41 For your notes...
Page 57: ...57 For your notes...
Page 63: ...63 63 For your notes...
Page 69: ...69 69 For your notes...
Page 85: ...85 85 For your notes...
Page 99: ...99 For your notes...
Page 143: ...143 For your notes...
Page 191: ...191 For your notes...
Page 212: ...212 212 For your notes...
Page 213: ...213 213 For your notes...
Page 214: ...214 For your notes...
Page 216: ...216...


