30 / 48
S1024.mz32_V1.7_sh_en
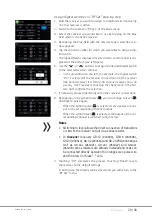
Assign Digital Switches to a widget step-by-step
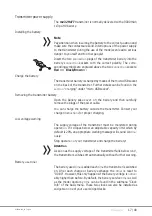
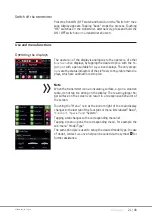
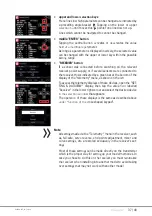
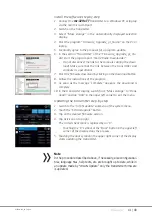
1. Switch to the submenu “Digital Switch”.
2. Tap on the
Įƌ
st “Act” icon to
ĂĐƟǀĂ
te the Digital Switch and select
the desired mode (On/O
ī͕
P
ƵůƐĞŽƌ&ůĂƐŚͿ͘
3. Connect for example a servo to the channel you designated as
Digital Switch.
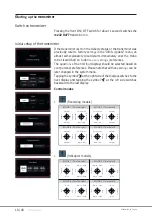
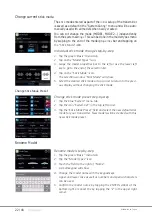
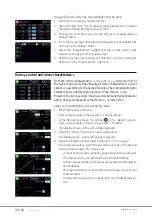
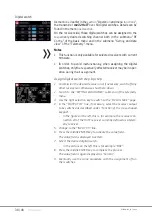
4. Go to the Home page and select an empty
ĚĞĐŬ
or available
ďůŽĐŬ
an bring up the Widget Editor.
5. Select the “Digital Switch” widget and tap on DS1 which is the
widget we assigned in the previous step.
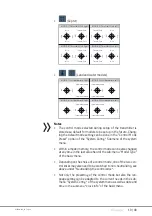
6. Test the
ŽƉĞƌĂƟŽŶ
by tapping on the bu
Ʃ
on. You can change its
behavior in the “Digital Switch” submenu.
Se
ƫŶŐ
control and mixer characteris
ƟĐƐ
Both the control characteris
ƟĐƐŝŶƚŚĞƐƵďŵĞŶƵ
„control se
ƫŶ
g“ of
the basic menu as well as virtually all mixer characteris
ƟĐƐ
are set
essen
ƟĂůůLJ
according to the same principles. The corresponding pro-
cedure is shown below with reference to the thro
ƩůĞĐƵ
rve.
However, the se
ƫŶŐƐ
shown have a purely demonstra
Ɵ
ve character
and in no way correspond to real thro
ƩůĞĐŚĂ
racteris
ƟĐƐ͊
Select characteris
ƟĐĐƵ
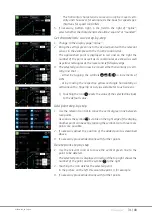
rve step-by-step
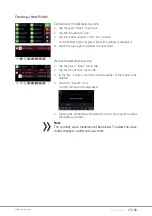
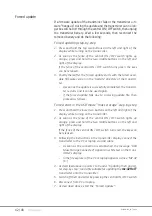
1. Enter the desired submenu.
Here is an example of the submenu “control se
ƫŶŐ
”.
2. In the desired line touch the symbol
…
in the “Detail” column.
Here is an example of the con
ƚƌŽůĨƵŶĐƟŽŶ
“Thro
ƩůĞ
”.
The display sho
ǁŶŽŶƚŚĞůĞŌǁŝůůďĞĚŝƐƉůĂLJĞĚ͘
3. Touch the “Other
͟ĮĞůĚŝŶƚŚĞƵƉƉĞƌƌŝŐ
ht corner.
The display sho
ǁŶŽŶƚŚĞůĞŌǁŝůůďĞĚŝƐƉůĂLJĞĚ͘
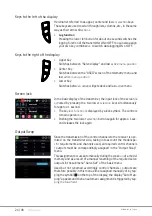
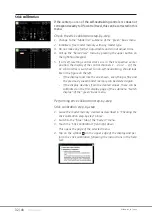
4. Touch the brigh
ƚƐĞůĞĐƟŽŶĮĞůĚ
to the right of “Curve type”.
In rot
ĂƟŽŶ
proc
ĞĚƵƌĞ͕
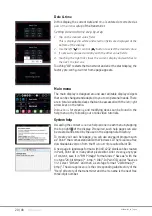
select the desired curve type or the desired
control characteris
ƟĐ͘dŚĞĐŚŽŝ
ces are:
-
A linear characteris
ƟĐ
without points between the endpoints.
This characteris
ƟĐ
corresponds to the standard se
ƫŶŐ͘
-
A linear characteris
ƟĐ
with 5 points evenly distributed between
the endpoints.
This characteris
ƟĐ
is to be selected as the basis of non-linear
characteris
ƟĐƐ͘
-
A horizontal curve with a single point in the middle of the con-
trol.
Summary of Contents for mz-32 HoTT
Page 2: ...2 48 S1024 mz32_V1 7_sh_en ...
Page 39: ...39 48 S1024 mz32_V1 7_sh_en ...
Page 43: ...43 48 S1024 mz32_V1 7_sh_en ...
Page 44: ...44 48 S1024 mz32_V1 7_sh_en ...
Page 45: ...45 48 S1024 mz32_V1 7_sh_en ...
Page 48: ......


