background image

GB - 20

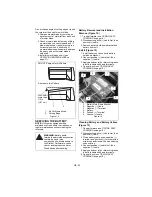
The Forward Pitch Of The Mower 
Blades (Figure 10):

Should be 0.0 in. (0.0 mm) to 1/4 in. 
(6.35 mm) pitched forward.

NOTE: This measurement must be taken 
when the mower blades ends are facing 
forward.

The Pitch Of The Mower Blades From 
Side-To-Side (Figure 11):

Should be within 1/4 in. (6.35 mm) as 
measured on each side of the mower 
deck.

NOTE: This measurement must be taken 
when the mower blades ends are 
perpendicular (at a right angle) to the frame 
of the unit.

Figure 9

1. Mower Deck
2. Mower Blade

3. Ground

Lowest Cutting Position

1-1/2 in. + 1/4 in. (3.8 cm + 0.64 cm)

1

3

2

Highest Cutting Position

4-1/2 in. + 1/4 in. (11.4 cm + 0.64 cm)

1

3

2

Forward Pitch of Mower Blades

Figure 10

1. Mower Deck
2. Mower Blade

3. Ground

Forward Pitch = 0.0 in. (0.0 mm) to 
1/4 in. (6.35 mm)

Front of Mower 

Deck

1

3

2

Figure 11

1. Mower Deck
2. Mower Blade

3. Ground

1

3

2

Side-To-Side Pitch

1/4-in. (6.35 mm) from Side-To-Side

Summary of Contents for ZT 915100 - 1732

Page 1: ...Owner Operator Manual Models 915100 1734 915102 2040 915104 2250 915106 2550 915132 2350 ZT 03829300 11 08 Printed in USA ENGLISH FRANÇAIS ...

Page 2: ...tes langues sont disponibles chez votre revendeur Rendez vous chez votre revendeur ou allez sur le site www gravely com pour consulter la liste des langues disponibles pour votre équipement Les manuels imprimés dans des langues différentes de l anglais sont également disponibles en téléchargement gratuit sur notre site Web http www gravely com THE MANUAL Before operation of unit carefully and comp...

Page 3: ...download from www gravely com on the internet DELIVERY Customer Note If you have purchased this product without complete assembly and instruction by your retailer it is your responsibility to Read and understand all assembly instructions in this manual If you do not understand or have difficulty following the instructions contact your nearest Gravely Dealer for assistance NOTE To locate your neare...

Page 4: ...e of children Never assume that children will remain where you last saw them Gasoline is extremely flammable and the vapors are explosive handle with care Disengage attachment stop unit and engine remove key engage parking brake and allow moving parts to stop before leaving operator s position Look for these symbols to point out important safety precautions They mean Attention Personal Safety Is I...

Page 5: ... 6 4 5 8 Maximum Tongue weight 30 lbs Maximum Trailer weight 300 lbs Do not use hitch with bagger attached Do not use on steep hills or slopes Do not park on hills when trailer is attached Do not use with any ground engaging equipment Avoid injury Stay clear of rotating parts OL1816 Always keep feet and hands away from rotating parts Always stand clear of discharge area Do not direct discharge tow...

Page 6: ...s going uphill stop blade and back down slowly Avoid sudden turns OL1813 OL1814 OL1815 OL1801 OL1802 OL1803 OL1804 OL1805 OL1806 MAX 10 OL1807 Keep safety devices guards shields switches etc in place and working Check interlock system per manual before use Understand location and function of all controls Never allow operation by untrained persons Disengage PTO stop unit and engine set parking brak...

Page 7: ... of a cliff or ditch or if an edge caves in Dust fog etc can reduce vision and cause an accident Operate unit only when there is good visibility and light Data indicates that operators age 60 and above are involved in a larger percentage of riding mower related injuries These operators should evaluate their ability to operate the riding mower safely enough to protect themselves and others from ser...

Page 8: ... DO NOT make sudden changes in speed or direction Use extra care while operating machines with grass catcher or other attachments They can affect stability of the machine Avoid starting stopping or turning on a slope If tires lose traction disengage the blades and proceed slowly straight down the slope DO NOT operate on slopes over 10 DO NOT park on slopes unless necessary If unit is parked on a s...

Page 9: ...sitive cable FIRST and negative cable SECOND A frozen battery can explode and result in death or serious injury DO NOT charge or jump start a battery containing frozen fluid Thaw the battery before putting on a charger or jump starting ALWAYS keep protective structures guards and panels in good repair in place and securely fastened NEVER modify or remove safety devices DO NOT change engine governo...

Page 10: ...heck Tire Pressure See SPECIFICATIONS on page 29 Level Mower Deck See LEVELLING AND ADJUSTING PITCH OF MOWER DECK on page 19 Fill Fuel Tank See FILLING FUEL TANK on page 14 Check Safety Interlock System See Safety Interlock System on page 13 ASSEMBLY WARNING AVOID INJURY Read and understand the entire Safety section before proceeding CAUTION Avoid injury Explosive separation of tire and rim parts ...

Page 11: ...GB 11 Check function of all controls See OPERATION on page 13 1 Steering Lever 2 Seat 3 Eccentric Spacer Figure 3 1 3 1 2 ...

Page 12: ...Control 3 Ignition Switch 4 PTO Switch 5 Seat 6 Steering Levers 7 Fuel Tank 8 Mower Lift Pedal 9 Mower Deck 10 Discharge Chute 11 Parking Brake CONTROLS AND FEATURES Figure 4 4 2 1 3 5 7 7 11 8 10 9 4 3 1 915106 132 915100 102 104 6 ...

Page 13: ...ard to start a cold engine Pull the choke lever to the rear when the engine gets warm Throttle Lever 915100 102 104 Choke 1 Use to start a cold engine Fast 2 Increases engine speed Slow 3 Decreases engine speed OPERATION WARNING AVOID INJURY Read and understand the entire Safety section before proceeding WARNING Safety interlock failure and improper operation of unit can result in death or serious...

Page 14: ...ng levers from the neutral position Mower Lift Pedal Figure 5 Raises and lowers mower deck NOTE The adjustment pin is used to set the height of the mower deck See SPECIFICATIONS on page 29 for cutting height dimensions Press mower lift pedal and install adjustment pin in the desired adjustment hole FILLING FUEL TANK 1 Clean fuel cap and surrounding area to prevent dust dirt and debris from enterin...

Page 15: ...rial 3 Engage PTO to start mower blades NOTE The parking brake must be disengaged prior to moving the steering levers from the neutral lockout position 4 Release parking brake 5 Use steering levers to move the unit 6 Disengage PTO to stop mower blades TRANSPORTING UNIT ALWAYS shut off engine set parking brake remove key and drain fuel when transporting unit on a truck or trailer Tie unit down secu...

Page 16: ...ge parking brake and engage transmission bypass lever see MOVING UNIT MANUALLY on page 15 Push unit If unit rolls contact your Gravely Dealer Clean Unit Clean engine battery seat mower deck etc of all dirt and debris Do not use solvents hard cleaners or abrasives NOTE Protect painted surfaces with automotive type wax Check Tires See SPECIFICATIONS on page 29 for correct tire pressure CAUTION Avoid...

Page 17: ...ttery and Battery Cables on page 22 Lubricate Unit Apply grease to zerk 1 on each front wheel 50 Hours or Every Season Check Fasteners Check mower blade mounting hardware and all other fasteners Replace fasteners that are missing or damaged Tighten all nuts and bolts to the correct torque value 100 Hours or Every Season Check All Belts Replace worn or deteriorated belts Check hydrostatic belt see ...

Page 18: ... REMOVAL AND INSTALLATION Remove Figure 8 1 Remove PTO belt from electric clutch see REPLACING PTO BELT on page 24 NOTE Perform step 2 and 3 for the right and left side of unit 2 Remove drag link from mower deck 3 Remove front and rear trunnions from lift arms 4 Slide mower deck out from under unit SERVICE AND ADJUSTMENTS WARNING AVOID INJURY Read and understand the entire Safety section before pr...

Page 19: ...level surface with the tires inflated to the correct air pressure see SPECIFICATIONS on page 29 There are three measurements required to level and adjust the pitch of the mower deck 1 The distance from the mower blades to the ground 2 The forward pitch of the mower blades 3 The pitch of the mower blades from side to side The Distance From The Mower Blades To The Ground Figure 9 In the lowest cutti...

Page 20: ...is measurement must be taken when the mower blades ends are perpendicular at a right angle to the frame of the unit Figure 9 1 Mower Deck 2 Mower Blade 3 Ground Lowest Cutting Position 1 1 2 in 1 4 in 3 8 cm 0 64 cm 1 3 2 Highest Cutting Position 4 1 2 in 1 4 in 11 4 cm 0 64 cm 1 3 2 Forward Pitch of Mower Blades Figure 10 1 Mower Deck 2 Mower Blade 3 Ground Forward Pitch 0 0 in 0 0 mm to 1 4 in 6...

Page 21: ... blades on mower deck with mounting hardware 2 Torque 5 8 inch hex bolt to 80 to 120 lbf ft 108 to 163 N m SHARPENING MOWER BLADE 1 Remove mower blade from unit see REPLACING MOWER BLADE on page 21 Gravely recommends having mower blades sharpened by a professional Contact your Gravely dealer Discard mower blade if figure 14 more than 1 2 in 1 27 cm of metal is removed the air lift erosion area is ...

Page 22: ... Connect positive cable first then negative cable 3 Apply petroleum jelly or dielectric grease to battery cable ends and terminals 4 Tip seat back see TIPPING SEAT FORWARD on page 18 Cleaning Battery and Battery Cables Figure 15 1 Tip seat forward see TIPPING SEAT FORWARD on page 18 2 Disconnect negative cable first then positive cable 3 Clean battery cable ends negative terminal and positive term...

Page 23: ... terminal and negative lead of charger to negative terminal 4 Charge battery according to battery charger and battery manufacturers instructions 5 Install battery on unit see Battery Removal and Installation on page 22 Jump Starting Gravely does not recommend jump starting your unit Jump starting can damage engine and electrical system components See your engine manual for more detailed informatio...

Page 24: ...stment bolt clockwise to decrease steering lever travel Turning adjustment bolt counterclockwise to increase steering lever travel REPLACING PTO BELT Remove Figure 18 1 Lower mower deck to the ground 2 Remove belt covers from mower deck 3 Pull idler arm towards outside of unit until tension is removed from PTO belt 4 Remove PTO belt from left mower deck pulley 5 Slowly release idler arm until tens...

Page 25: ...uel tank Refer to Engine Manual for the proper engine storage procedures Touch up all scratched or chipped paint surfaces Fuel System Gasoline left in the fuel system for extended periods without a stabilizer will deteriorate resulting in gum deposits in the system These deposits can damage the carburetor and the fuel hoses filter and tank Prevent deposits from forming in the fuel system during st...

Page 26: ...2 Air filter cartridge plugged 2 Clean or replace air filter cartridge Refer to Engine Manual for detailed instructions 3 Faulty engine 3 Contact your Gravely Dealer Unit does not move with engine running when using steering levers 1 The transmission bypass lever is engaged 1 Disengage transmission bypass lever see MOVING UNIT MANUALLY on page 15 2 Faulty hydrostatic belt 2 Replace hydrostatic bel...

Page 27: ...PECIFICATIONS on page 29 2 Steering levers need adjustment 2 Adjust steering levers see Forward and Reverse Speed Adjustment on page 24 3 Hydrostatic transmission and or linkage needs adjustment 3 Contact your Gravely Dealer Unit creeps with steering levers in neutral position 1 Hydrostatic transmission and or linkage needs adjustment 1 Contact your Gravely Dealer Poor cutting quality 1 Mower deck...

Page 28: ... 104 03498400 1 40 Inch Mower Blade 915102 00651800 1 34 Inch Mower Blade 915100 08866800 1 50 Inch Mulching Blade 915132 106 104 00272800 1 40 Inch Mulching Blade 915102 00869100 1 34 Inch Mulching Blade 915100 ACCESSORIES See your authorized Gravely dealer to add these optional accessories to your unit Part No Qty Description 71502900 1 Dump Cart 71503200 1 48 Inch Aerator 71503300 1 36 Inch Rol...

Page 29: ...ake Fuel Fuel Type Refer to Engine Manual Fuel Tank Capacity gal L 3 25 12 3 Transmission Hydrostatic Drive Size and Weight Length in cm 70 178 Width in cm 58 147 58 147 58 147 48 122 44 112 Weight lbs kg 540 245 540 245 530 240 520 236 520 236 Height in cm 40 102 Tires Front Tire Size in cm 4 x 11 10 6 x 28 Rear Tire Size in cm 18 x 9 5 x 8 46 x 24 x 20 18 x 8 5 x 8 46 x 21 x 20 18 x 6 5 x 8 46 x...

Page 30: ... through fifth year from the date of purchase the parts required to repair a defect in material or work manship of the main frame not the labor will be provided free of charge 90 Day Limited Warranty on Service Parts and Accessories Genuine Ariens or Gravely brand service parts and accessories are warranted to be free from defects in material and workmanship for a period of 90 days after the date ...

Page 31: ...s purchased in the United States including Puerto Rico and Canada In all other countries contact place of purchase for warranty information Disclaimer Ariens may from time to time change the design of its products Nothing contained in this warranty shall be construed as obligating Ariens to incorporate such design changes into previously manufactured products nor shall such changes be construed as...

Page 32: ...GRAVELY 655 West Ryan Street Brillion WI 54110 1072 920 756 2141 Fax 920 756 2407 www gravely com ...

Reviews: