56
•
Stainless steel surfaces : to maintain your
grill’s
high quality appearance, wash with mild detergent and
warm soapy water and wipe dry with a soft nonabrasive cloth after each use. Backed-on grease deposits
may require the use of an abrasive plastic cleaning pad.
CLEANING THE BURNER ASSEMBLY
Follow these instructions to clean and / or replace parts of burner assembly or if you have trouble
igniting grill.
1.
Turn gas off at control knobs and LP Tank.
2.
Remove cooking grates, grease tray and grease cup.
3.
Remove screw at end of burner using a screwdriver.
4.
Carefully lift each burner up and away from valve openings.
Inspect burner for any damage (cracks or holes). If damage is found, replace with a new
burner. Reinstall the burner, check to ensure that the Gas valve orifices are correctly positioned and
secured inside the burner inlet
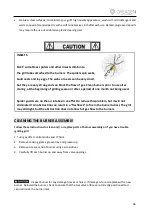
INSECTS.
FACT: sometimes spiders and other insects climb into
the grill tubes attached to the burners. The spiders spin webs,
build nests and lay eggs. The webs or nests can be very small,
but they are very strong and can block the flow of gas. Clean burners prior to use after
storing, at the beginning of grilling season or after a period of one month not being used.
Spider guards are on the air intakes in an effort to reduce this problem, but it will not
eliminate it! An obstruction can result in a “flashback” (a fire
in the burner tubes). The grill
may still light, but the obstruction does not allow full gas flow to the burners.
Summary of Contents for GR-3B31NA
Page 1: ......
Page 2: ......
Page 15: ...15 5 Monter l accolade de porte 10 au chariot avec des vis 24 6 Monter les portes 11 et 12...
Page 17: ...17 9 Fixer le panneau avant gauche 13 l tag re gauche 14 l aide de vis 24 C t gauche C t droit...
Page 18: ...18 10 Montage de la jauge de temp rature 11 Placer les dompteurs de flammes 17...
Page 19: ...19 12 Placer les grilles 18 13 Placer la grille de r chauffement 19...
Page 42: ...42 5 Assemble the door brace 10 to the trolley with screws 24 6 Assemble the doors...
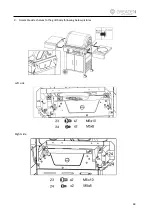
Page 44: ...44 9 Assemble side shelves to the grill body following belowpictures Left side Right side...
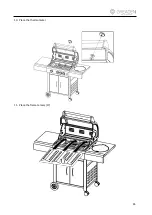
Page 45: ...45 10 Place the thermometer 11 Place the flame tamers 17...
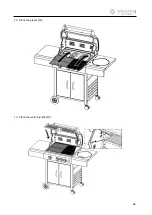
Page 46: ...46 12 Place the grates 18 13 Place the warming rack 19...
Page 59: ......


