Section 2: Operating Instructions
NTS2507, NTS2509, & NTS2511 s/n+ 2019+ NTS Seeder 313-900M
7/1/19
24
15.
Refer to Figure 2-7:
On the back of the NTS Seeder,
remove slow moving vehicle sign from mounting
socket (#5) and insert it in the mounting bracket on
the back of the tractor.
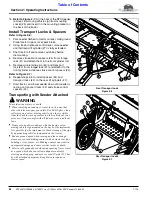
Install Transport Locks & Spacers
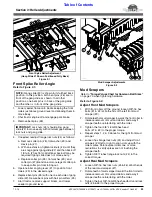
Refer to Figure 2-6:
1.
Park seeder hitched to tractor on level, solid ground.
Place tractor in park or set park brake.
2.
Using tractor hydraulic control lever, raise seeder
until hydraulic lift cylinder (#7) is fully extended.
3.
Shut tractor off and remove switch key before
dismounting.
4.
Remove stroke control spacers (#4) from storage
rack (#1) and attach them to the front cylinder rod.
5.
Remove wire retaining pin (#3) and transport
lock (#2) from storage rack (#1) and attach it to the
front cylinder rod above stroke control spacers (#4).
Refer to Figure 2-7:
6.
Repeat steps 2-5 to install spacers (#4) and
transport locks (#2) on the rear lift cylinders (#7).
7.
Start tractor, and lower seeder down until seeder is
resting on transport locks (#2) and stroke control
spacers (#4).
Transporting with Seeder Attached
WARNING
!
To avoid serious injury or death:
•
When traveling on roadways, travel in such a way that
•
Transport on public roadways with the tractor’s slow
•
Reduce ground speed when turning and leave enough
•
Select a safe ground speed when transporting. Never travel
Front Transport Lock
Figure 2-6
Rear Transport Locks
Figure 2-7
39058
39059

