Great Planes Glider Tow Release
Installation Instructions
Requires:
Standard Servo (FUTM0029)
Threadlocker (GPMR6060)
CA Glue (GPMR6001)
Z-Bend Pliers (HCAR2000)
3/32
"
[2.4mm] Drill Bit
Coarse Sandpaper
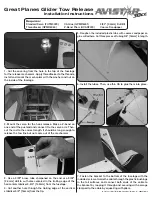
1. Cut the covering from the hole in the top of the fuselage
for the release mechanism. Apply threadlocker to the threads,
install and mount the mechanism with the washer and nut on
the inside of the fuselage.
2. Mount the servo for the hook release. Make a Z-bend on
one end of the pushrod and connect it to the servo arm. Then,
cut the rod to the correct length. It should be long enough to
release the tow line but not come out of the mechanism.
3. Use a 3/32" brass tube sharpened on the end or a 3/32"
[2.4mm] drill to cut holes centered in the trailing edge of the
horizontal stabilizer 5-3/4" [145mm] from the fuselage.
4. Cut another hole through the trailing edge of the vertical
stabilizer 5/8" [16mm] from the tip.
5. Roughen the included plastic tube with coarse sandpaper so
glue will adhere. Cut three pieces of tubing 5/8
"
[16mm] in length.
6. Install the tubes. Then, use thin CA to glue them into place.
7. Fasten the bracket to the bottom of the fuselage with the
included screws. Guide the cable through the plastic bushings
in the tail surfaces and connect both ends of the cable to
the bracket by looping it through and securing with a swage
clamped to the cable by squeezing with pliers.
© 2017 Great Planes Model Mfg. A subsidiary of Hobbico, Inc. GPMA4567Instr


