11
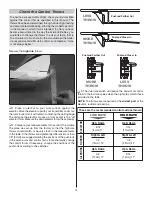
Hinge Line
Hinge Line
CORRECT
INCORRECT
❏
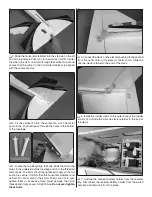
5. As you did with the aileron pushrods, install a clevis 20
complete turns onto two 6 -1/4" [159 mm] pushrods and slide a
silicone clevis retainer onto each clevis. Connect the clevises
to the outer holes of two control horns. Hardwood plates are
installed beneath the covering of the fl aps for mounting the
control horns. The edges of the plates can be seen by viewing
the wing at a shallow angle. Position the control horns over
the hardwood plates with the pushrods parallel to the servo
cases and aligned over the outer holes of the servo arms. The
holes in the control horns should be directly over the hinge
line of the fl aps. When satisfi ed with the position of the control
horns, use a felt-tip pen to mark the location of the control
horn mounting holes onto the fl aps.
❏
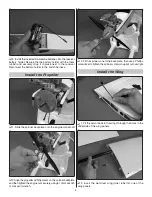
6. Drill 1/16" [1.6mm] holes through the hardwood plates
at the marks you made on the fl aps.
Take care to only drill
through the plates. Do not drill completely through the
fl aps!
The holes only need to be 3/8" [9.5mm] deep. Thread
a #2 x 3/8" [9.5mm] self-tapping screw into each hole and
back it out. Apply a drop or two of thin CA glue to each hole
and allow the glue to harden. Install the control horns onto
the fl aps using four #2 x 3/8" [9.5mm] self-tapping screws.
❏
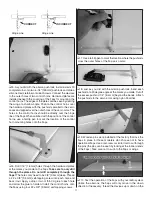
7. Use a felt-tip pen to mark the location where the pushrods
cross the outer holes of the fl ap servo arms.
❏
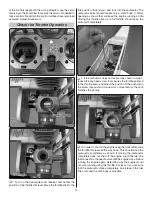
8. Just as you did with the aileron pushrods, bend each
pushrod at a 90 degree angle at the marks you made. Cut off
the excess pushrod 1/4" [6.4 mm] beyond the bends. Attach
the pushrods to the servo arms using nylon FasLinks.
❏
9. Wooden pins were installed at the factory that lock the
fl aps in place for those modelers who choose not to have
operational fl aps. Use a razor saw or similar tool to cut through
the pins (the pins can be seen by looking at the inboard ends
of the fl aps). Take care not to cut into the fl aps or wings.
❏
10. Test the operation of the fl aps with your radio system.
Unlike the ailerons, the fl aps will only move in the down
direction. If necessary, thread the clevises up or down on the


