❏
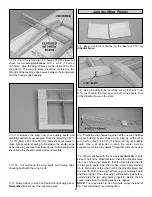
1. With Great Planes Plan Protector positioned over the
fuselage top view, pin the laser-cut 1/16” (1.6mm)
fuselage
bottom
(the side with the “B” facing up) in position over
the plan.
❏
2. On the fuselage bottom, mark the location for the five
fuselage formers.
❏
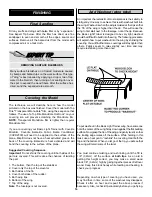
3. Position the laser-cut 1/16” (1.6mm) balsa
fuselage
side
so that the edge is flat against the building board and
one end of the fuselage side is aligned with one end of the
fuselage bottom. Make sure the “S” is facing inward. Then,
glue the side, perpendicular, to the bottom.
❏
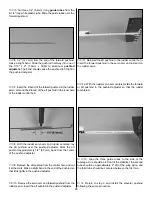
4. At the marks on the fuselage bottom, glue the five
laser-cut 3/32" (2.4mm)
fuselage formers
, perpendicular to
the fuselage bottom and side.
❏
5. Make sure that the “S” is facing inward and the edge of the
fuselage side is flat against the building board. Glue the second
fuselage side to the fuselage bottom and the five formers.
Note:
You may need to sand the formers flush with the side
and bottom.
❏
6. Remove the pins holding the fuselage bottom to the
building board. Re-pin the fuselage to the building board by
inserting pins through the fuselage sides. This will allow the
fuselage top to be attached without trapping the pins inside
the fuselage.
❏
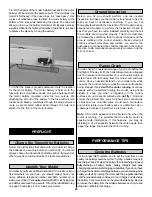
7. Test fit the laser-cut 1/16” (1.6mm) balsa
fuselage top
between the fuselage sides. The top should be flush with
the top edge of the fuselage sides. When satisfied with the
fit, apply medium CA to the top of the formers. Position the
fuselage top on the formers so that the end of the fuselage
top is aligned with the ends of the fuselage sides. Apply thin
CA along the joint between the fuselage top and sides.
❏
8. Lightly sand the sides of the fuselage to remove any
excess glue.
Assemble the Fuselage Sides
BUILD THE FUSELAGE
12
Summary of Contents for BLT
Page 24: ...TWO VIEW...

