INTRODUCTION
. . . . . . . . . . . . . . . . . . . . . . . . . . . . . . 2
SAFETY PRECAUTIONS. . . . . . . . . . . . . . . . . . . . . . . . 2
DECISIONS YOU MUST MAKE . . . . . . . . . . . . . . . . . . . 3
Radio Equipment . . . . . . . . . . . . . . . . . . . . . . . . . . . 3
Speed Control . . . . . . . . . . . . . . . . . . . . . . . . . . . . . 3
Motor System . . . . . . . . . . . . . . . . . . . . . . . . . . . . . 3
Battery Recommendations . . . . . . . . . . . . . . . . . . . . 3
Chargers . . . . . . . . . . . . . . . . . . . . . . . . . . . . . . . . . 4
Covering . . . . . . . . . . . . . . . . . . . . . . . . . . . . . . . . . 4
Building Board . . . . . . . . . . . . . . . . . . . . . . . . . . . . . 4
ADDITIONAL ITEMS REQUIRED . . . . . . . . . . . . . . . . . 4
Building Supplies . . . . . . . . . . . . . . . . . . . . . . . . . . . 4
Optional Supplies and Tools. . . . . . . . . . . . . . . . . . . 5
IMPORTANT BUILDING NOTES . . . . . . . . . . . . . . . . . . 5
Patterns. . . . . . . . . . . . . . . . . . . . . . . . . . . . . . . . . . 6
Metric Conversions . . . . . . . . . . . . . . . . . . . . . . . . . 6
Metric/Inch Scale . . . . . . . . . . . . . . . . . . . . . . . . . . . 6
BUILD THE TAIL SURFACES . . . . . . . . . . . . . . . . . . . . 7
Build the Fin & Rudder. . . . . . . . . . . . . . . . . . . . . . . 7
Build the Stabilizer & Elevator . . . . . . . . . . . . . . . . . 8
BUILD THE WING . . . . . . . . . . . . . . . . . . . . . . . . . . . . . 9
Build the Wing Panels . . . . . . . . . . . . . . . . . . . . . . . 9
Join the Wing Panels . . . . . . . . . . . . . . . . . . . . . . . 11
BUILD THE FUSELAGE . . . . . . . . . . . . . . . . . . . . . . . 12
Assemble the Fuselage Sides . . . . . . . . . . . . . . . . 12
FINISHING . . . . . . . . . . . . . . . . . . . . . . . . . . . . . . . . . . 14
Final Sanding. . . . . . . . . . . . . . . . . . . . . . . . . . . . . 14
Covering the Model . . . . . . . . . . . . . . . . . . . . . . . . 14
Add Washout . . . . . . . . . . . . . . . . . . . . . . . . . . . . . 14
COMPLETING ASSEMBLY . . . . . . . . . . . . . . . . . . . . . 15
Mount the Stabilizer & Fin . . . . . . . . . . . . . . . . . . . 15
RADIO INSTALLATION . . . . . . . . . . . . . . . . . . . . . . . . 16
Mount the Servos. . . . . . . . . . . . . . . . . . . . . . . . . . 16
ASSEMBLE THE GEAR DRIVE. . . . . . . . . . . . . . . . . . 16
MOUNT THE MOTOR . . . . . . . . . . . . . . . . . . . . . . . . . 17
INSTALL THE PUSHRODS . . . . . . . . . . . . . . . . . . . . . 17
INSTALL THE LANDING GEAR . . . . . . . . . . . . . . . . . 19
SET THE CONTROL THROWS . . . . . . . . . . . . . . . . . . 19
BALANCE YOUR MODEL . . . . . . . . . . . . . . . . . . . . . . 19
PREFLIGHT. . . . . . . . . . . . . . . . . . . . . . . . . . . . . . . . . 20
Charge the Transmitter Batteries . . . . . . . . . . . . . . 20
Identify Your Model . . . . . . . . . . . . . . . . . . . . . . . . 20
Ground Inspection . . . . . . . . . . . . . . . . . . . . . . . . . 20
Range Check. . . . . . . . . . . . . . . . . . . . . . . . . . . . . 20
PERFORMANCE TIPS. . . . . . . . . . . . . . . . . . . . . . . . . 20
Cycle the Batteries. . . . . . . . . . . . . . . . . . . . . . . . . 20
Examine the Propeller . . . . . . . . . . . . . . . . . . . . . . 21
Motor Care . . . . . . . . . . . . . . . . . . . . . . . . . . . . . . 21
Oil the Wheels . . . . . . . . . . . . . . . . . . . . . . . . . . . . 21
Motor Safety Precautions . . . . . . . . . . . . . . . . . . . . 21
AMA Safety Code . . . . . . . . . . . . . . . . . . . . . . . . . 21
Find a Safe Place to Fly. . . . . . . . . . . . . . . . . . . . . 21
FLYING . . . . . . . . . . . . . . . . . . . . . . . . . . . . . . . . . . . . 22
Takeoff. . . . . . . . . . . . . . . . . . . . . . . . . . . . . . . . . . 22
Flight . . . . . . . . . . . . . . . . . . . . . . . . . . . . . . . . . . . 22
Landing . . . . . . . . . . . . . . . . . . . . . . . . . . . . . . . . . 23
ROG Takeoff . . . . . . . . . . . . . . . . . . . . . . . . . . . . . 23
2-VIEW DRAWING. . . . . . . . . . . . . . . . . . . . . back cover
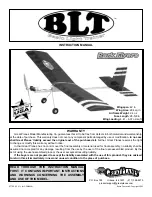
Congratulations and thank you for purchasing the
Great
Planes Basic Light Trainer (BLT)
. The
BLT
is one in a
series of
Park Flyers
from Great Planes designed to be
flown in small areas. Park Flyers are a relatively new class
of small, lightweight, slow-flying, fast-building models. Since
Park Flyers are small and fly slowly, little space is required.
A nearby park, schoolyard or vacant lot becomes an
impromptu flying site (
see
Find a Safe Place to Fly
on
page 21). Additionally, Park Flyers are perfect for those
evenings at the field when everybody else is packing up
their gear, the wind has died, and there is still enough light
to fly a small, slow model.
The BLT is a slow flying, high-wing model that is about as
simple to build as they get. However, if you have never
flown an R/C model before, learning to fly the BLT all by
yourself is not recommended. As with any trainer airplane,
you should find an experienced modeler to help you with
your first flights. Information about R/C clubs and instructors
is provided later in this manual.
1. Even though the
Great Planes
BLT
is small, lightweight
and flies slowly, if it is not assembled and operated correctly
it could possibly cause injury to yourself or spectators and
damage property.
2. Build the plane according to the plans and instructions. Do
not alter or modify the model, as doing so may result in an
unsafe or unflyable model. In a few cases the instructions may
differ slightly from the photos. In those instances the plans and
written instructions should be considered as correct.
3. Take time to build straight, true and strong.
4. Use an R/C radio system that is in first-class condition.
This Park Flyer requires micro servos, a micro receiver and
a micro speed control able to handle 5 amps.
5. You must properly install all R/C and other components so
that the model operates properly on the ground and in the air.
6. You must test the operation of the model before
every
flight to insure that all equipment is operating, and that the
model has remained structurally sound. Be sure to check
connectors often and replace them if they show signs of
wear or fatigue.
PROTECT YOUR MODEL,YOURSELF
& OTHERS...FOLLOW THESE
IMPORTANT SAFETY PRECAUTIONS
INTRODUCTION
TABLE OF CONTENTS
2
Summary of Contents for BLT
Page 24: ...TWO VIEW...

