❏
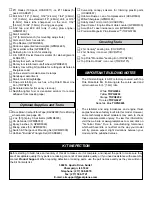
5. Cut the covering from the hole in the bottom of the
center section for the aileron servo wire.
Again, start with the bottom, left wing first…
❏
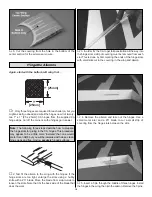
1. Only three hinges are required for each aileron, but you
might as well go ahead and cut all the hinges now. Cut twenty-
two 1" x 1" [25 x 25mm] CA hinges from the supplied CA
hinge strips. Cut off the corners so the hinges go in easier.
❏
2. Test fit the aileron to the wing with the hinges. If the
hinge slots are too tight, enlarge the slots using a hobby
knife with a #11 blade. Move the blade from side-to-side to
loosen the slots. Note that it’s the back side of the blade that
does the work.
❏
3. In order for the CA to get full penetration all the way into
the hinge slots a strip of covering must be removed from each
slot. This is done by first marking the ends of the hinge slots
with small slits cut in the covering in the wing and aileron.
❏
4. Remove the aileron and take out the hinges. Use a
small metal ruler and a #11 blade to cut a small strip of
covering from the hinge slots between the slits.
❏
5. Insert a T-pin through the middle of three hinges. Install
the hinges in the wing, then join the aileron. Remove the T-pins.
Note: The following three steps describe how to prepare
the hinge slots for gluing in the CA hinges. This procedure
may appear to be a little more “involved” than one would
prefer for an ARF, but you will be rewarded with close, clean
hinge gaps and free-moving, securely hinged surfaces.
1" [25mm]
1"
[25mm]
Hinge the Ailerons
10


