❏
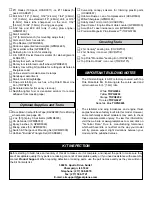
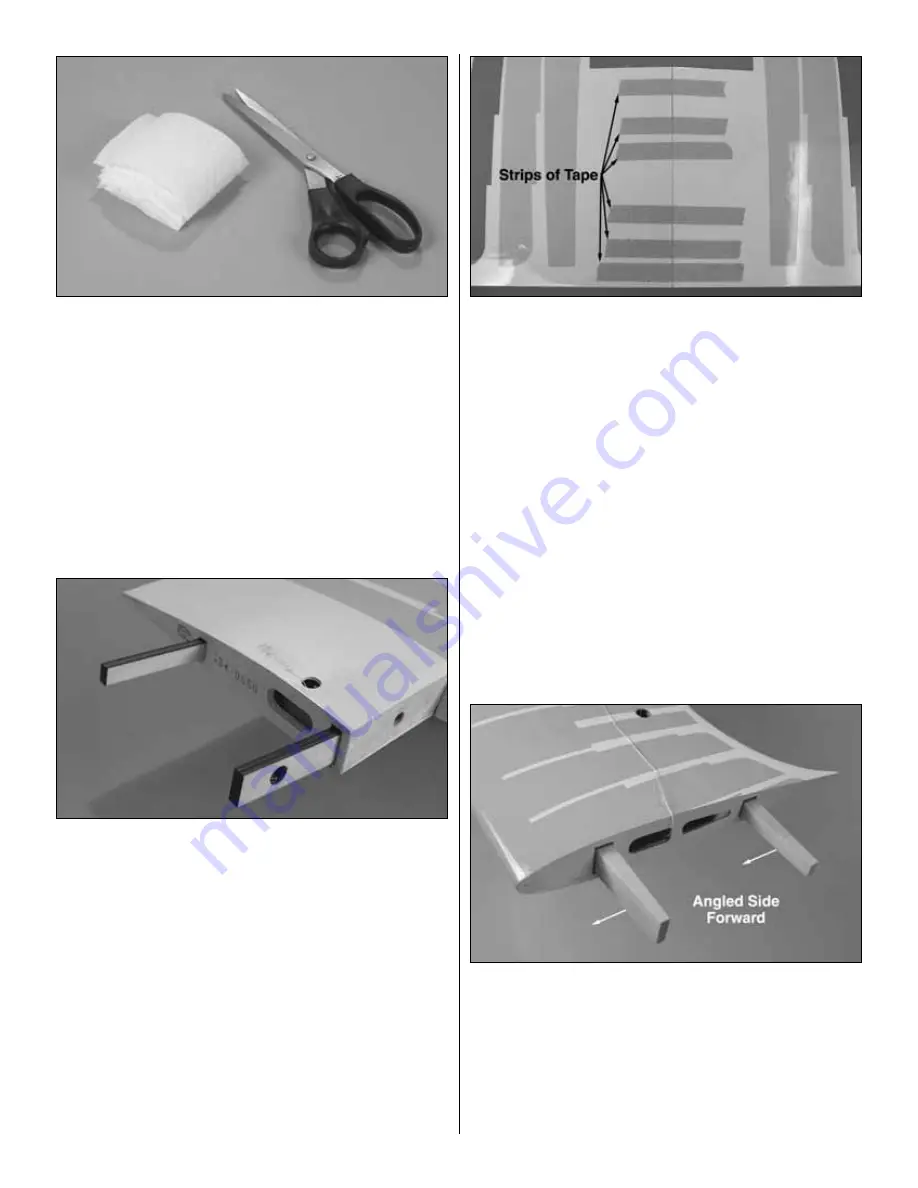
3. Lay two or three paper towels on top of each other. Use
scissors to cut them into smaller squares. These will come
in handy throughout assembly. Gather the rest of the items
required for joining the bottom wing including 30-minute
epoxy, a mixing cup, an epoxy brush, mixing sticks, masking
tape and a sheet of wax paper to protect your workbench.
The key to a secure wing joint is applying epoxy to all
contacting surfaces—this means both inside the wing
between the spars and to the joiners…
❏
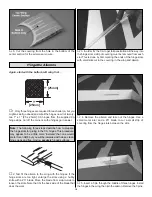
4. Mix approximately 1 oz. [30ml] of 30-minute epoxy.
Working quickly, pour a generous amount into one wing
half where the joiners go. Use a piece of wire or a dowel to
thoroughly spread the epoxy, coating all surfaces inside.
Coat the end of the wing and one half of both joiners with
epoxy. Insert the coated ends of the joiners into the wing.
Immediately proceed to the next step.
❏
5. Coat the inside and the end of the other panel with
epoxy. Also coat the protruding end of the joiners in the first
panel. Join the wings and wipe away excess epoxy as it
squeezes out. Coat one end of the dowels with epoxy, then
insert them into the wings. Be certain the dowels key into the
holes in the forward joiner. 3/8" [10mm] of the dowels should
protrude. Immediately proceed to the next step.
❏
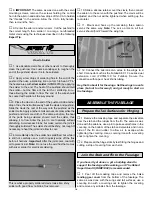
6. Tightly tape the wing together with several strips of
masking tape on the top and bottom. Use the small paper
towel squares dampened with denatured alcohol to wipe
away excess epoxy as the tape is applied. Be certain the
trailing edges of both wing halves accurately align. After the
wing is all taped together, epoxy under any of the strips of
masking tape can be wiped away by removing the strip,
wiping away the epoxy, then replacing the strip. After all the
epoxy has been cleaned up, set the wing aside and do not
disturb until the epoxy has hardened.
❏
7. After the epoxy joining the bottom wings has
hardened, remove the masking tape. If there is still residual
hardened epoxy that you weren’t able to remove before, you
may be able to pick it off with a #11 blade or, in some cases,
remove it with a paper towel square wetted with denatured
alcohol. Use a covering iron with a covering sock to re-bond
any covering that lifted while peeling off the masking tape.
Now join the top wing. One outer panel at a time will be
joined to the center panel…
❏
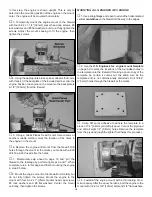
8. Without using any glue, test fit the outer panels to the
center panel with the forward and aft top wing joiners. The
angled side of the joiners faces forward. There is no dihedral
in the top wing, so it should be flat. Make any adjustments
necessary for a good fit.
❏
9. Untape the strings on the ends of both outer panels
and on both ends of the center panel. Temporarily put the
strings inside the wings so they will not be in the way.
12


