❏
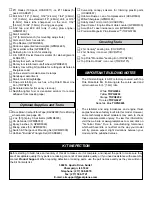
13. After the epoxy on the stab has hardened, slide the
fin into position. Holding the rudder to the fin, make certain
the top of the rudder aligns with the top of the fin and the
bottom of the rudder aligns with the bottom of the fuselage.
Also make sure the trailing edge of the fin is parallel with the
end of the fuselage. If necessary, trim the bottom of the fin
to achieve the correct alignment.
❏
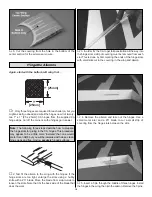
14. The same as was done with the stab, use a fine-point
felt-tip pen to mark the fuselage all the way around both sides
of the fin. Remove the fin. Cut and remove the covering, then
wipe the ink from the fin and fuselage. Cut and peel the
covering from the fin, then glue it into position with 30-minute
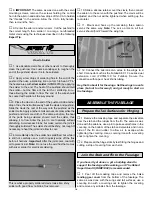
epoxy. Use a Hobbico Builder’s Triangle to make certain the
fin is vertical. If necessary, use masking tape to pull the tip of
the fin to one side or the other to get it vertical.
Do not join the rudder and elevators to the fin and
stabilizer until instructed to do so.
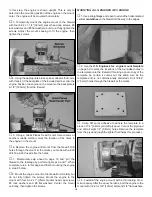
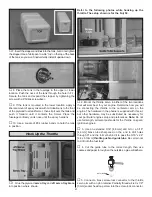
Place a weight over the aft end of the fuselage to hold it
down while mounting the engine (or skip ahead to page 28
and perform steps 1 and 2 to mount the elevator and rudder
servos). The fuselage will be nose-heavy and could nose-
over and fall off your building stand until the servos are
installed. A small zip-lock sandwich bag half-filled with shot
is shown in the photo.
MOUNTING A GLOW ENGINE
Follow these instructions if mounting a glow engine. If
mounting a gas engine, proceed to the gas engine
mounting instructions on page 18.
❏
1. Cut the glow engine mounting bolt pattern from page
49. (If making a photo copy, be certain it comes out the same
size as the pattern and is not dimensionally distorted.) Tape
the pattern to the firewall, aligning the lines on the pattern with
the lines on the firewall. Use a large T-pin to mark the center
of the holes on the pattern onto the firewall.
❏
2. Remove the pattern from the firewall. Drill 1/16"
[1.6mm] pilot holes at the marks. Enlarge the holes with a
7/32" [5.6mm] drill. Mount 8-32 blind nuts to the back of the
firewall by pulling them into the wood with an 8-32 screw
from the front, but before installing the blind nuts apply a few
dabs of epoxy to the flange of each one.
Mount the Engine
17


