12
❏
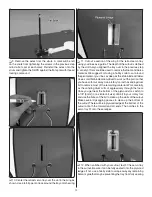
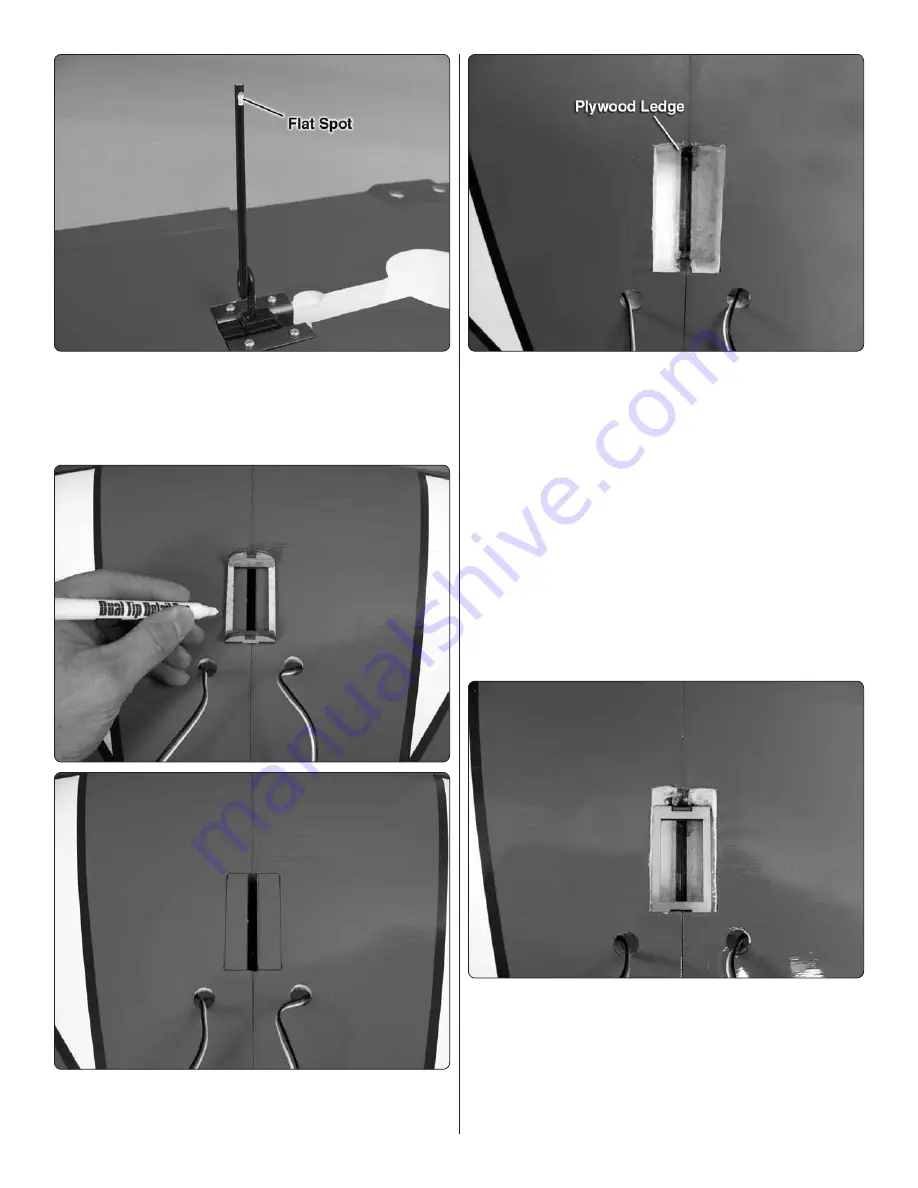
9. Remove the axles from the struts. A mark will be left
on the struts from tightening the screws in the previous step.
Grind a fl at spot at each mark. Reinstall the axles onto the
struts and tighten the SHCS against the fl at spots with thread
locking compound.
❏
10. Center the retract servo tray over the slot in the wing as
shown. Use a felt-tip pen to trace around the tray onto the wing.
❏
11. Cut out a section of the wing for the retract servo tray
using your lines as a guide. The depth of the cutout is defi ned
by the slot that you aligned the tray over in the previous step.
A variety of tools could be used to remove the foam and balsa
material. We suggest fi rst using a hobby knife to cut around
the perimeter of your lines as deep as the knife blade will allow.
Use a small fl at blade screw driver to work out the portion that
you have so far cut away. Use a rotary tool with a sanding drum
bit to remove most of the remaining material. Work carefully
as the sanding drum will cut aggressively through the foam.
Once you get near the bottom of the plywood slot, switch to
a 1/8" [3mm] (or a similar bit size) drill bit in your rotary tool
and use the fl utes of the bit to clean up the walls of the cutout.
Make several zigzagging passes to clean up the bottom of
the cutout. There will be a plywood ledge at the bottom of the
cutout at both the forward and aft ends. The notches in the
servo tray fi t onto these ledges.
❏
12. When satisfi ed with your cutout, test fi t the servo tray
in the cutout. Be sure it can be fully seated onto the plywood
ledges. If not, use a hobby knife to scrape away any remaining
balsa or glue that may be preventing the tray from fully seating.


