16
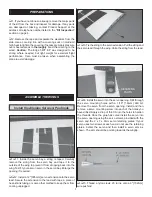
When positioned properly the control horn will rest on a
hardwood plate in the rudder. The center of the control horn
is approximately 5/8" [16mm] from the bottom of the rudder.
Mark the location of the mounting holes onto the rudder. Drill
a 1/16" [1.6mm] hole on the marks. Do not drill completely
through the rudder. Attach the control horn to the rudder
using two 2-56 x 3/4" [19mm] machine screws. Remove the
screws and apply a drop of thin CA to both holes. After the
CA has cured, reinstall the control horn.
❏
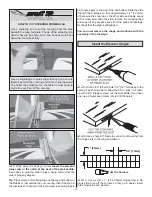
5. Slide a silicone clevis retainer over the clevis. With
the rudder servo and the rudder centered, mark the rudder
pushrod where it crosses the rudder servo arm. Make a 90°
bend at the mark. Cut the pushrod 3/8" [9.5mm] past the
bend. Attach the pushrod to the rudder servo arm with a
nylon FasLink.
❏
6. Connect the ESC, voltage regulator, rudder servo,
elevator servo and Y-harness to the receiver.
❏
7. Connect the fl ight battery to the ESC and voltage
regulator. Check that all the servos are operating correctly.
Arm the motor (with the prop removed) and slowly start the
motor to make sure it is rotating in the correct direction.
❏
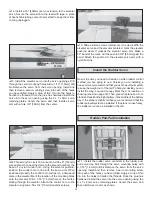
8. Overlap by 1" [25mm] two strips of non adhesive backed
hook and loop material. Route the hook and loop material
through the slot in the battery tray, under the tray and back
through the slot on the other side of the tray.
❏
9. Attach a strip of sticky backed hook material to the
center of the battery tray. The loop material can be attached
to the battery.
Apply the Decals
The box photographs show the location of the decals on
the airplane. Refer to the box for the exact placement of the
decals. The following tips may be useful for applying them.
1. Be certain the model is clean and free from oily fi ngerprints
and dust. Prepare a dishpan or small bucket with a mixture
of liquid dish soap and warm water–about one teaspoon of
soap per gallon of water. Submerse the decal in the soap and
water and peel off the paper backing. Note: Even though the
decals have a “sticky-back” and are not the water transfer
type, submersing them in soap and water allows accurate
positioning and reduces air bubbles underneath.
2. Position decals on the model. Holding the decal down, use
a paper towel to wipe most of the water away.
3. Use a piece of soft balsa or something similar to squeegee
remaining water from under the decal. Apply the rest of the
decals the same way.
GET THE MODEL READY TO FLY
Check the Control Directions
❏
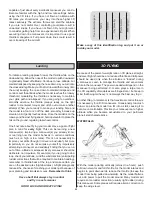
1. Turn on the transmitter and receiver and center the
trims. If necessary, remove the servo arms from the servos
and reposition them so they are centered. Reinstall the
screws that hold on the servo arms.
❏
2. With the transmitter and receiver still on, check all the
control surfaces to see if they are centered. If necessary, adjust
the clevises on the pushrods to center the control surfaces.


