11
If you choose not to purchase a Slot Machine
™
you can
make the slots by following these instructions.
❏
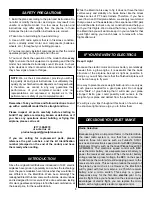
17. Cut the hinge slots in the elevators, stabilizer, fin and
rudder using a Hobby Knife with a #11 blade. Begin by
carefully cutting a very shallow slit at the hinge location to
accurately establish the hinge slot. Make three or four more
cuts, going a little deeper each time. As you cut, slide the
knife from side to side until the slot has reached the proper
depth and width for the hinge.
❏
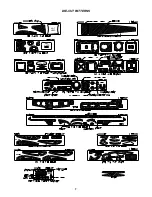
18. Cut the 3/8" x 1" hinges for the elevator and rudder
from the supplied 2" x 9" hinge material, then snip off the
corners. Temporarily join the elevators to the stab and the
rudder to the fin with the hinges, adjusting any hinge slots if
necessary so they all align. Do not glue in the hinges until
you are instructed to do so.
❏
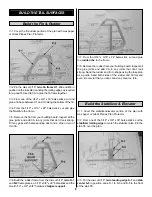
1. Refer to the Expert Tip that follows and shape the
leading edge of the elevators and rudder to a “V” as shown
on the plan.
❏
2. Use the same procedure to bevel the leading edge of
the rudder.
❏
3. Temporarily attach the elevators to the stab and the
rudder to the fin. Use your bar sander to round the entire
perimeter of the elevator, stab, rudder and fin (do not round
the bottom edge of the fin where it will be glued to the stab
and fuse).
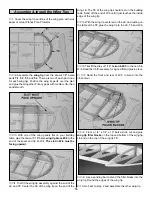
Start by building the left wing panel right side up over the
left wing panel plan so your progress matches the photos.
❏
1. Set aside two of the hardest and straightest 1/4" x 1/4"
x 13" balsa sticks for use later to make pushrods.
❏
2. The shaped and notched balsa wing leading edges are
fastened together by a thin web of balsa. Separate the LE’s
by folding them until the balsa web breaks. Sand away the
excess balsa that remains along the edges, using a sanding
bar with 150-grit sandpaper. Before using the leading edge
you must determine which one to use for the left wing panel.
Here’s how:
A. We have drawn a red line on the top of each piece.
B. The pieces are notched on one end but not on the other.
The notched end goes toward the wing tip.
C. Position one of the leading edge pieces on the left wing
panel plan with the red line up. If the notched end is on the
left side (at the tip) you have the correct piece. (When
building the right wing panel the red line must be up, with
the notched end on the right side, at the tip).
Build the Wing Panels
BUILD THE WING
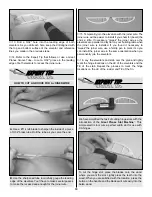
B. Using the “bevel to” lines and the centerline as a guide,
make the “V” on the leading edge of the elevators with a
razor plane or your bar sander with 150-grit sandpaper.
A. Place the leading edge of one of the elevators on your
work surface and use your pen to mark a “bevel to” line
on both sides, about 3/32” high.
Note: You will probably have to adjust the height of the
elevator with card stock so your “bevel to” line is not too high.
HOW TO BEVEL THE LEADING EDGES
Finish the Tail Surfaces


