42
❏
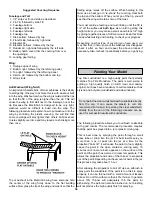
3. Install the aileron servo by first threading two nylon
torque rod horns on the aileron torque rods so that they
are approximately 3/8" above the bottom of the wing.
❏
4. Thread two nylon clevises 14 turns onto the threaded
end of two 12" wire pushrods. Connect the clevises to the
torque rod horns and slide a silicone clevis retainer over
each clevis.
❏
5. Install a mini servo in the aileron tray and plug it into the
receiver.
❏
6. Trim a servo wheel as shown for aileron differential throw.
Aileron Differential Throw: Ailerons that are set up to
deflect more in the upward direction than downward are
said to have “Differential Throw.” The purpose is to
counteract “Adverse Yaw.”
Adverse Yaw: The tendency of an airplane to yaw in the
opposite direction of the roll. For instance, when right
aileron is applied, the airplane yaws to the left, thus
opposing the turn. Adverse yaw is common in trainer type
airplanes having flat-bottom wings and is most noticeable at
slow speeds and high angles of attack, such as during
takeoffs and when stretching a landing approach. Caused
by the unequal drag of the upward and downward deflecting
ailerons, this undesirable trait can be minimized by setting
up the ailerons with “Differential Throw,” or by “coordinating”
the turns, using aileron and rudder control simultaneously.
❏
7. Bend the aileron pushrods as shown on the plan. Switch
on the transmitter, then receiver. With the aileron servo
centered, hold the aileron pushrods on the servo wheel and
mark the hole locations on the pushrods. Make a Z-bend at
the marks and insert the Z-bend in the servo wheel.
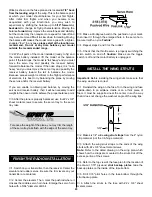
Note: This section is VERY important and must NOT be
omitted! A model that is not properly balanced will be
unstable and possibly unflyable.
❏
1. Accurately mark the balance point on the bottom of the
wing on both sides of the fuselage. The balance point
BALANCE YOUR MODEL


