11
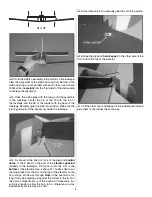
These are the recommended control surface throws:
ELEVATOR
HIGH RATE
LOW RATE
5/8"
[16mm]
17°
Up
5/8"
[16mm]
17°
Down
3/8"
[10mm]
10°
Up
3/8"
[10mm]
10°
Down
RUDDER
1-1/4"
[32mm]
25°
Right
1-1/4"
[32mm]
25°
Left
3/4"
[19mm]
15°
Right
3/4"
[19mm]
15°
Left
Balance the Model (C.G.)
At this stage the model should be in ready-to-fl y condition
with all of the systems in place including the motor, complete
radio system, ESC, propeller and battery.
❏
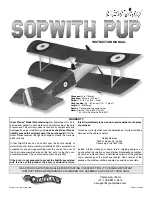
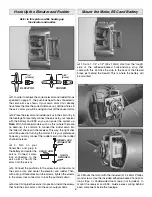
1. Note the “balance spikes” under the top of the cabanes.
These indicate the forward, aft, and recommended (middle)
C.G. locations. For fi rst fl ights it is recommended to balance
the model at the middle location.
❏
2. Lift the model with your fi ngers under the middle balance
spikes. If the tail drops, the model is “tail heavy” and weight
must be added to the nose to balance. If the nose drops, the
model is “nose heavy” and weight must be added to the tail
to balance. If additional weight is required use segments of
Great Planes “stick-on” lead (GPMQ4485). If nose weight is
required, don’t attach it to the cowl. Attach any nose weight
required to the fi rewall.
❏
3.
IMPORTANT:
If you found it necessary to add any weight,
recheck the C.G. after the weight has been installed.
PREFLIGHT
Charge the Batteries
Follow the battery charging instructions that came with your
radio control system to charge the transmitter batteries.
You should always charge your transmitter and receiver
batteries the night before you go fl ying, and at other times as
recommended by the radio manufacturer.
CAUTION:
Unless the instructions that came with your
radio system state differently, the
initial
charge on
new
transmitter and receiver batteries should be done for 15
hours
using the slow-charger that came with the radio
system
. This will “condition” the batteries so that the
next charge may be done using the fast-charger of your
choice. If the initial charge is done with a fast-charger, the
batteries may not reach their full capacity and you may be
fl ying with batteries that are only partially charged.
Balance Propellers
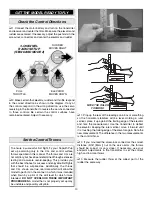
Take a few minutes to balance your propeller and a spare
propeller before you fl y. A balanced propeller will allow the
motor run smoothly and effi ciently. A severely unbalanced
propeller can cause enough vibration to stress glue joints
and cause screws to loosen.
If the propeller is unbalanced, use a single-edge razor blade
or a hobby knife to scrape material off the heavy blade until
you can get the propeller to balance.


