background image

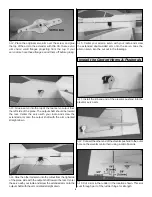
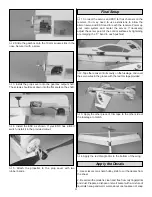
1. Cut the covering away from the wing in the shaded

area shown. Do this on both the top and the bottom.

2. Glue the wing into the fuselage, making sure that it is

centered and square.

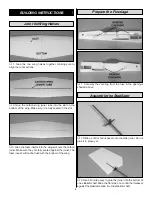
1. Use the included clear tape to hinge the ailerons to the

wing. Tape the top of the hinge first, then fold the aileron up
as far as possible and tape the bottom side.

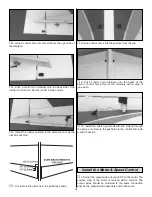
1. Remove the screws and servo arms from your servos.

Push each screw through the center hole of a servo arm
extender (1 double-sided and 2 single-sided).

Install the Servos

Hinge the Ailerons

Join the Wing to the Fuselage

8

Summary of Contents for EP YAK 55 3D

Page 1: ...diately in new and unused condition to the place of purchase To make a warranty claim send the defective part or item to Hobby Services at the address below Hobby Services 3002 N Apollo Dr Suite 1 Cha...

Page 2: ...nes com Open the Airplanes link then select theYAK 55 ARF If there is new technical information or changes to this model a tech notice box will appear in the upper left corner of the page We urge you...

Page 3: ...ger NEVER use a NiCd NiMH peak charger NEVER charge in excess of 4 20V per cell ONLY charge through the charge lead NEVER charge through the discharge lead NEVER charge at currents greater than 1C ALW...

Page 4: ...Choose Where to Buy at the bottom of the menu on the left side of the page Follow the instructions provided on the page to locate a U S Canadian or International dealer If a hobby shop is not availab...

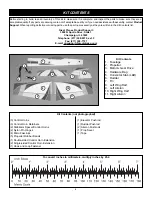
Page 5: ...od 2 Aileron Pushrods 1 Prop Saver 1 Tape Before starting to build take an inventory of this kit to make sure it is complete and inspect the parts to make sure they are of acceptable quality If any pa...

Page 6: ...inst the joiner The foam inserts will not be flush with the bottom of the wing 1 Cut away the covering from the fuse in the openings shaded above 1 Slide a control horn spacer onto the stab joiner Do...

Page 7: ...yourself enough working time Glue the stabilator half and spacer to the joiner tube Use two square sticks any scrap you have will do and lightly clamp the stabilator halves between them to align ever...

Page 8: ...Use the included clear tape to hinge the ailerons to the wing Tape the top of the hinge first then fold the aileron up as far as possible and tape the bottom side 1 Remove the screws and servo arms fr...

Page 9: ...nto the cutout from the right side of the plane side with the output shaft toward the rear Center the servo with your radio and screw the extended arm onto the output shaft with the arm oriented strai...

Page 10: ...these slots from the top 9 Push control horn retainers onto the backs of the aileron control horns Secure the retainers with a drop of glue each 10 Install the aileron pushrods with the Z bend throug...

Page 11: ...ower up your radio system and center the servos If necessary adjust the center point of the control surfaces by tightening or enlarging the V bend in each pushrod 2 Tape the receiver into its cavity o...

Page 12: ...we recommend setting the throws at the high rate setting Note The throws are measured at the widest part of the elevators rudder and ailerons At this stage the model should be in ready to fly conditio...

Page 13: ...arge your transmitter batteries the night before you go flying and at other times as recommended by the radio manufacturer Charge the flight battery using a charger designed for Lithium Polymer batter...

Page 14: ...ed a successful radio equipment ground check before the first flight of a new or repaired model 2 I will not fly my model aircraft in the presence of spectators until I become a qualified flier unless...

Page 15: ...the throttle to see how the model handles at slower speeds Add power to see how she climbs as well Continue to fly around executing various maneuvers and making mental notes or having your assistant...

Page 16: ...levator pushrod can become flexible over time allowing the stabilator to oscillate when the plane is flown at high speed If this problem appears when flying the plane at high speed simply stiffen the...

Reviews: