21
❏
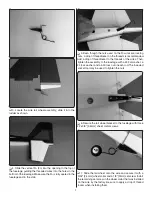
2. The other method is to secure the canopy to the fuselage
with four #4 x 1/2" [13mm] washer head screws. Inside the
fuselage you will fi nd four hardwood plates for the screws.
Transfer the location of these plates to the outside of the
fuselage.
❏
3. Place the canopy onto the fuselage and then drill a hole
through the canopy, into the fuselage and through the plates.
Secure the canopy with the four #4 x 1/2" [13mm] washer
head screws.
Install the Propeller and Spinner
❏
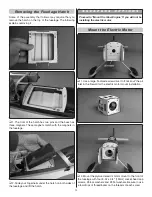
1. Install the spinner back plate and propeller onto the
engine. Temporarily install the prop washer and prop nut. Fit
the spinner cone to the spinner back plate. The screws for the
spinner cone need to align with the screw holes in the back
plate. Depending on your choice of engine and propeller the
holes will most likely not align correctly. If this is the case, cut
the alignment pins from the spinner back plate with a sharp
hobby knife.
❏
2. Install the modifi ed back plate, propeller and spinner
cone. Secure the spinner cone to the back plate with the four
screws included with the spinner.
Apply the Decals
❏
1. Be certain the model is clean and free from oily fi ngerprints
and dust. Prepare a dishpan or small bucket with a mixture
of liquid dish soap and warm water—about one teaspoon of
soap per gallon of water. Submerse the decal in the soap and
water and peel off the paper backing.
Note:
Even though the
decals have a “sticky-back” and are not the water transfer type,
submersing them in soap & water allows accurate positioning
and reduces air bubbles underneath.


