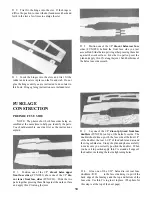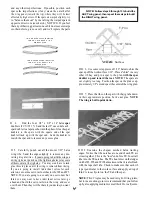
D 4. Position the servo in the center of the rib bay and
mark on the rails, through the mounting holes, where to
drill. Remove the servo and use a 1/16" drill bit to drill
holes where you made the marks.
end flush with rib Wl B. Any extra tube protruding more
than 1/4" past Rib W4 can be cut off. Glue the tube into
place with med/thick CA.
D 5. Install the servos using the mounting screws
provided with your radio.
ADD THE CENTER SHEETING
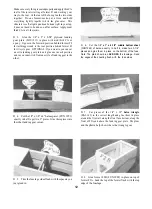
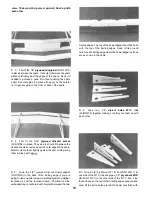
D 6. Cut four pieces of 1/4" square balsa (FUN 1S02)
approximately 1/8" longer than the servo and glue one on
each side of each servo. Cut four more pieces of 1/4"
square balsa to fit across the ends of the "servo bays" and
glue them to the 1/4" balsa already in place. Sand these
"frames" so they are flush with the surface of the ribs but
do not change the shape of the ribs while sanding.
NOTE: Put a strip of masking tape on each rib to keep
from sanding the ribs during this step.
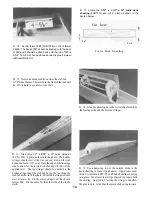
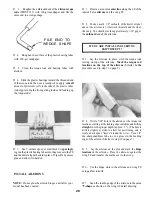
D 1. Cut two of the 1/16" x 2-5/8" x 9-7/8" balsa wing
center sheets (FUN1W12) to fit between the W3 ribs.
Position one of the sheets between the ribs and mark where
the center of the leading edge sheet is. Now slide the sheet
forward until it touches the rear of the leading edge
sheeting joint and mark where the sheets cross at the W3
ribs. Remove the center sheet and cut from the center dot
to each end dot. Test fit the sheeting back into place. Sand
it if needed and glue it in place. Repeat this for the other
side of the wing.
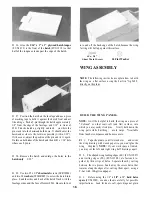
D 7. Enlarge (elongate) the hole in rib W4 towards the
TE so that you can install the paper tube (PTUBE001) for
carrying the servo cable. The paper tube can be held
diagonally through rib W3, inserted into rib W4, and then
slid through the remaining ribs and into position with its
D 2. Cut four pieces of sheeting 3-1/2" long from the
remaining 1/16" x 2-5/8" x 9-7/8" center sheets. Glue one
of these sheets behind the one you just installed with it
centered over the Wl and W2 ribs. Cut another one to fit
between the last one and the trailing edge and glue it in
place. Do the same for the other side of the wing. On the
bottom of the wing the last sheet will have to be cut similar
to the sketch on the following page to clear the dowels.
24
Summary of Contents for FUN-ONE
Page 5: ...5...

