❏
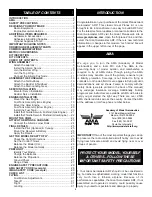
8. Slide the other wing panel onto the wing joiners and
press the two panels together. Clean up any epoxy that
squeezes out with a paper towel and alcohol.
❏
9. Press the wing panels together tightly to eliminate or
minimize any gap present and hold them together using
several pieces of masking tape. Set the bottom wing aside
and allow the epoxy to fully cure before proceeding.
❏
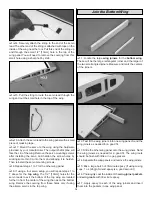
10. Position the wing bolt plate over the wing bolt holes
in the wing. Trace the outline of the plate on the wing. Trim
away the covering on the plate, about 3/32" [2.4mm] inside
of the outline and glue the wing bolt plate in place as shown
using medium CA.
❏
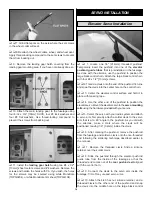
1. Locate the two hardwood wing joiners for the top wing.
The larger wing joiner should have angled ends as shown in
the photo. Measure and mark the centerlines on the joiners.
❏
2. Test fit the wing joiners in the wing joiner pockets. Note
the direction of the main wing joiner. Sand the wing joiners
as needed for a good fit.
❏
3. Join the wing following the same technique as done
with the bottom wing.
❏ ❏
1. The following photos and procedures will show the
connection of a bottom wing servo pushrod. The
procedure will be the same for all aileron servos.
❏ ❏
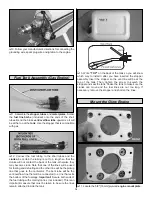
2. Make sure all trims and sticks are centered on your
radio system. Temporarily connect the aileron servo to the
radio system and center it. Attach a servo horn to the servo
so that the arms are aligned as shown.
❏ ❏
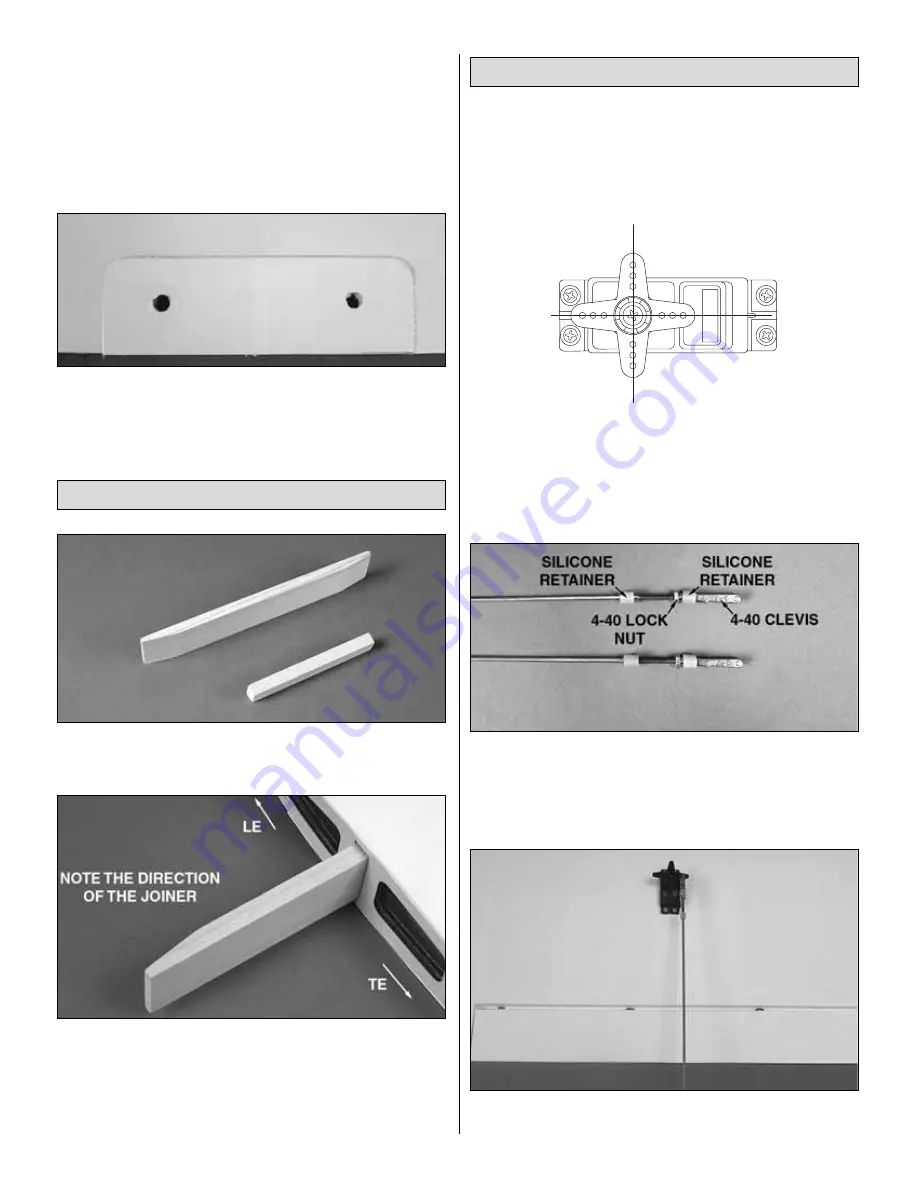
3. Locate one 4-40 x 12" [305mm] pushrod. Assemble
the pushrod end as shown. The clevis should be threaded 14
turns onto the threaded end of the pushrod.
❏ ❏
4. Attach the clevis to the 3rd hole out on the servo arm.
Align the pushrod at a 90° to the arm and aileron as shown.
Connect the Ailerons Pushrods
Join the Top Wing
11


